I'm going to file this one under "Most Random Kid Project Completed to Date" because it was completely unexpected but also quite satisfying.
The backstory goes something like this:
My friend was having a baby shower. Her husband is British. She asked for books in lieu of cards. I knew she would have a TON of books and nowhere to store them.
Enter, the Telephone Booth Bookshelf:
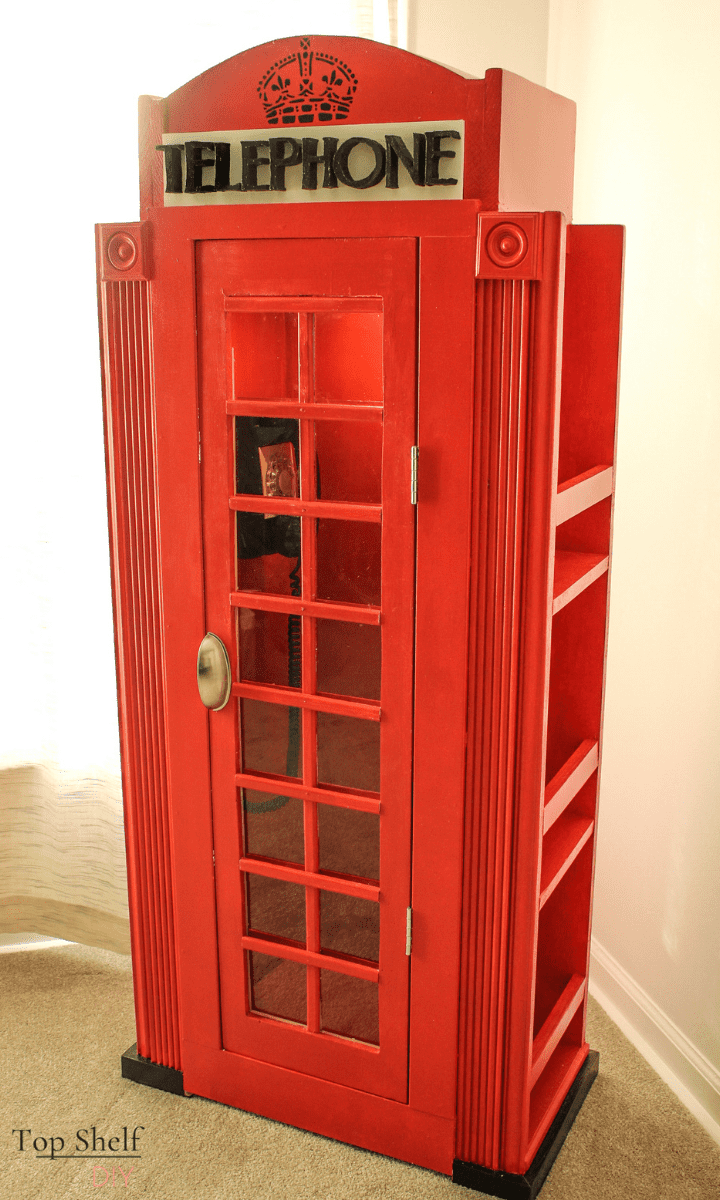
If you've ever wanted to replicate this iconic British landmark, here's how to do so on a smaller scale.
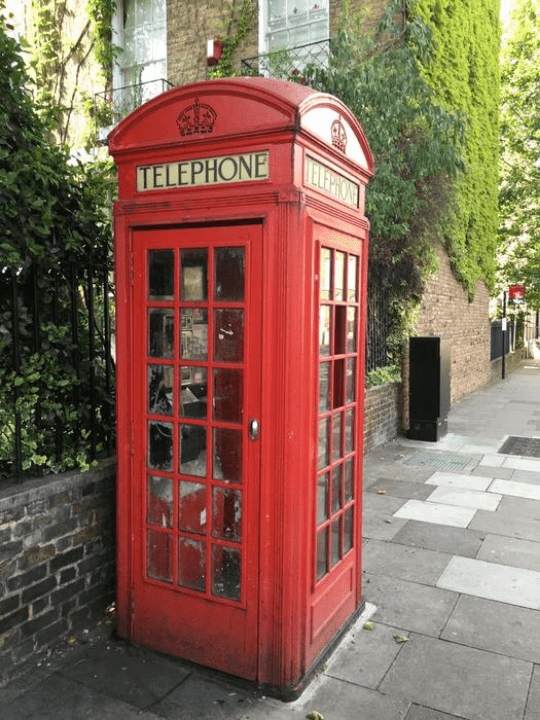
The Inspiration
The dimensions for the bookshelf carcass come from these Ana White bookshelf plans. I figured once I had the base assembled I would turn it into a phone booth by adding fluted trim, an arched roof, and a plexiglass door.
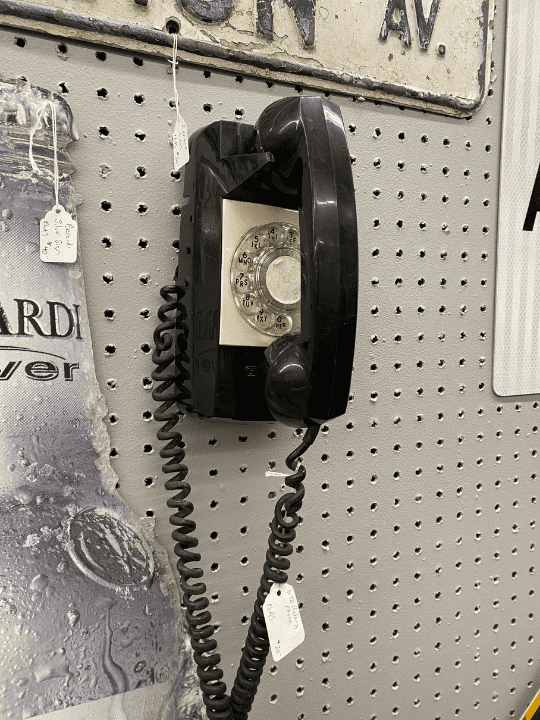
I immediately started scouring the internet for vintage phones. I wanted an old black phone, preferably a pay phone or a rotary. I scored this little ditty at a local vintage store for $20.
Tools and Materials
- Miter saw
- Nail gun + brad nails
- Router + rabbet bit
- Drill
- Kreg Jig
- Jig saw
- Circular saw with a diamond blade
- Scroll saw (if you don't have a scroll saw, you can still make a flat telephone sign using graphite tracing paper)
- Hammer + chisel
- (2) door hinges
- 1 1/4" pocket hole screws
- Door handle
- Window mullions
- Plexiglass
- Pan head screws
- One quart of satin finish latex paint in Lady Bug by Benjamin Moore
- One quart of satin black paint
- Paint brush
- 2 wood medallions
- Fluted trim + various strips of trim for the door inset.
- Wood glue
- 3/4" plywood scraps (for the arch)
- 1/4" plywood scraps (for the roof)
- 1x12 pine boards - see Ana's plans for this
- 1x4 pine
- 1x2 pine
- Puck light (optional)
For the crown insignia and "Telephone" font I used the free graphics provided in this life-size K2 telephone booth tutorial by Build Eazy.
Steps
Start by assembling the bookshelves and carcass according to Ana White's plans. The main difference here is that you won't have shelves inside your telephone booth. I also extended the height of the side shelves to go all the way up the side of the main box.
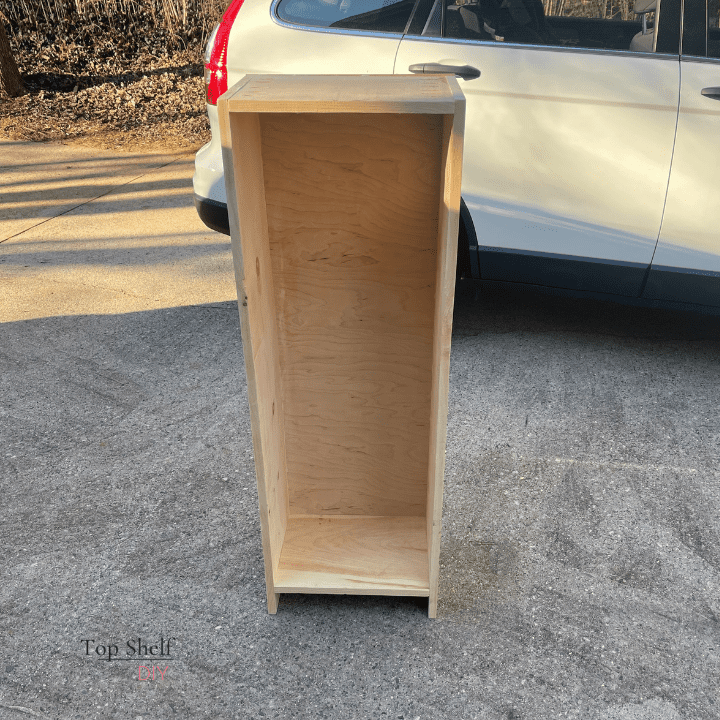

At this point my kids were already playing inside a completely unfinished wood box, so I took this as a good sign. I reinforced the shelves with regular screws and a countersink drill bit because, well, kids.
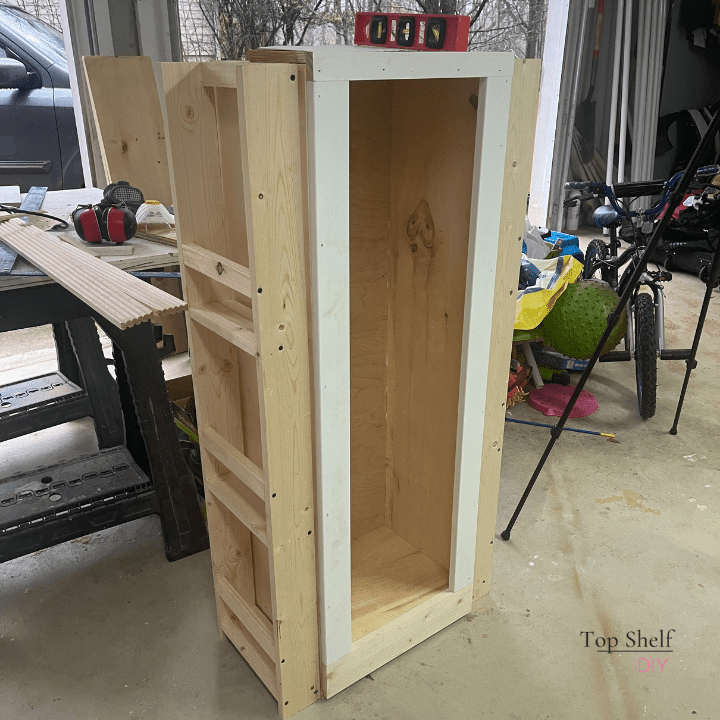
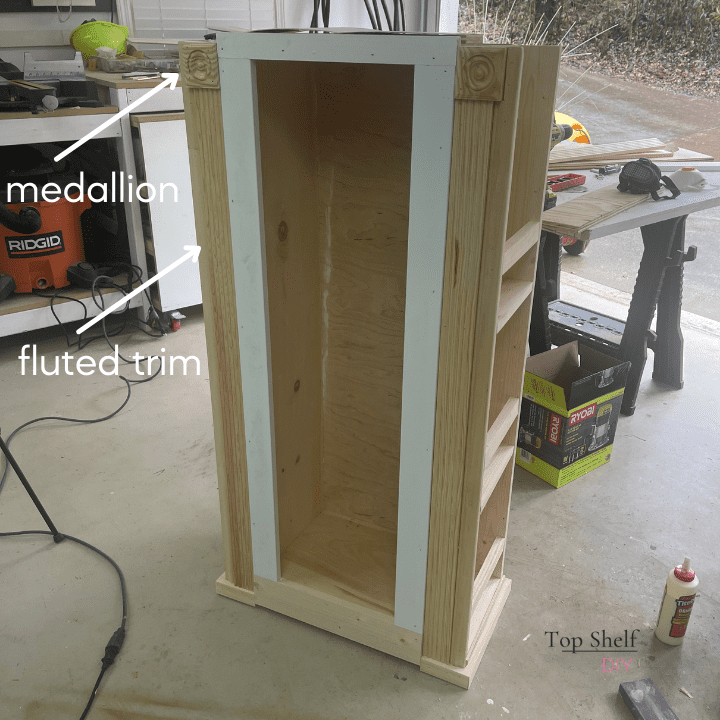
Then came the arched roof. I made several templates from poster board paper and when I was happy with the look I traced the template onto three pieces of scrap 3/4" plywood. These were secured to the base of the telephone booth with pocket holes.
To finish the roof I cut small strips of 1/4" plywood and secured them to the inner frame with wood glue and brad nails.

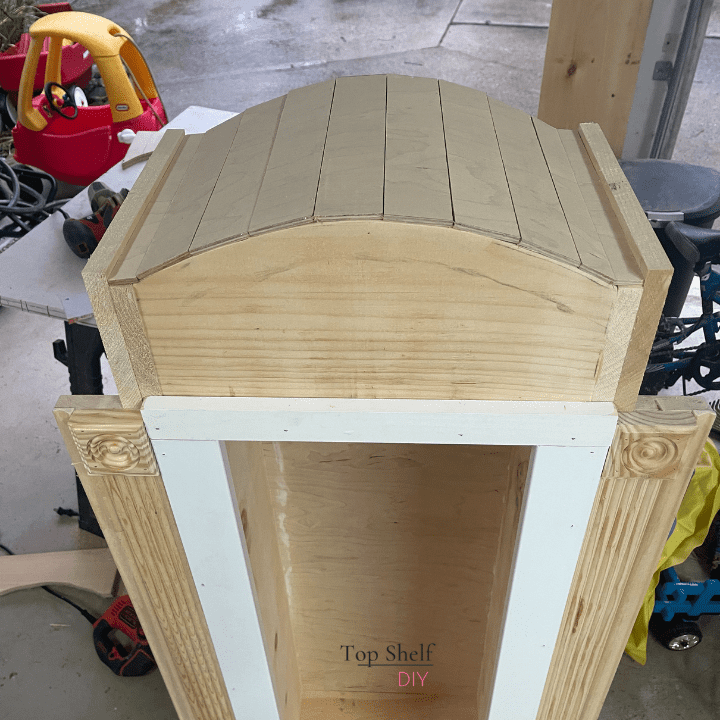
I was getting pretty psyched about how things were looking at this point. The door was going to be a challenge, though. I'd never used a router or worked with plexiglass before.
I started by cutting a piece of 1x12 to the correct length. Then I marked a 1 1/2" inset along the sides and 3 1/2" inset along the top and bottom. I removed the inside of this box with a jigsaw.
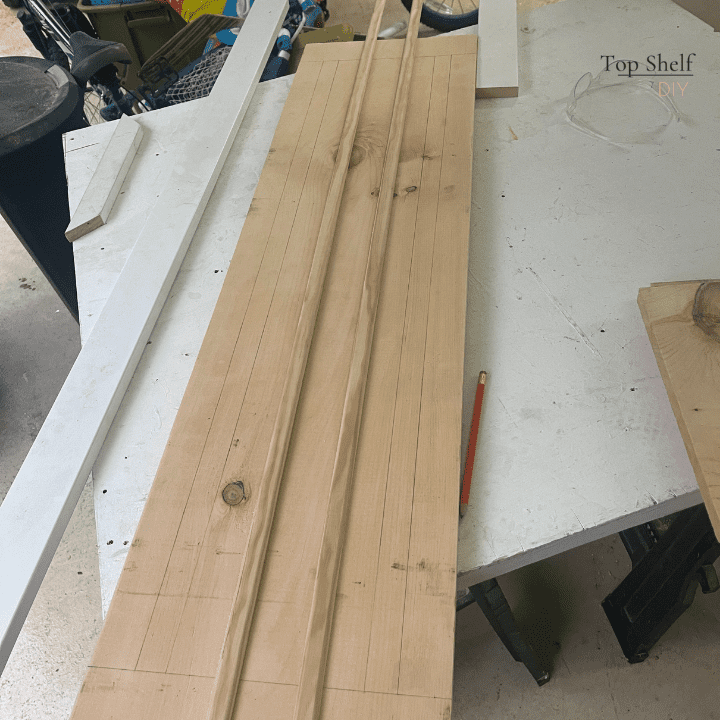
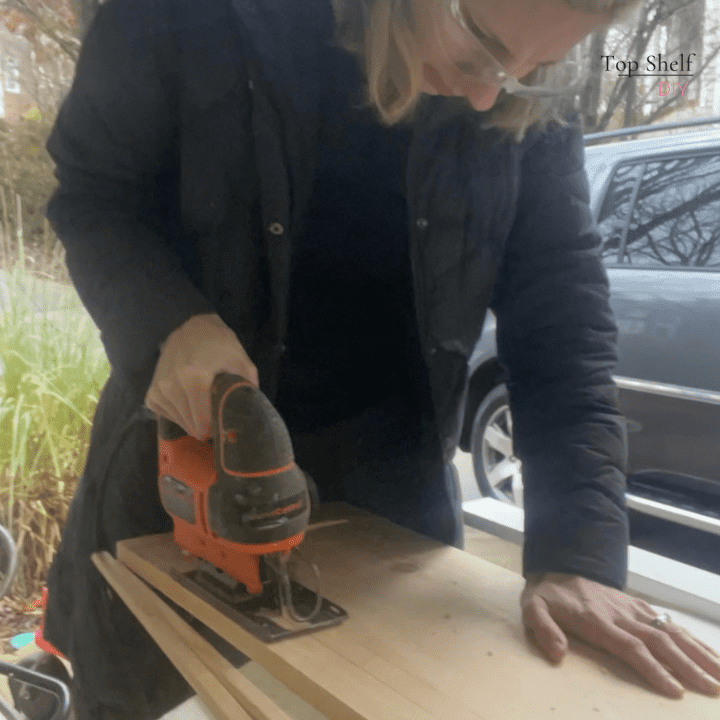
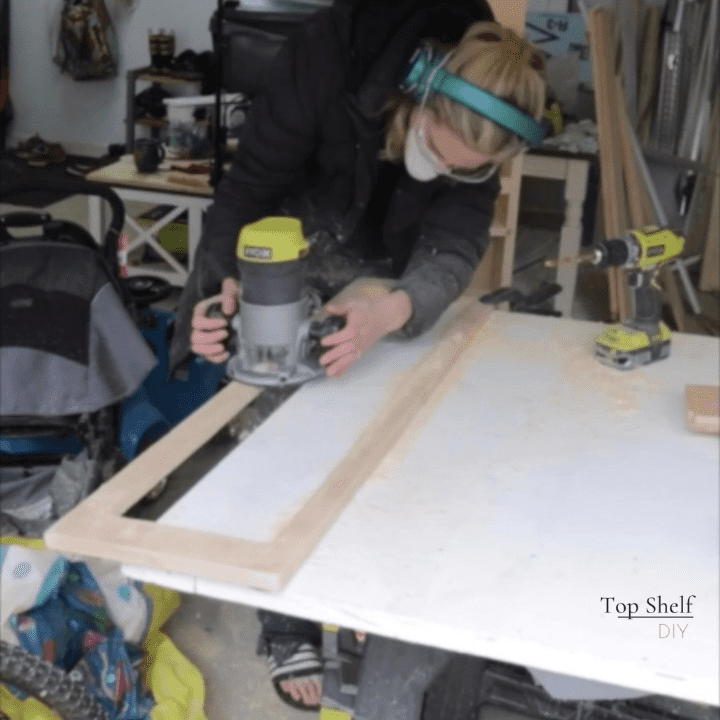
Next, I took my router and rabbeted an inset on the back side of my door. I cut my plexiglass to fit the opening of the doorway using a diamond blade on my circular saw. Disclaimer: I'm not 100% sure that a diamond blade is the way to go, but it worked for me just fine. Just go slowly and put a piece of painter's tape over your line.
Once the plexiglass was inside the opening resting on the grooved edge I had routed, I placed a piece of trim over the top of the plexiglass and secured it with several screws.
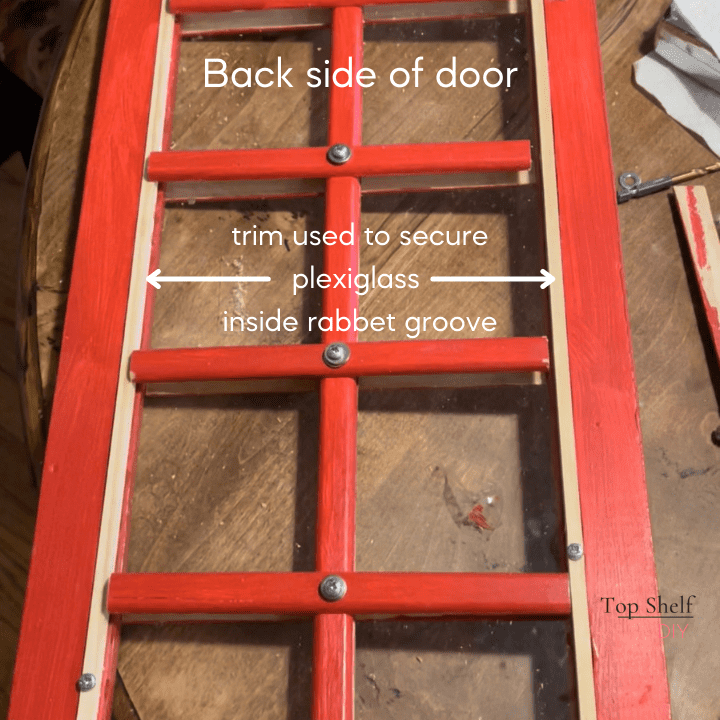
To recreate the lattice door of an authentic British telephone booth, I placed pieces of trim on either side of the plexiglass and secured them with wood glue and screws. This process took a little bit of trial and error and I had to go very slowly when I was pre-drilling the holes through the plexiglass.
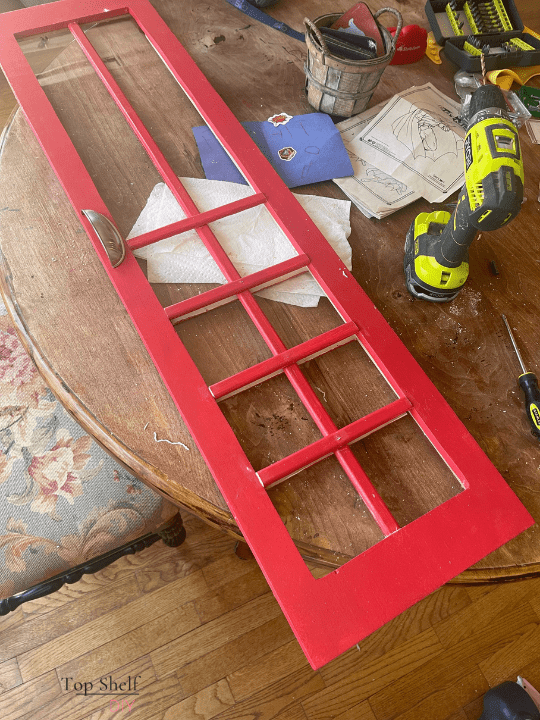
I filled in all the nail holes, sanded, and painted the rest of the telephone booth in spurts while working on the door. Once the door was done I added the handle and the hinges (using a hammer and chisel to mortise).
Thanks to Ana's plans the door fit perfectly!
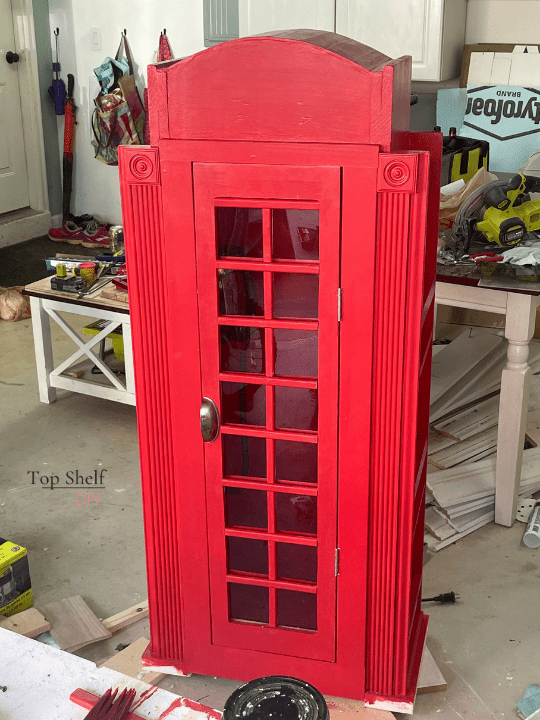
All that was left at this point was the sign and the crown. Honestly, I think a flat sign would have looked more like the original, but it was fun cutting out the letters with my scroll saw.
To add the crown I simply traced the graphic (provided by Build Eazy) through my computer screen onto a piece of tracing paper, then traced the image onto the wood using black graphite tracing paper.
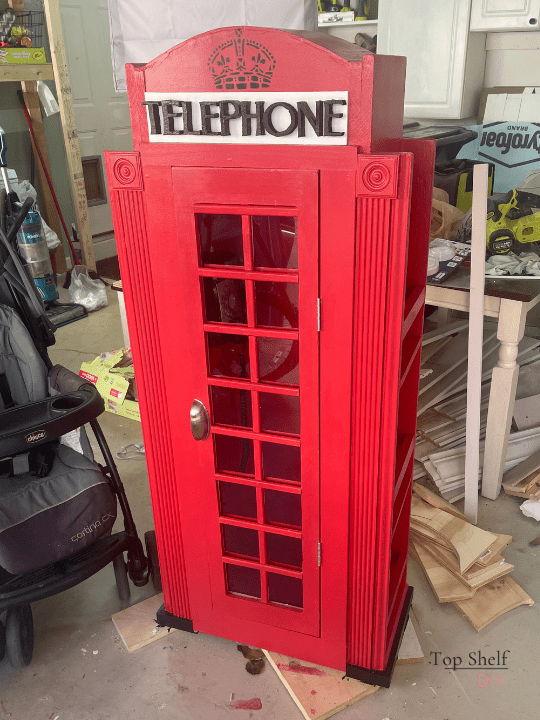
At this point the telephone booth was ready for delivery! I added a battery-powered puck light inside for the complete effect.
The Final Reveal
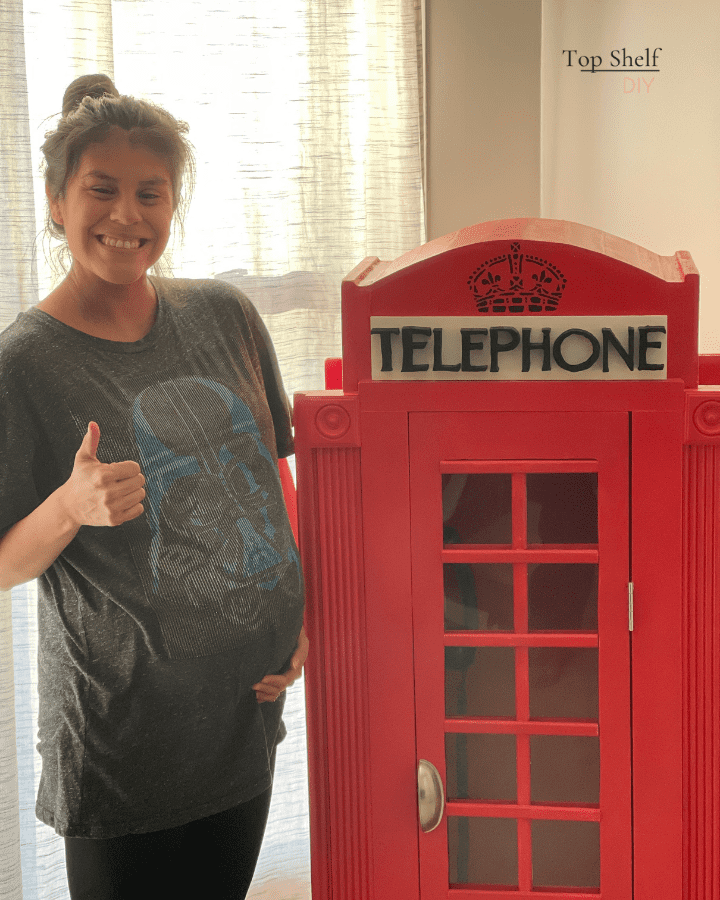
I told my friend I was building a bookshelf. That's it. She had no clue it was going to be a telephone booth. Her reaction was, "I've always wanted to step inside one of these."
While preggo mama won't be fitting in there anytime soon, she loved it -- correction, was "obsessed" with it. I think my work here is done!
Cheers,
Erin


I really love it. It's adorable.