The products in this post were provided by The Home Depot. This post includes affiliate links. All opinions and photography are my own. Thanks for supporting the brands that support this blog!
Have you ever wondered what goes into making the elegant coffered ceilings you see in stately historic homes?
In this post I'm spilling all the details for how we installed our very own coffered ceiling, from planning the layout right on down to the finish details. I completed this project in my living room as part of the Orange Tank competition sponsored by Home Depot.

At the outset I wasn't sure if a coffered ceiling would feel too "heavy" in our small living room. We have 9-foot ceilings and I was worried the extra architectural detail would make it feel cramped.
My mom was ultimately the one who convinced me (via 5,000 Pinterest photos), so you can thank her for making this happen!
Another problem we faced – our living room was very dark. We had a ceiling fan and two can lights above the fireplace. That was it. Even with a floor lamp there were dark spots. We needed a lot more hardwired lighting to make this coffered ceiling work.
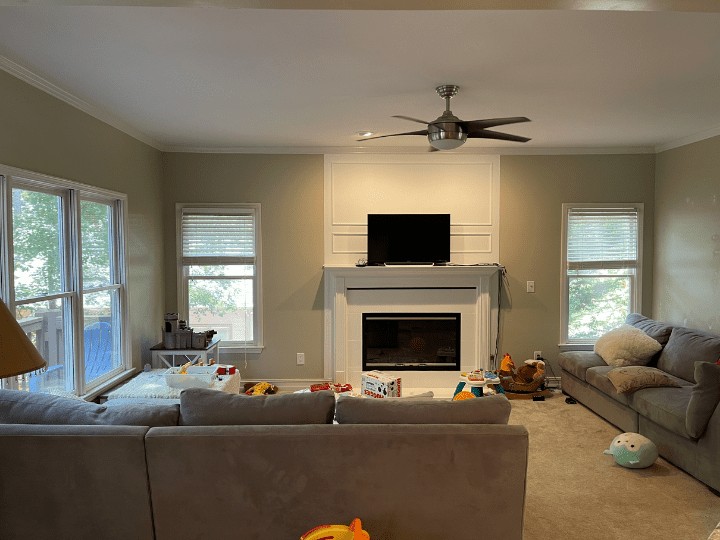
To recap, this was our starting point:
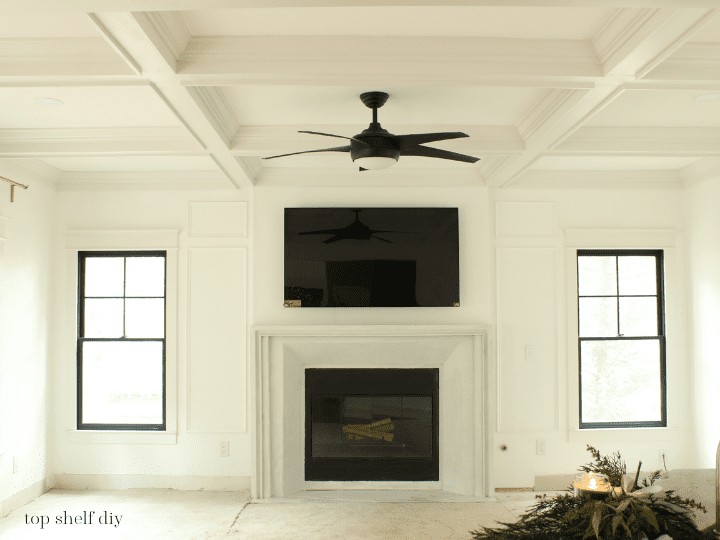
Here's what the room looks like now. I love it sooo much. Rather than weighing down the room, it's actually made the room feel more expansive because there's less wasted space above your head.

The planning process
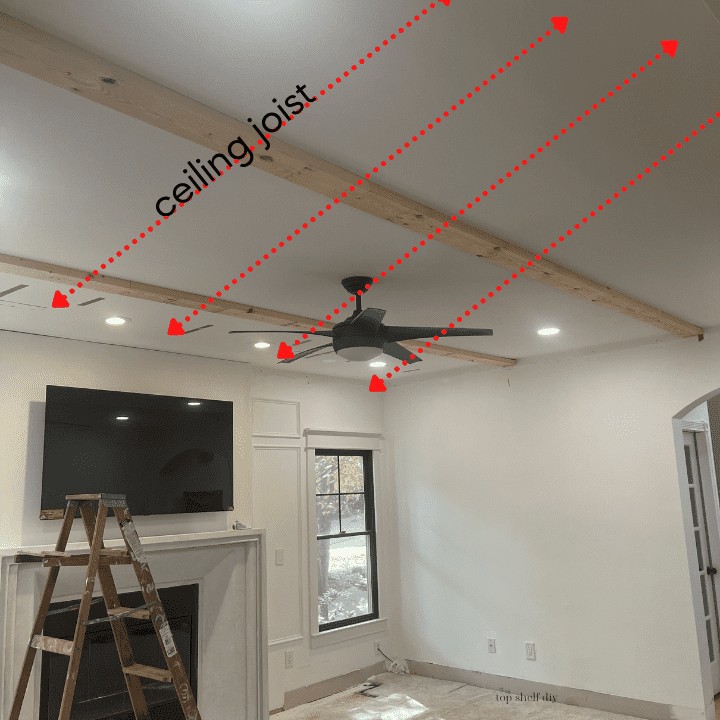
Step 1: Use a stud finder to figure out which way your ceiling joists run. This is vital because your largest beams will be installed perpendicular to these joists.
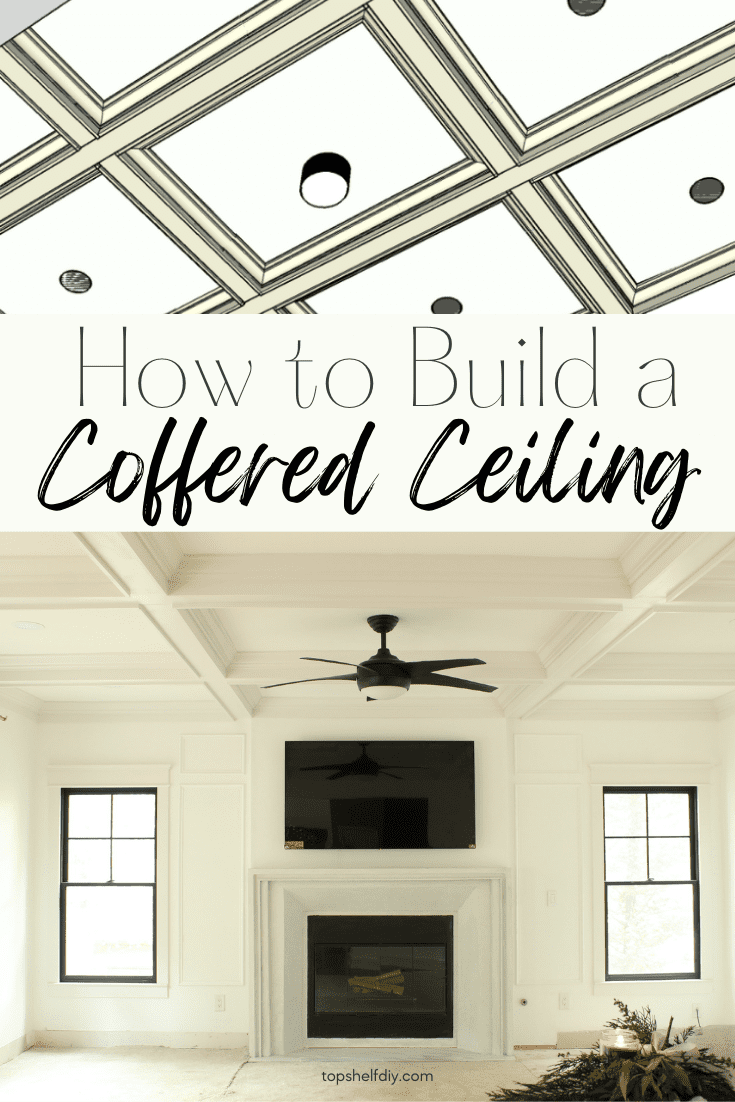
Step 2: Divide your space into evenly sized boxes. Measure each wall (I prefer to use this digital measuring tape because I don't need a partner) and jot your numbers down. With my numbers in hand I went to SketchUp and mapped out the space in 3D. If you don't know how to use this program you can just sketch things out on paper!
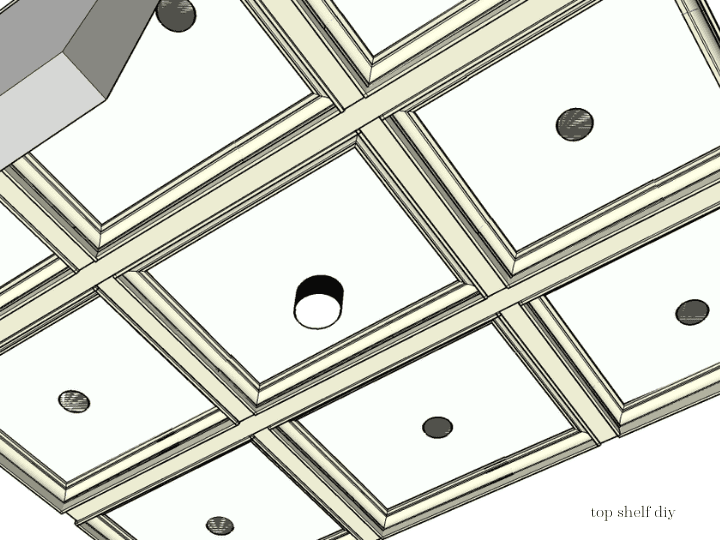
These boxes are constructed from 2x6 untreated pine, 1x6 MDF, and crown molding. Using this layout I was able to plan exactly where our electrician would wire six additional can lights.
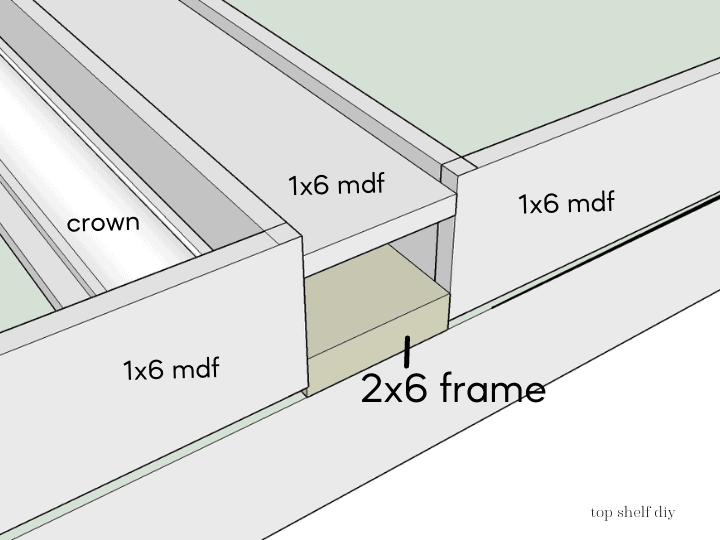
Using these plans I could also estimate the cost of materials with relative accuracy.
Materials list
- 6 recessed ceiling lights + cost to outsource licensed electrician: $1170
- (36) 8' pieces of crown molding (4 per box, with 9 boxes total): $384.84
- (3) 2x6x12 untreated pine: $32.94
- (10) 2x6x8 untreated pine: $76.40
- (2) 1x6x12 pre-primed MDF: $21.88
- (24) 1X6X8 pre-primed MDF: $192
- (2) Painter's DAP caulk: $10.60
- (1) Gallon flat white ceiling paint (already had this)
- (1) Gallon satin paint in Cameo White: $48
- Wood filler: $7.50
- Sanding wedges
- 2" brad nails
- Wood glue
- 2 1/2" pocket hole screws
- 3" construction screws
- Liquid Nails construction adhesive
Some of these materials were already in my garage. The total remaining cost was: $1,944.16. Had we done the electrical ourselves we could have got everything done for $774.16
According to Home Advisor, the average cost to install a coffered ceiling is $20-$30 per square foot, meaning this job would have cost about $8,000 had we hired out the work!!!
Tools
- Stud finder
- Measuring tape
- Miter saw
- Coping saw
- Nail gun
- Power drill
- Impact driver (product linked above is drill + driver)
- Kreg jig
- Caulk gun
- An extra set of hands for the first few beams – those 12-foot 2x6's are heavy!
Here's a link to the video for this project!
Time investment
I was able to get the entire job done in 12 days. 12 Days! I probably could have got it done quicker had I not needed my husband helping me with the first couple of beams. My experience installing crown molding was a huge asset. Cutting and coping 36 pieces of crown is not always a walk in the park. I love the challenge!
For in-depth tutorials on crown molding check out these posts:
6 Essential Tools for a Seamless Crown Molding Finish
Coped Crown: 5 Mistakes You Might Be Making
The hardest part was filling and sanding in all the nail holes. I spent three full days sanding, caulking, and painting everything. Bleh!
Steps 3-8
Now that you've sourced your materials and created your plans, the hard part is over. Seriously! Once my electrician had installed those ceiling lights things moved pretty fast.
Step 3: Install your 12-foot 2x6 beams perpendicular to the direction of your ceiling joists. To make things a bit easier on my arms I marked the joist locations on my beams and pre-drilled 3" construction screws half-way through them. Once my husband and I had those beams in position all I needed to do was drill it in the rest of the way using an impact driver.
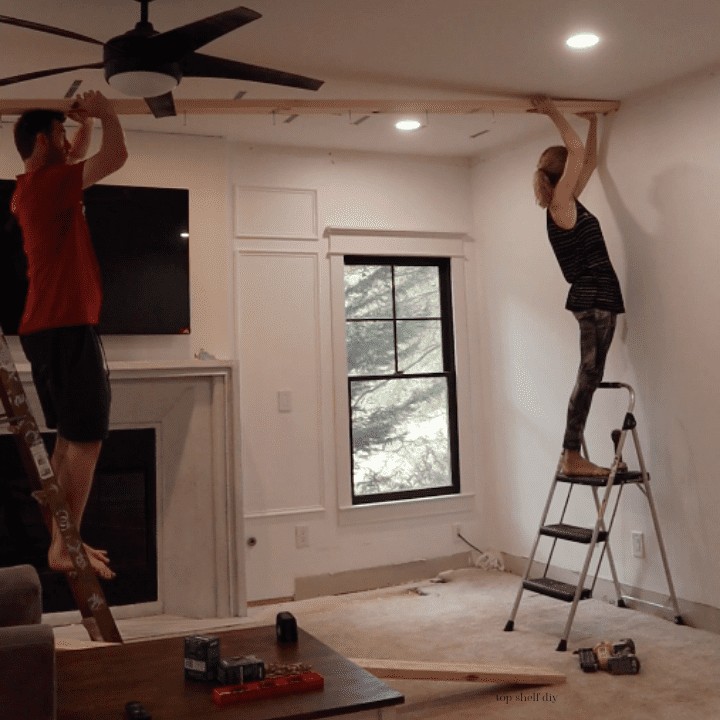
Depending on the size of your room you may need to add another piece of 2x6 to span the entire length/width of your room. If your room is fairly small you might be able to get away with using just one 16-foot piece of 2x6!
Once the first set of beams were up and secured to the joists, we added the cross beam 2x6's using pocket hole joinery.

Step 4: Add 3" wedges made from 2x6 scrap material. I drilled pocket holes into them and secured them to the beams at all the major intersections and along each beam.
Step 5: Once the wedges were secured it was time to start adding trim! Using wood glue and brad nails I secured 1x6 MDF to the underside of each beam. Nail along the length of your board directly into the 3" blocks.

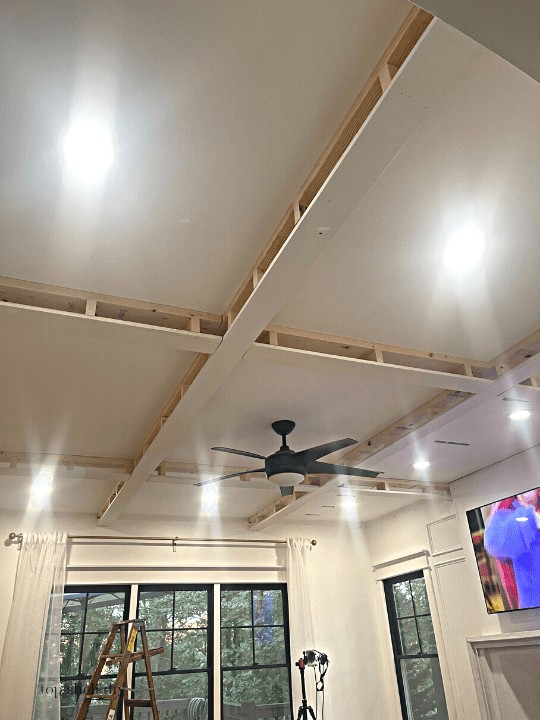
You can really start to visualize how the ceiling is coming together at this point. The next step was to cover all the exposed side of the beams with 1x6 MDF. I intentionally left a 1/2" gap from the ceiling in case it wasn't level.
I used a piece of scrap 1X6 to ensure all my sides were installed at the same level.
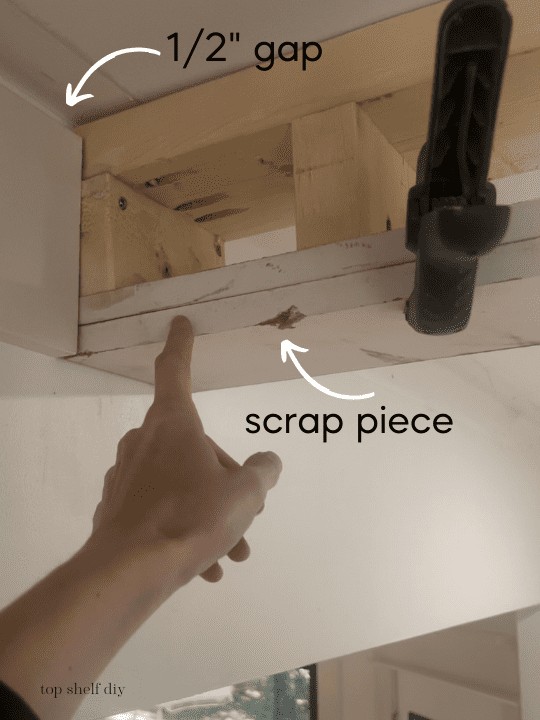
Step 7: Once all the beams were enclosed with 1x6 it was time to add crown molding! Since the cuts were all 45-degree inside corners they needed to be coped. As you may have read in my previous posts, a coped inside corner is less likely to crack at the seams during temperature fluctuations and natural settling in your home.
I like to install crown molding in a clockwise direction with my coped side on the left. This gives me the most leverage while coping since I am right-handed. Place a starter block on the corner that can be removed once you install your final piece.
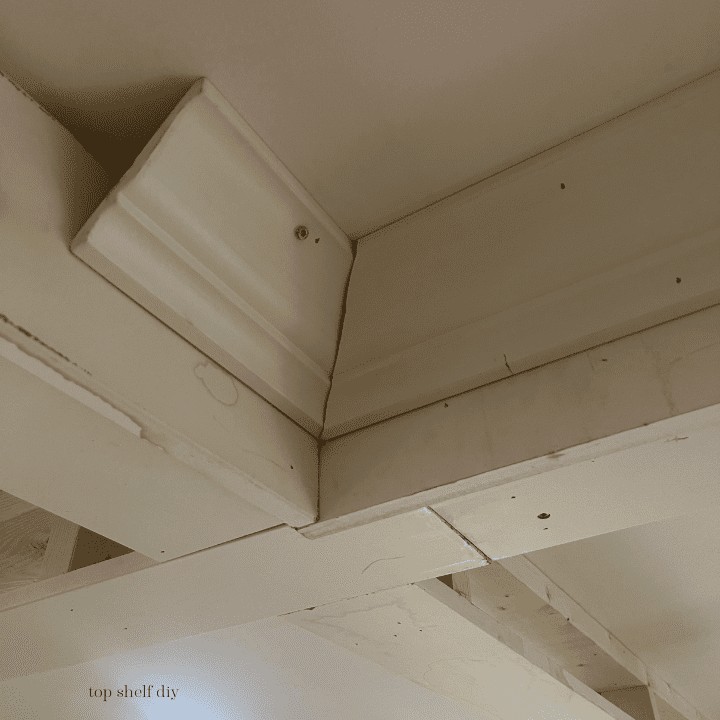
To cope, you have three options:
- Cope manually by hand with a coping saw.
- Use a Collins coping foot – an accessory that can be attached to most common jigsaws.
- Use an angle grinder with a flap disc.
Every option involves a bit of a learning curve, but I found the angle grinder option to be the easiest. A coping saw is definitely the cheapest option, but can cause muscle fatigue if you're doing a lot of repeat cuts.
Continue installing all of your crown molding until every box is finished.
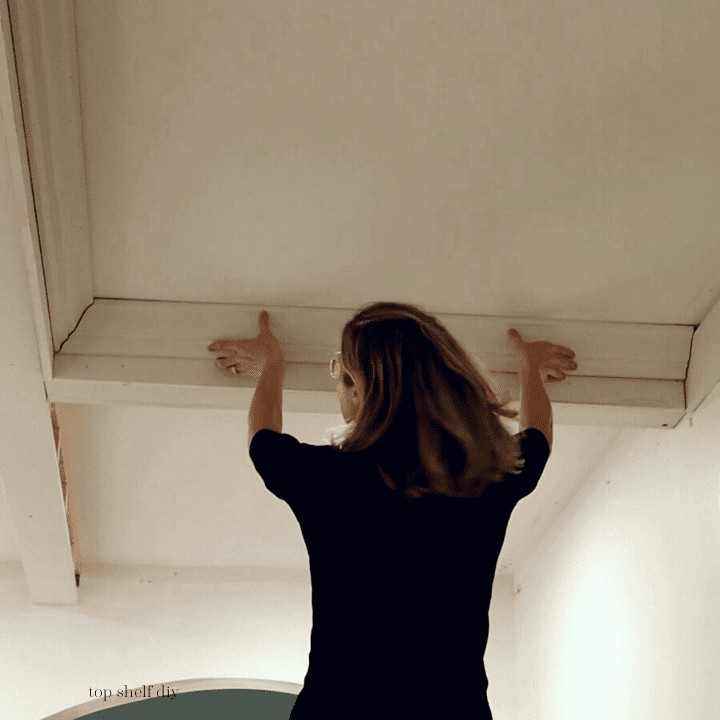
Secure each piece of crown with 2" brad nails and Liquid nails adhesive.
Step 8: The last step is to caulk every seam where the crown molding comes together and touches the ceiling. Fill in every nail hole with wood filler and sand once dry.
I painted my ceiling first in a flat white color, then my trim in Behr's Cameo White with a satin finish. Believe me when I say you'll need lots of wine and Netflix series to get you through this part 🤪
Just keep reminding yourself that you're literally saving thousands of dollars by doing this grunt work yourself!
A special thanks to the guys over at Finish Carpentry TV for explaining this entire process over on YouTube. I must have watched their videos at least a dozen times while planning this project. I can't recommend them enough.
Ready for more? Here are all of the projects from this renovation series, including the final reveal!
- Painting the Chrome Finishes (Week 1)
- DIY Black Inset Windows (Week 2)
- DIY Cast Stone Fireplace (Part 1) – Demo & The Hearth (Weeks 3-4)
- DIY Cast Stone Fireplace (Part 2) – The Mantel (Week 5)
- DIY Cast Stone Fireplace (Part 3) – Mounting the TV (Weeks 6-7)
- The Coffered Ceiling (Week 8)
- Luxury Vinyl Plank Flooring (Weeks 9-10)
- Modern Farmhouse Living Room Reveal!
Cheers,
Erin




Wow! You rock girl. That looks great and you did it so quickly. Ceiling work is hard to do… arms raised, head bent back and all on a ladder. It looks phenomenal and I feel like it raises the look of your house to the next pay grade, if you know what I mean. Its the little things like a coffered ceiling or a walk in pantry or a jaw dropping fire place that really bumps a house up to the next level. Thanks for sharing.
Thank you so much! It might just be one of my favorite projects to date 🙂 I love that you felt inspired enough to comment!
Stunning!!! I have a 100+ year old home that needs this kind of charm. I’ve wanted to do this for so long and this has inspired me to get the ball rolling. What a wonderful tutorial, I hope I can do it as well as you!
You can do it!!!
You need to glue the ends of the 1x6’s to the longer runs. That will help eliminate the cracking