The products in this post were provided by The Home Depot. This post includes affiliate links. All opinions and photography are my own. Thanks for supporting the brands that support this blog!
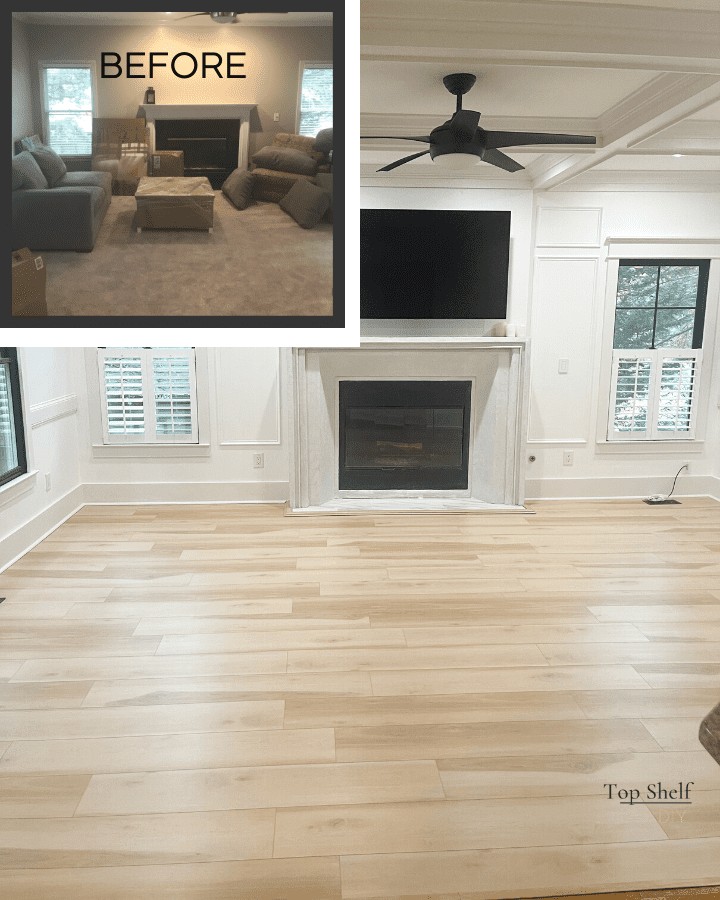
The final project in our 3.5-month living room renovation was trading out our sad, stained carpeting for luxury vinyl plank. It's a floating floor that simply locks into place with a tongue and groove system.
Just look at the difference it made in the room!
Jump to:
Planning your order
The first thing I did was calculate how much flooring we needed based on the square footage of our space. Our living room is 270 square feet with one wall measuring 18 feet and the other almost 15. Using The Home Depot's handy dandy online calculator I was able to determine how much flooring we needed.
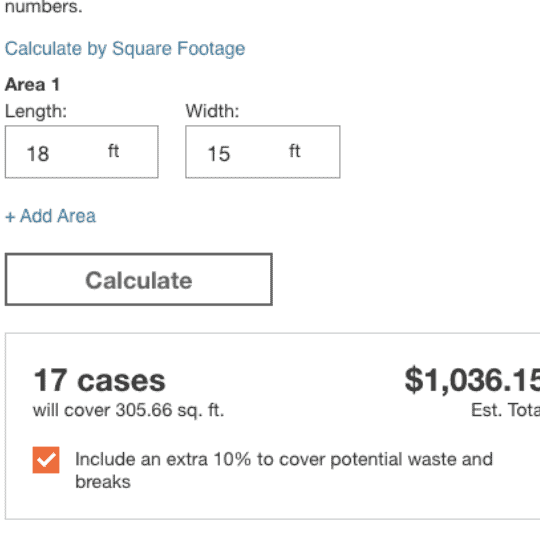
They even added an extra 10% for waste. Guys, I used exactly what I ordered. Had I not needed to mix and match patterns, I would have returned one extra box. Once you have the flooring in your possession make sure you leave it in your space to let it acclimate for 24-48 hours.
Now you're ready to prep your space.
Materials
- LVP Flooring install kit (includes spacers, tapping block, pull bar and mallet)
- LVP Flooring, I chose the Lifeproof brand in Boulder Pass Hickory
- Underlayment (optional; this LVP includes a layer of built-in underlayment)
- LVP transition pieces
- Tracing paper
Tools
- Measuring tape
- Level
- Trim puller
- Miter saw
- Jig saw
- Multi-tool
- Table saw (optional, but made ripping easier)
- PPE: safety goggles, respirator, ear protection
Preparing for install
When it comes to LVP, preparation is everything. Once you've completed these, you're in the home stretch.
Here are the points things to address:
- Which way do you want your boards to run? Consider your starting point in relation to where rooms start and stop to prevent super narrow cuts.
- Make sure your subfloor is level and clean. I used a 6-foot level for this step; I got lucky and didn't need to add self-leveling concrete because things were level. In the areas where I discovered dried cat urine, I painted the subfloor with two coats of odor-blocking primer. I also replaced the damaged drywall and baseboard.
- Are you reusing baseboards or replacing them altogether? Either way, you'll need to remove them prior to installation for a professional looking finish. If you plan to reuse them, carefully pry them off using a trim puller! Side note: Megan over at TwoFeetFirst has a great tutorial on how to remove baseboard without damaging the wall.
- Cut away any trim under door jambs with a multi-tool.
- When cutting under door jams and obstacles (vents, transitions, etc) don't forget to account for your expansion gap.
- Remove any existing transitions (such as hardwood transitions) since those will be replaced with your LVP transitions.
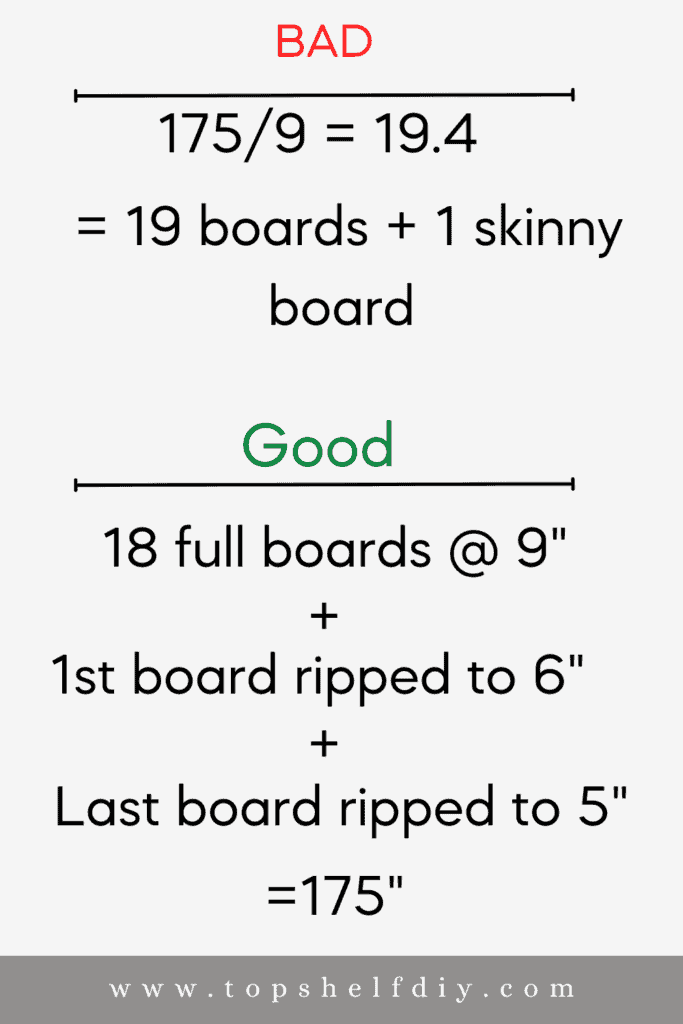
Plan on having to rip the first and last row of flooring so that you don't end with a super skinny piece. For example, my wall was 175 1/2" wide and my planks were ~9" wide. I substracted 1/2" to account for a 1/4" expansion gap on either end.
Here were my calculations:
Demoing the Carpet
Before I could proceed with the install I had to pull up our all of our old carpeting. Luckily this is a relatively easy process! I did the entire job myself, just little ole me.

Cut your carpet with a utility knife into manageable sections and roll it up along with the flooring pad. I was able to fit the entire 270-square feet of carpeting into a Waste Management Bagster.
Lastly, use a pry bar and a hammer to pull up any remaining tacking strips. A flathead screwdriver works great for removing staples.
Installing your LVP flooring
Be sure to read the directions enclosed in your box of flooring. The installation process can vary by manufacturer. Whereas I didn't need to add underlayment, other products may require it.
I recommend having a few boxes open at the same time so you can mix and match different patterns. Staggering your seams will give the floor a more natural pattern and flow.
Start in the left-hand corner of your room. Remove the tongue from the sides that will be next to the wall. Try to position your piece as straight as possible using a level as your guide.
Insert spacers between the wall and your piece of LVP. Here's what the first piece will look like:

Just pretend the baseboard isn't there since this is a post-production shot 😉 My actual first piece was ripped to 6.6" as mentioned earlier.
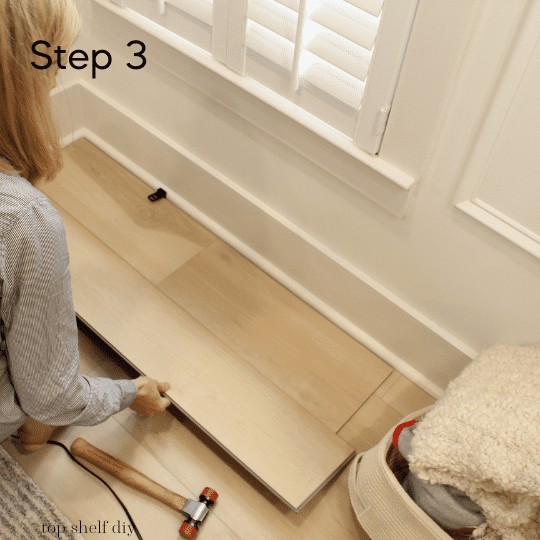
Add your next piece like so.
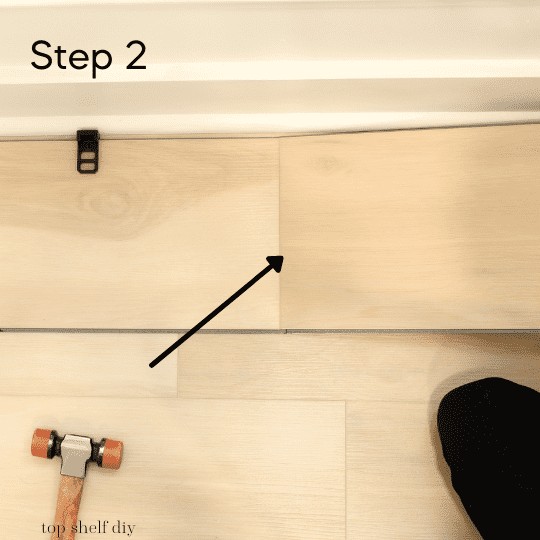
Keep adding planks this way for the first row. Once complete, start your second row going from left to right as before. Insert your piece at a slight angle. Tap the edge with your tapping block and mallet; once the locking system connects you'll feel the new plank click into place and become flush with the floor.
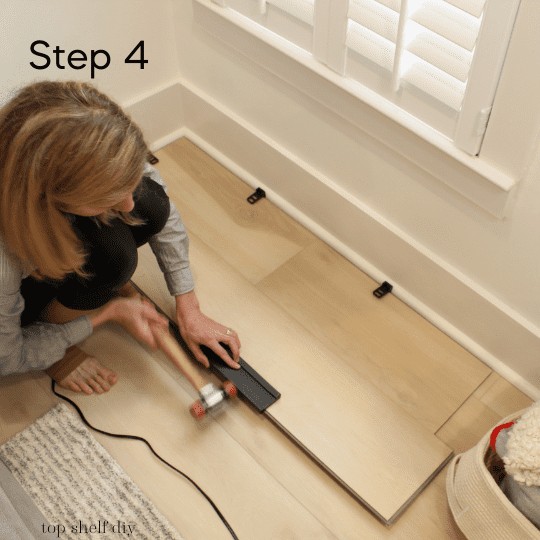
Continue in this manner until your entire room is complete! Remember to leave an expansion gap around hearths and transition pieces. I cut 90% of my pieces with a miter saw because it's quicker and easier than using a utility knife.
I used a jigsaw for cutting around smaller objects, and a table saw for ripping my planks.
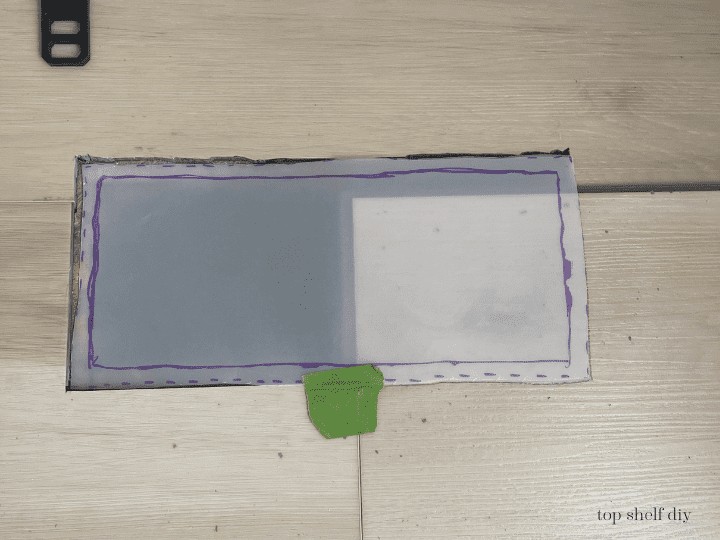
Quick tip #1: When cutting around obstacles, trace the outline of your expansion gap and use this as a template for cutting your LVP. For example:
Quick tip #2: If your wood subfloor has squeaky spots, add 1-2 construction screws to secure it to your floor joists. I had to pull up an entire section of new flooring in one spot when I realized it had made the creaking problem worse.
Transition pieces: the bane of my existence
A quick word on adding your transition strips. I hate them! Okay, maybe hate is a strong word...I'm not a huge fan of them. Specifically, the transition strips made by Home Depot – mostly because they come in six-foot pieces, so you're dealing with seams in large openings and around hearths.
I searched for alternatives at other flooring places but could not find a better color match than what was offered at HD. Just know that for this specific type of transition strip I needed to screw it into the subfloor to get it to stay in place. Liquid Nails adhesive doesn't cut it.
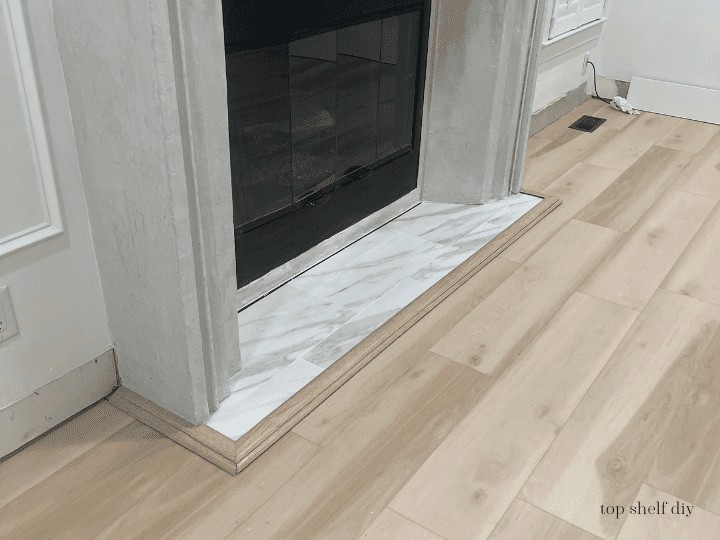
I installed a double layer of transition strips around the hearth because there was such a dramatic drop from the hearth to the floor. I actually kind of like how it turned out, even though I totally made this up as I went along. What do you think?
I think I spent just as much time cutting and scouting for transition strips as I did installing the actual floor! I hope you have better luck than I did.
Finish work
The final step in the process is to add your new baseboard and toe kick/quarter round. Caulk all seams and fill nail holes with wood filler. Add 1-2 coats of satin or semi-gloss paint to seal your hard work!
All of the expansion gaps should be hidden by the new trim.
Final thoughts
Not only did luxury vinyl plank flooring lighten up the room, but it immediately made the space smell better and feel cleaner. I no longer have to worry about Lucy (our chocolate Labrador retriever) leaving traces of red clay in our carpeting.
The smell was further improved by addressing hidden pet urine stains in the subfloor left behind by a previous owner. We've had these new floors for a month and they've withstood kid tantrums, canine rip-snorts, and Christmas tree hauls without so much as a scratch.
If you have heavy traffic area that needs a little love and protection from the elements, you should definitely consider luxury vinyl plank.
Ready for more? Here are all of the projects from this renovation series, including the final reveal!
- Painting the Chrome Finishes (Week 1)
- DIY Black Inset Windows (Week 2)
- DIY Cast Stone Fireplace (Part 1) – Demo & The Hearth (Weeks 3-4)
- DIY Cast Stone Fireplace (Part 2) – The Mantel (Week 5)
- DIY Cast Stone Fireplace (Part 3) – Mounting the TV (Weeks 6-7)
- The Coffered Ceiling (Week 8)
- Luxury Vinyl Plank Flooring (Weeks 9-10)
- Modern Farmhouse Living Room Reveal!
Cheers,
Erin
Erin,
Your floor looks beautiful and thanks for nice blog about your experience.
I am planning to install vinyl flooring in my basement which is roughly 1000 sqft.
I liked Home Depot’s lifeproof luxurious pine wood and thinking to buy. …. But during some research I found the Boulder pass hickory like you have installed. Both are light and almost look same to me.
I don’t see much photo boulder pass hickory floor online. So I am little worry about ? Although I bought 1 box of each flooring to see how they look in person. Hard to make decision. Please help.
What do you think which would be the best for my basement ?
Waiting for your feedback ?
Thanks
Hi,
I think either would look great! The luxurious pine has a lot more knots, otherwise the tones are almost the same as boulder hickory. Good luck with your project! Also, you may need to add a moisture barrier if you're installing it on a basement floor - so ask someone at HD about that.
Hi Erin, we just stumbled across your amazing work! Can you share what you used for your baseboards ?
I used 8" MDF pre-primed boards!
As someone who understands the significance of flooring in transforming a space, I appreciate the detailed guide provided here. Indeed, flooring is one of the most crucial elements in any home or business establishment, setting the tone for style, comfort, and functionality. This piece offers valuable insights for anyone considering a vinyl flooring installation upgrade. Well done!
You're welcome! Glad it helped.