Grab a book, crack open the wine and throw in some bath bombs – this DIY bathtub shelf is the key to a relaxing bubble bath night routine.
Have you ever wondered how some people manage to squeeze in the time to take a bath at night? Me too. I have trouble with the concept of being forced to relax.
You can't make me relax, darn it! I will stay stressed all I like, thank you very much!
To be completely honest, I use my nice bathtub to bathe the dog more than myself.
Well, maybe I need to reconsider my stance on bath time...
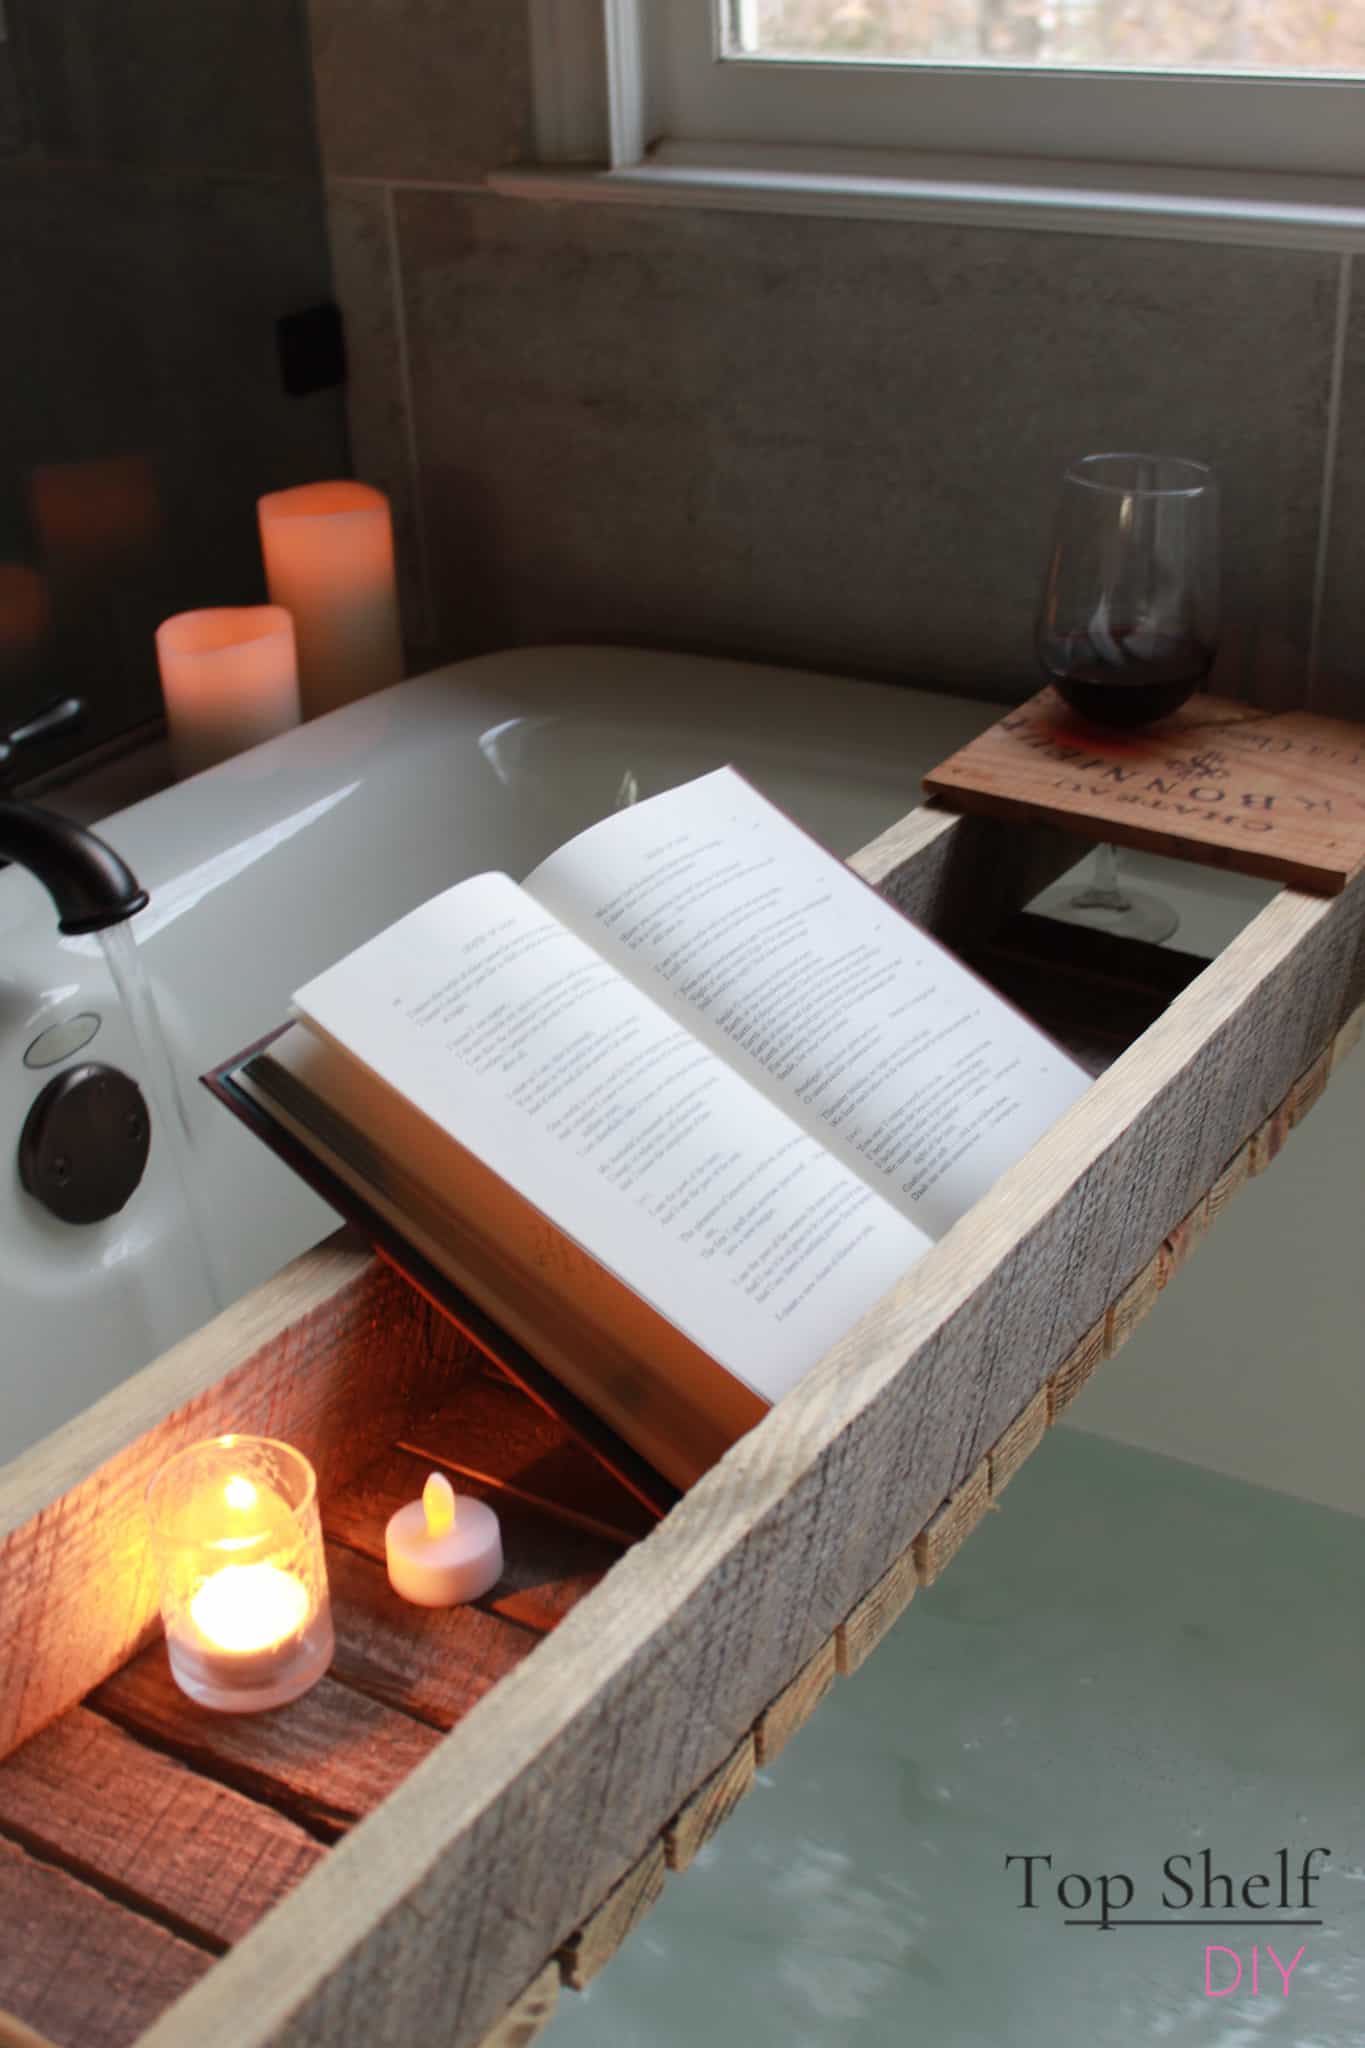
As I started thinking about all the different wood projects to make as Christmas gifts, a bathtub shelf was at the top of the list. So I researched all the different designs for bathtub shelves. What I really liked about the design above was that it had side supports where one could easily nestle a book or tablet.
I suspect if you're bringing electronics into a large body of water you're going to want to make sure that puppy is well-secured!
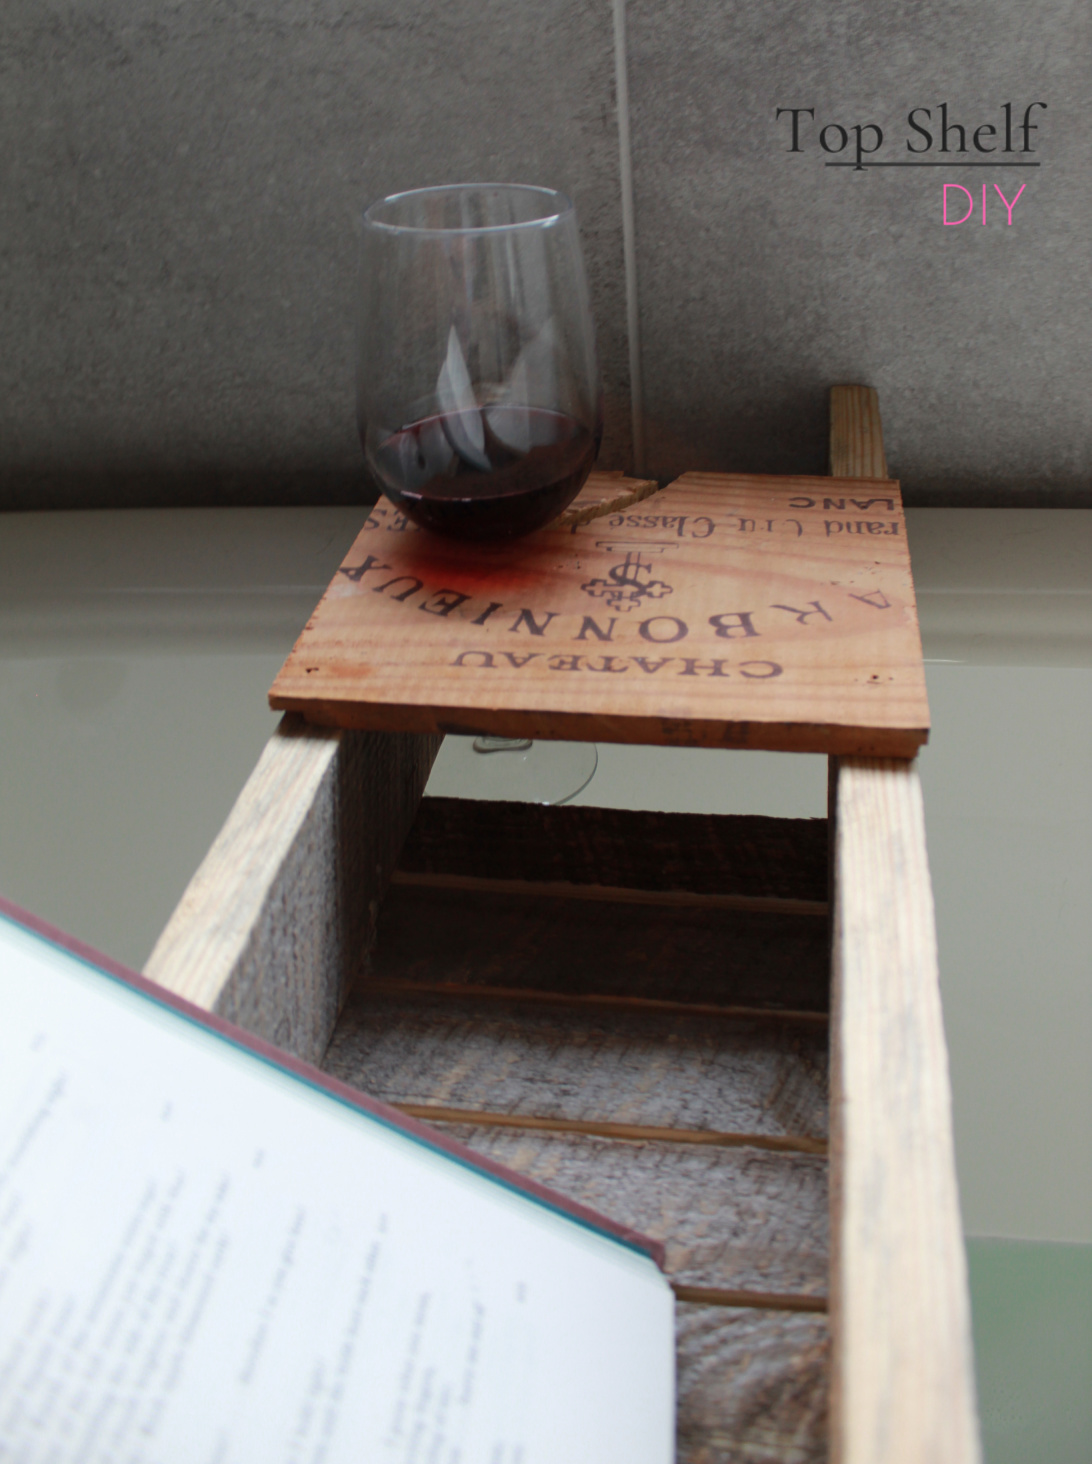
Then I had to get creative and figure out how to incorporate the wine, because you know mama needs her wine. I turned to my tried and true scrap material -- wine crates -- to add the additional shelf with a notched-out holster for my wine glass.
Ready to make your own shelf? Let's go!
Disclaimer: this post includes affiliate links, which means I will earn a small commission if you purchase any of the items below (at no additional cost to you!). For more, see my disclosures.
Materials Needed for Your DIY Bathtub Shelf
- reclaimed lumber of your choosing (I got mine at a lumber yard for $10. It was sitting in a junk pile and the guy was happy to be rid of it). You can use regular pine from a big box store but I really wanted the rustic farmhouse look.
- table saw
- nail gun + 2" brad nails
- wood glue (Titebond is my Frank's hot sauce...I put that sh** on everything)
- miter saw
- jig saw
- screw driver + 5/8" spade bit
- wine crate scrap wood (really any scrap wood will do)
- polycrylic protective finish + paint brush
Time Needed to Make Your Bathtub Shelf
I made this in about three hours. It probably would have taken less had I not cut all of the bottom slats the wrong length the first time around. Whoopsie!
Assembling Your Bathtub Shelf with Wine Holder
- Using a table saw, rip your boards down to 3 inches in width.
.
- Next, cut the boards to whatever length will accommodate the width of your tub. My tub was 44 1/4" across.
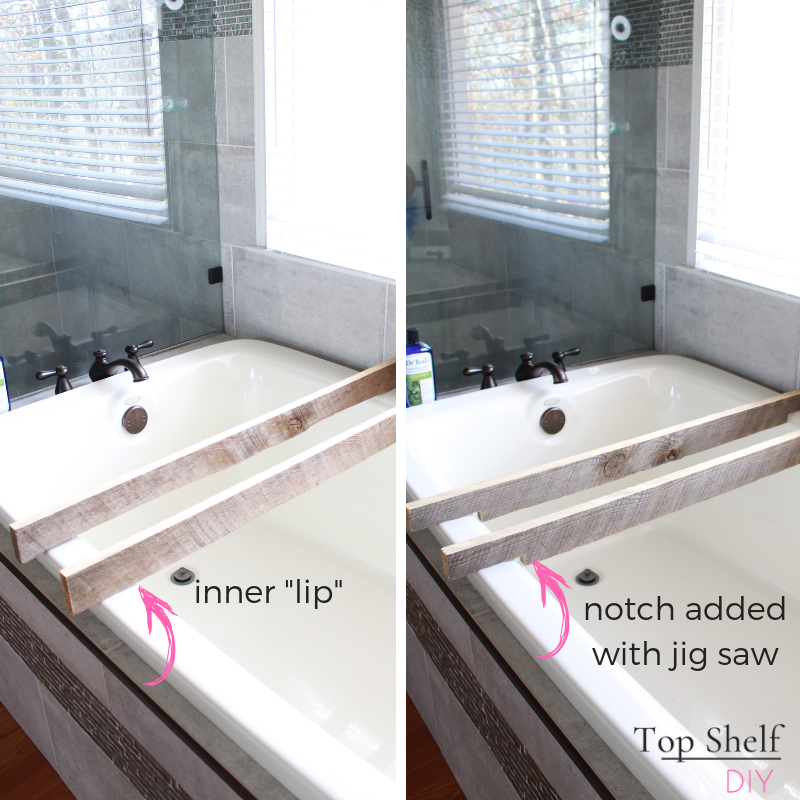
- Measure the length from the edge of your tub to the inner "lip." Mine was 5.5" on one side and 5" on the other.
- Place a mark on your board two inches down from either end. Place another mark at the length you determined in step #3. Draw this square on your board and cut it out with your jig saw. See below for a "before" and "after."
. .
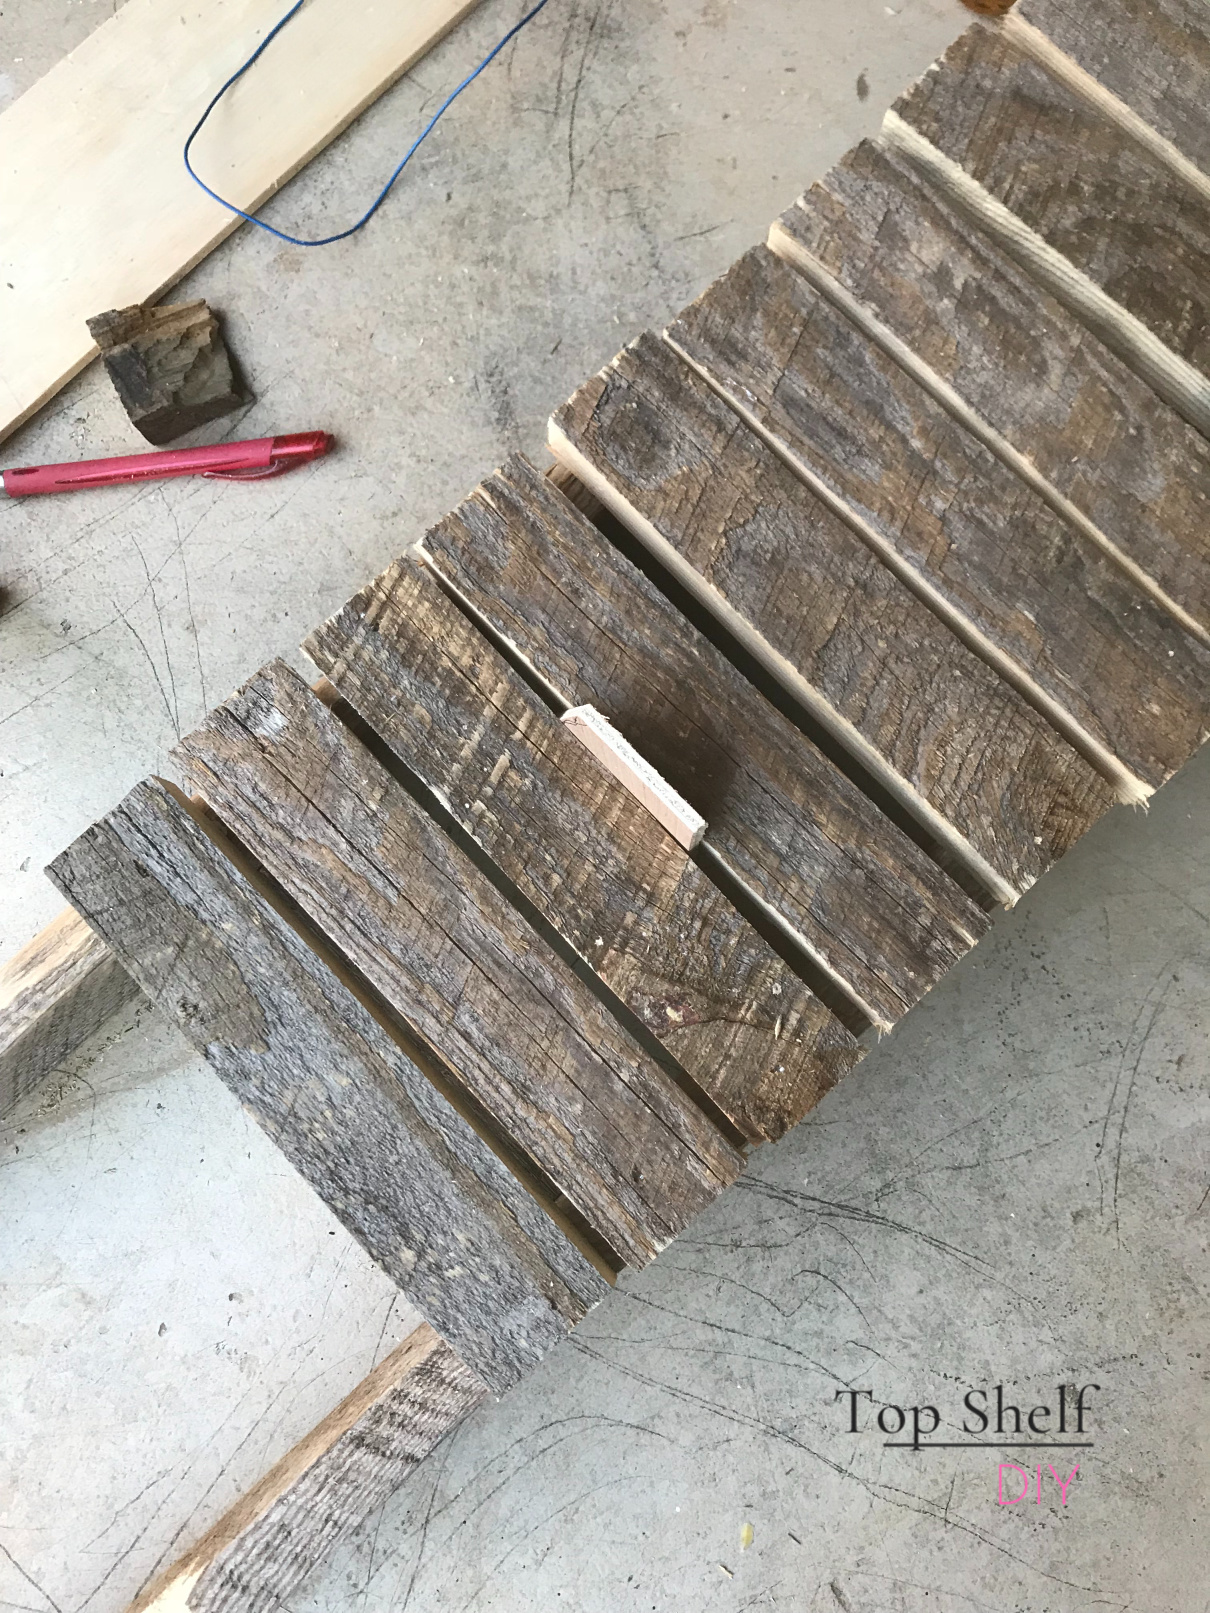
. - Flip your boards upside down. Next, cut a series of small planks (mine were 1-3/4" wide) to go across the bottom of your shelf. My shelf is 8" deep so all of the planks were cut to 8" long with my miter saw. Take care to leave a gap where the bottom of your wine glass is going to sit.
.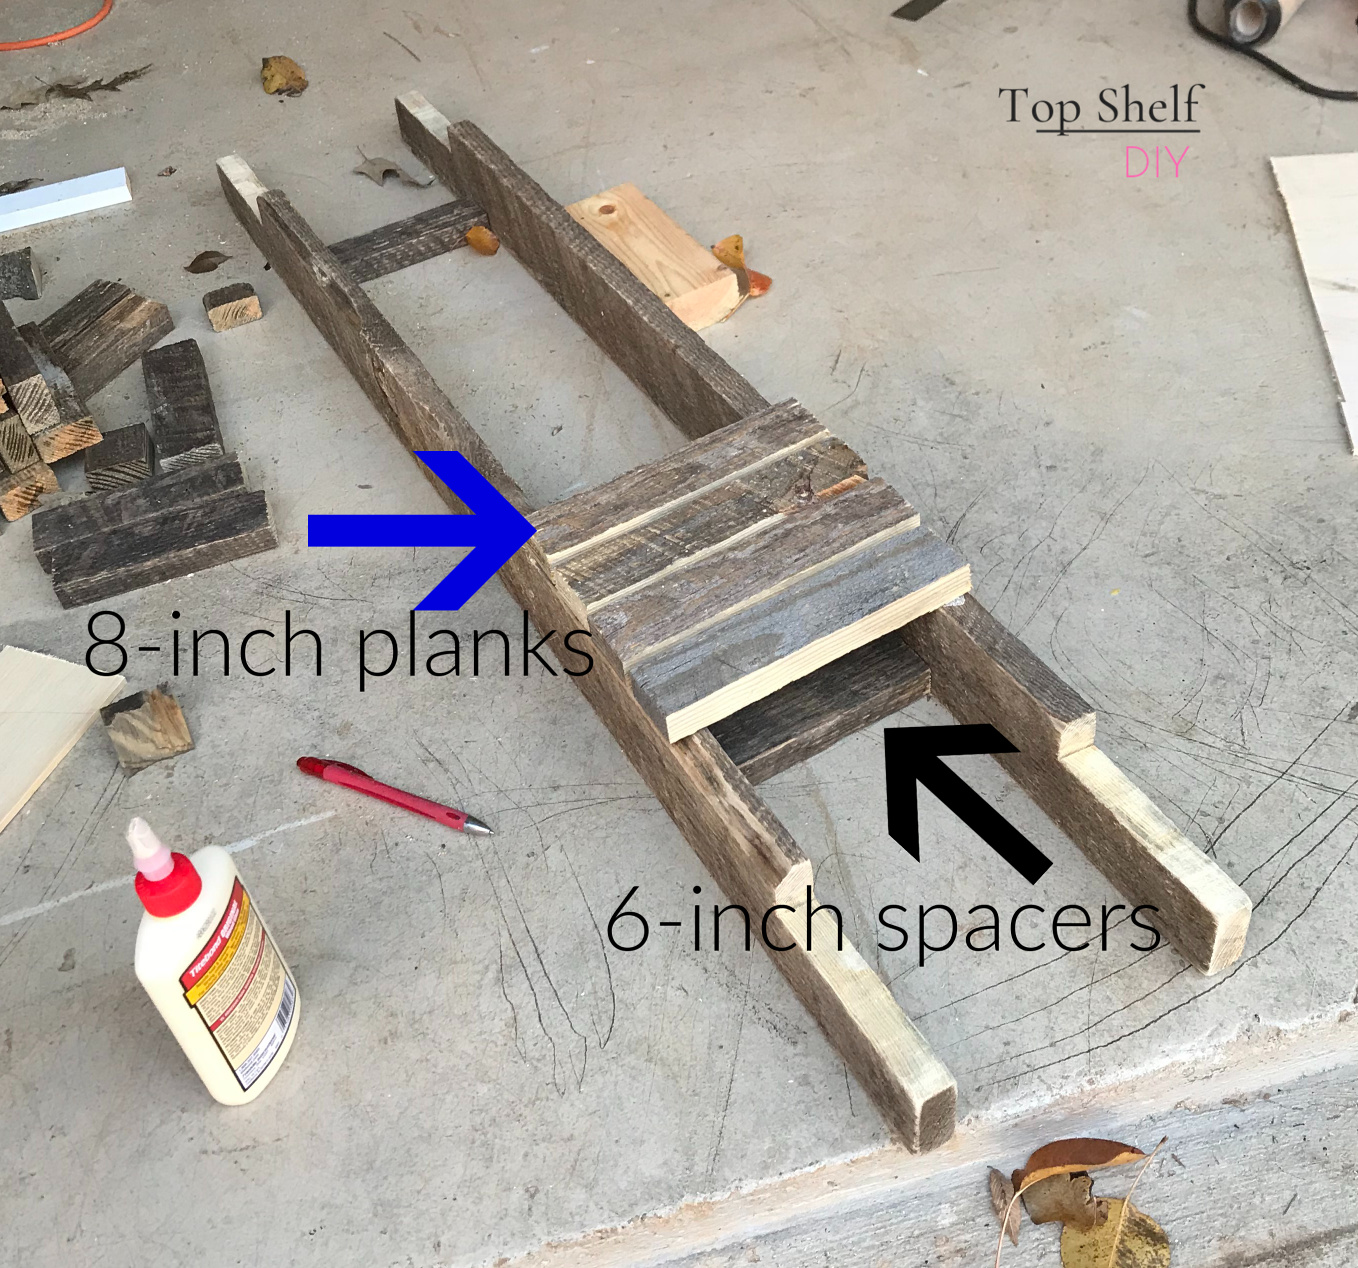
I used 6-inch spacer boards to make sure my boards remained perfectly parallel as I was nailing the planks in place. - Add a small bead of glue to the back of your board and nail into place. Use a piece of scrap wood as a spacer to maintain a consistent gap between your planks.
.
Turn your shelf over and do a dry fit to make sure it looks good in your tub. Only a few steps left!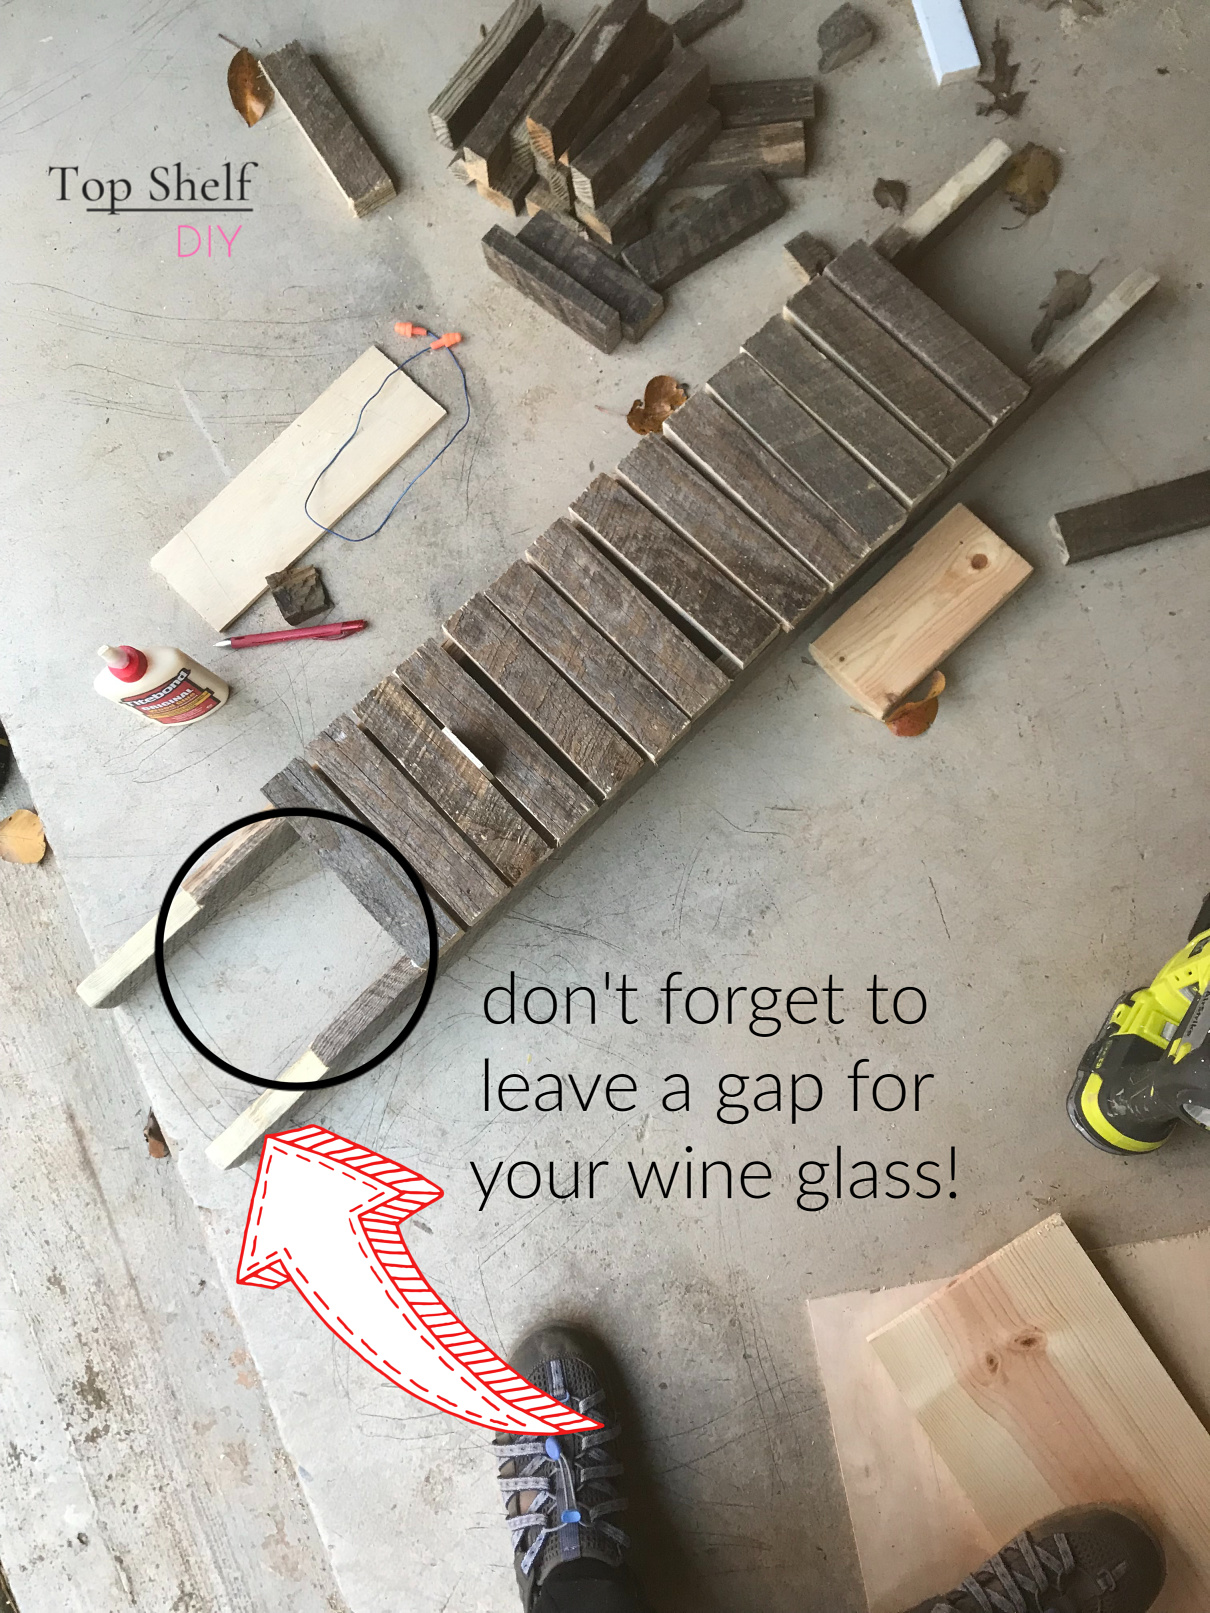
- Using a table saw or miter saw, cut a piece of scrap wood to the width of your shelf. Using a spade drill bit, make a hole for the stem of your wine glass. Then cut a "swath" or trail for your glass to travel toward the hole you just created using a jig saw.
- Secure your piece of scrap wood to your shelf with wood glue and brad nails.
- Lastly, seal your wood with poly to protect it from water damage. That's it!
Total cost of this project: $19. I already had most of the supplies, which is one of the big perks of being a crafter/woodworker. These shelves sell between $150-200 on Etsy! Once you invest in some basic tools you can save a buttload of money on projects down the road.

And one last view from the other direction:
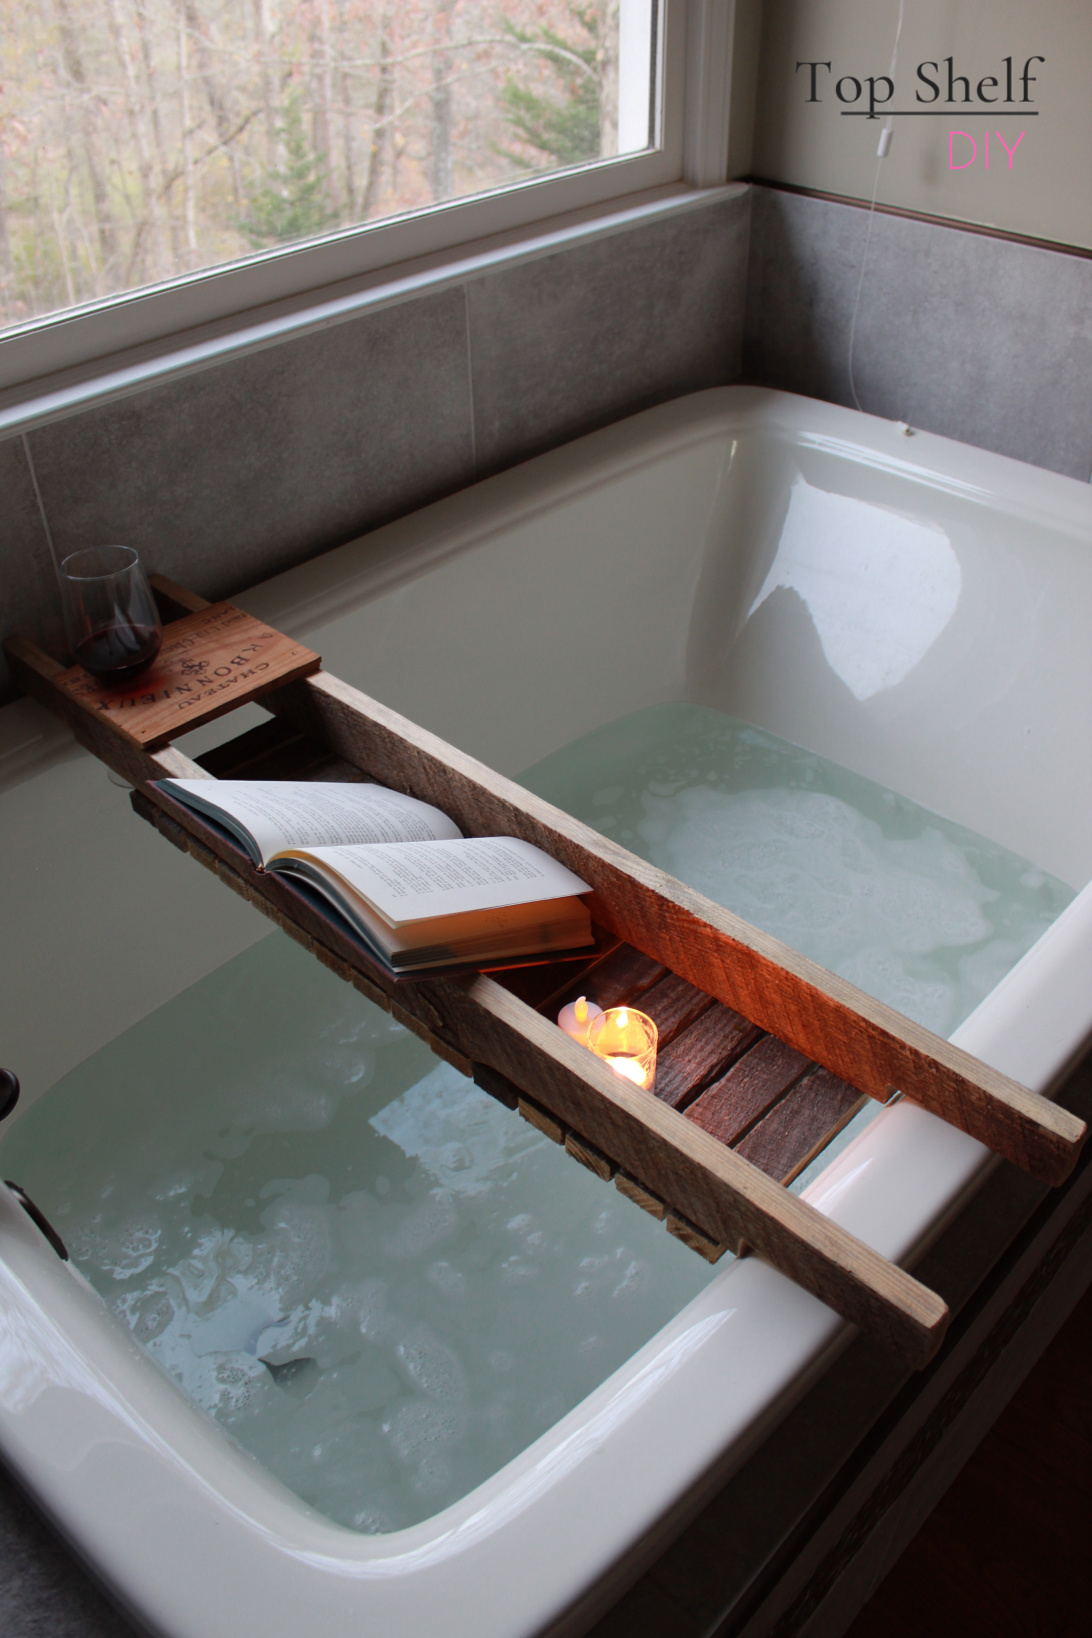
Will this inspire you to start a new bath routine? I'd love to hear your thoughts in the comment box below!
Also, if you'd like to connect or ask questions, join the Top Shelf Handywoman Facebook Community. It's a great place for like-minded female builders to learn, laugh, and share nerdy inside jokes.

Pin this for your project list!


This is an excellent idea!! Thanks for sharing!!
Virginia from Lindstrom, MN
That’s about the nicest shelf for the tub I think I’ve ever seen! It’s rustic and very inviting with the book and candles..lol. I would love to have one for the guest bathroom! Unfortunately I can no longer use a tub but it sure looks relaxing!
Thanks Shirley!