Phase 2 of Our Playroom Makeover: Demolition, Patching, and Painting
I planned to leave the wainscoting alone. Really I did.
But then, a familiar feeling crept in and my face began to twitch. I blacked out and lost all sense of time and space. Mrs. Hyde walked in with a pry bar and took control of the room. I vaguely remember hearing my husband say, "Mommy is destroying the house again!"
When the dust settled, the wainscoting was gone.
I'm sorry. Well, maybe a little...not really. I have big dreams for this room, and they don't include beige walls and 90's wainscoting.
At this point, I had three options going forward:
- gut the damaged drywall below the chair rail and replace with all new drywall.
- cover the walls with wallpaper, beefier wainscoting, or shiplap.
- patch the bejeezus out of the walls and pray.
I went with option #3.
I know what you're thinking. "Really Erin? WTF? Can't you leave things well enough alone?"
Great women of history never leave things well enough alone. Besides, I can't be held liable for decisions made when sleep deprived. #refluxbaby
After many hours of scraping, sanding, re-scraping, and painting, I'm tickled with how things turned out. If you're patient and highly motivated to make your space align with your design vision (i.e. one that does not include wainscoting), you can do it too.
But first, a note about wainscoting.
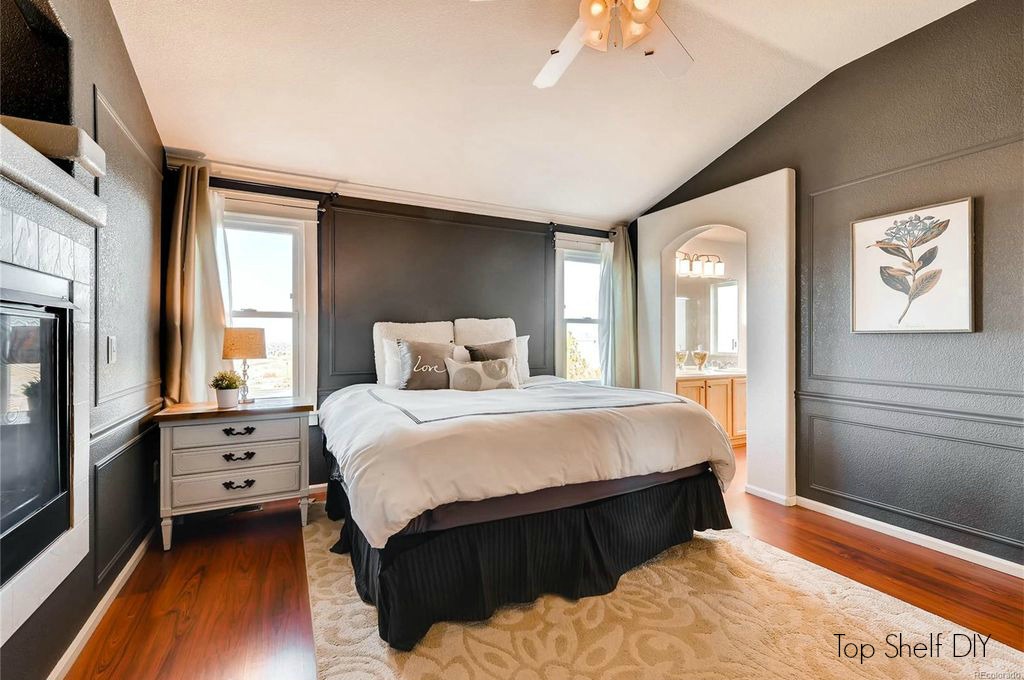
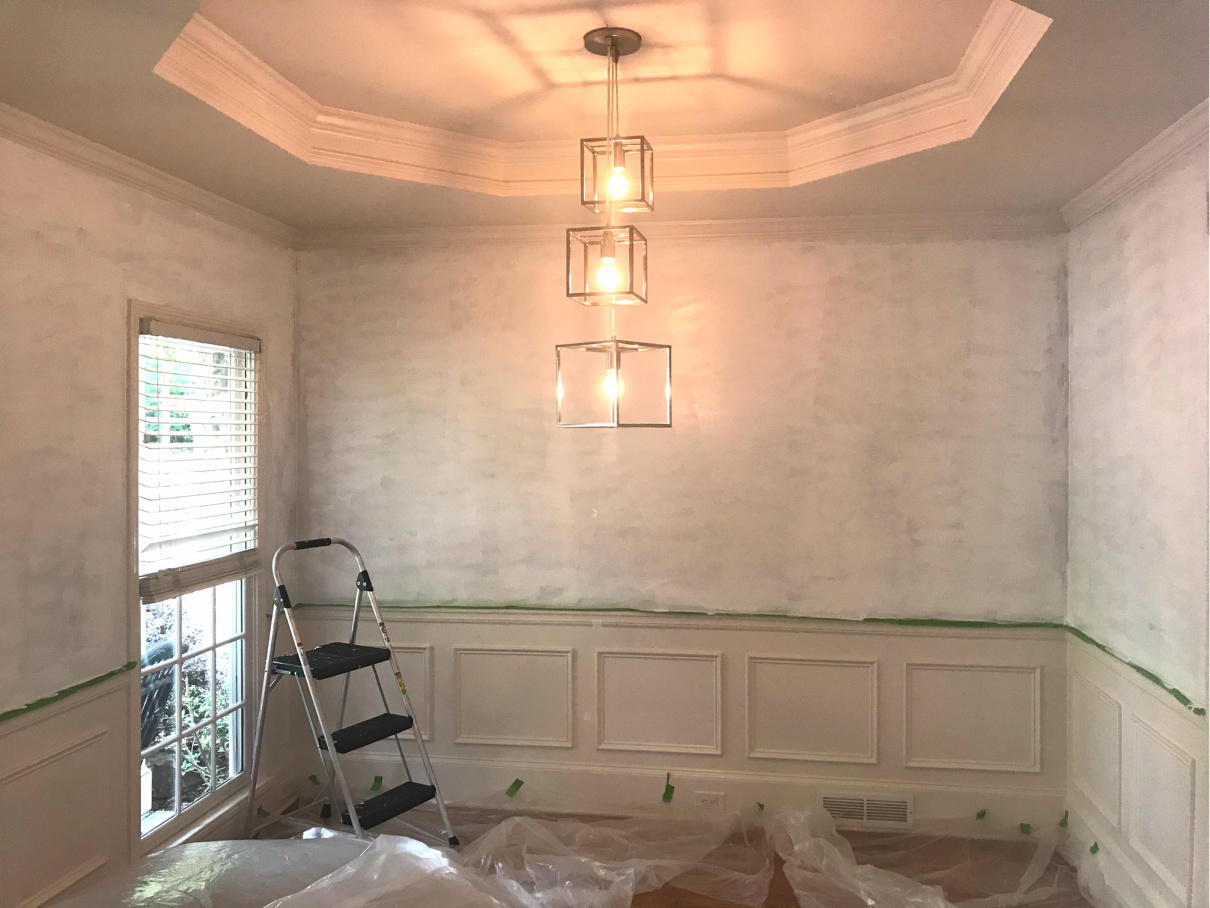
There are many different types of wainscoting -- also known as paneling. It can refer to anything from beadboard panels to more of a board and batten look. Regardless of the construction materials, they're typically made to cover the lower half of the room (but not always!) and sit below what's referred to as a chair rail. For example, here's the picture frame molding we added to our old master bedroom. It was really easy to apply and turned out beautiful!
Your removal process may be more or less complicated based on what materials were used in your home to achieve the wainscoting look. But the general rules should still apply.
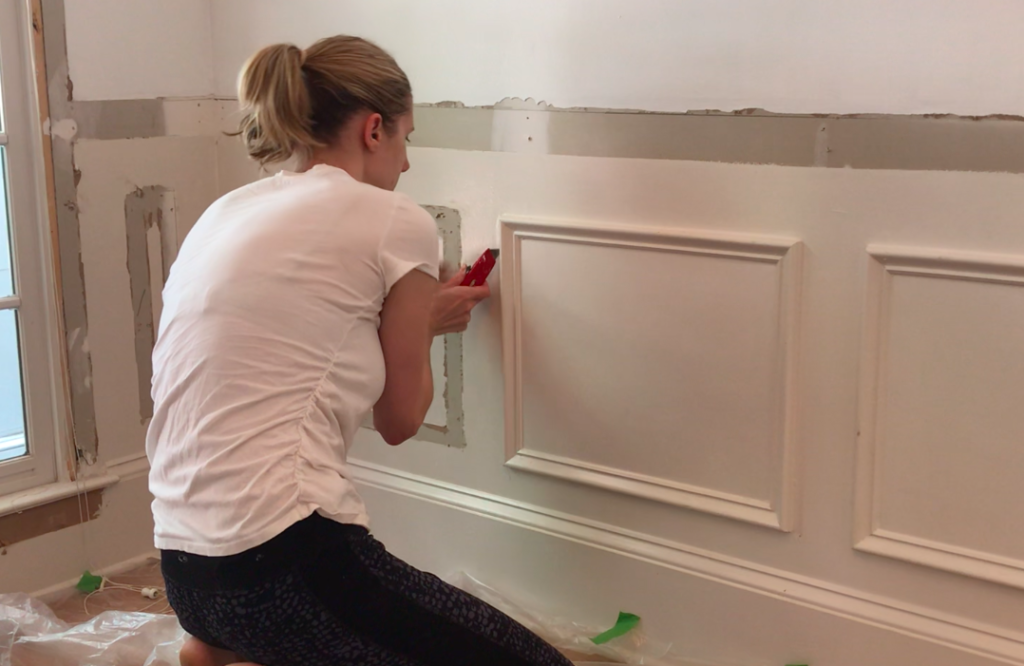
I was lucky that our wainscoting didn't have backer board -- paneling used to achieve a smooth surface on textured walls. This would have made the job nearly impossible without completely replacing the drywall, since the construction-grade adhesive applied to backer board causes significant tear out upon removal.
Key to the success of this demo was the absence of backer board. Our walls were already smooth, so the wainscoting was nailed directly to the wall in a picture frame style. The builders used base cap, which is the trim typically used on top of baseboards (as the name would suggest).
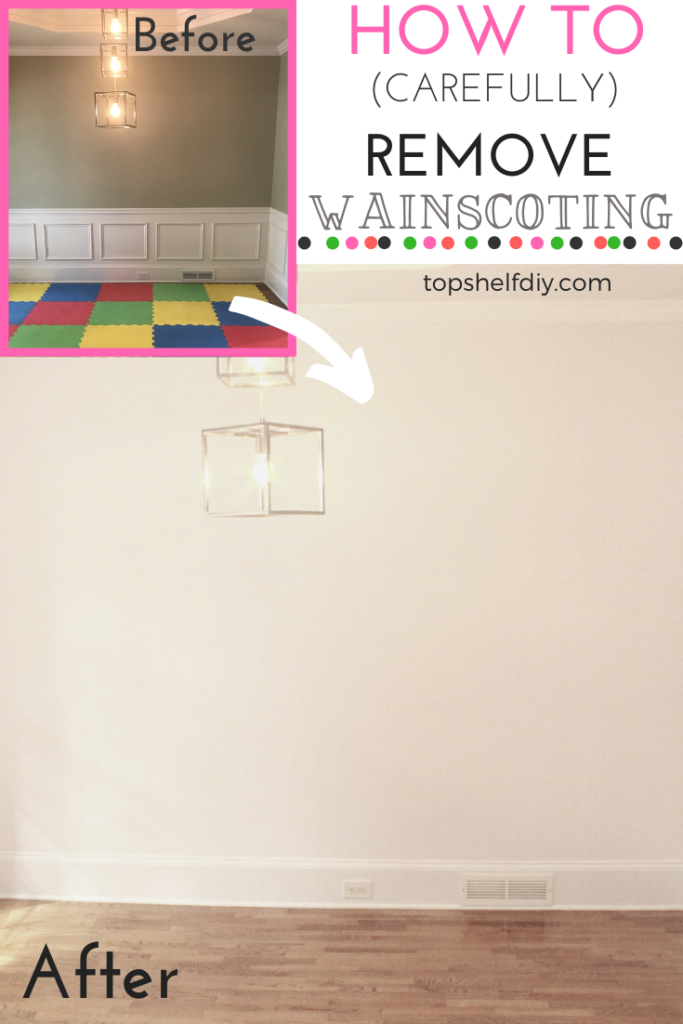
Here's what our dining room looked like shortly after we moved into our home in 2017.
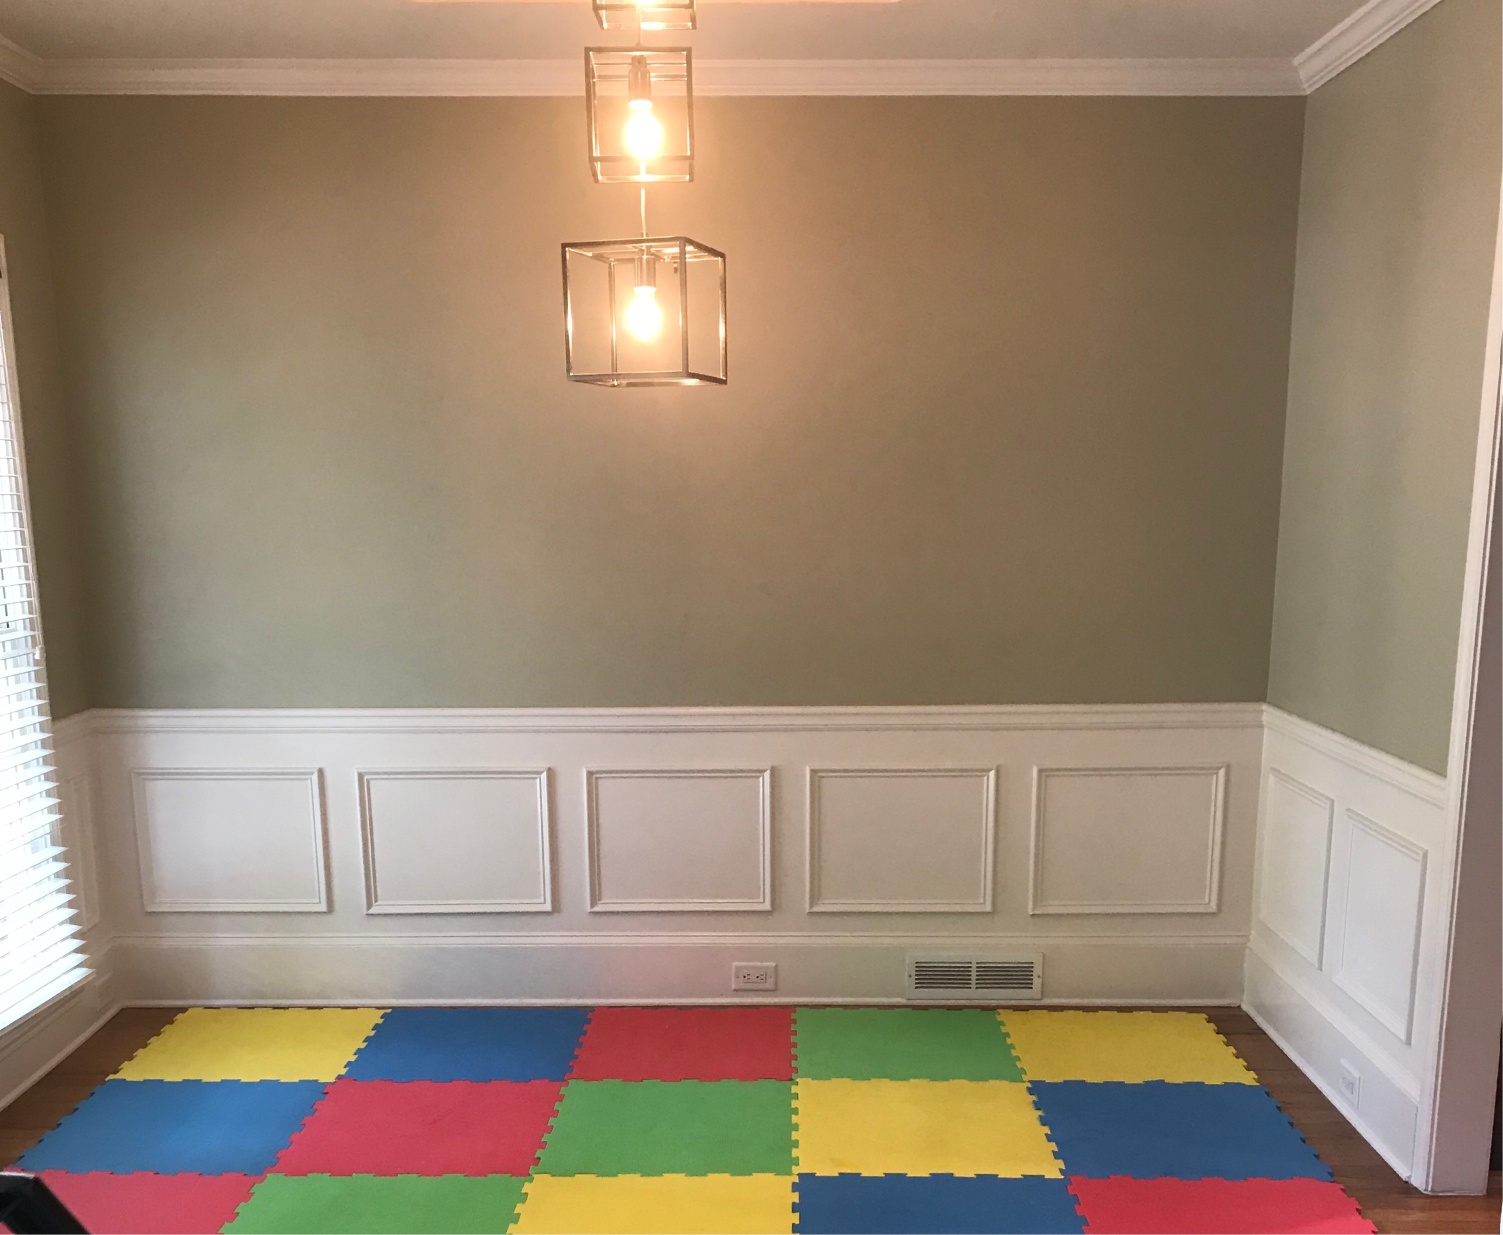
Once I cursed a thousand suns painted the beige walls white, I realized how boxy and outdated the room looked with the wainscoting left intact.
Alright, so just one more point to address here, and then we will remove your wainscoting in one fell swoop.
How much does it cost to remove wainscoting?
Very little. This process does not involve complicated tools or expensive products. In total, I spent about $50 on two gallons of paint (for the trim and walls). I had everything else in my workshop already.
The better question to ask here is, how much spare time do you have? This is not exactly a quick process. I probably spent a solid week doing the demo, patching, sanding, and painting. There's a lot of overnight waiting for products to dry. Patience is key.
My #1 Tip for this process: remove as much caulk and adhesive as you can before you begin painting. Once you start painting it's harder to hide flaws. Also, it's much easier to fill in holes than to try and cover up residual caulk. So scrape, scrape away to your heart's content!
Tools Needed for Wainscoting Removal, i.e. Wall Surgery
*This post contains affiliate links*
- hammer
- pry bar
- utility knife
- putty knife
- sanding wedges in coarse and medium grits (60 and 120 work well!)
- a set of strong hands
Materials
- joint compound
- drywall repair tape
- primer + paint in a color and sheen of your choosing (I chose semi-gloss for easy cleanup since this is going to be a playroom)
- paint brush or roller
That's it! Not too bad really.
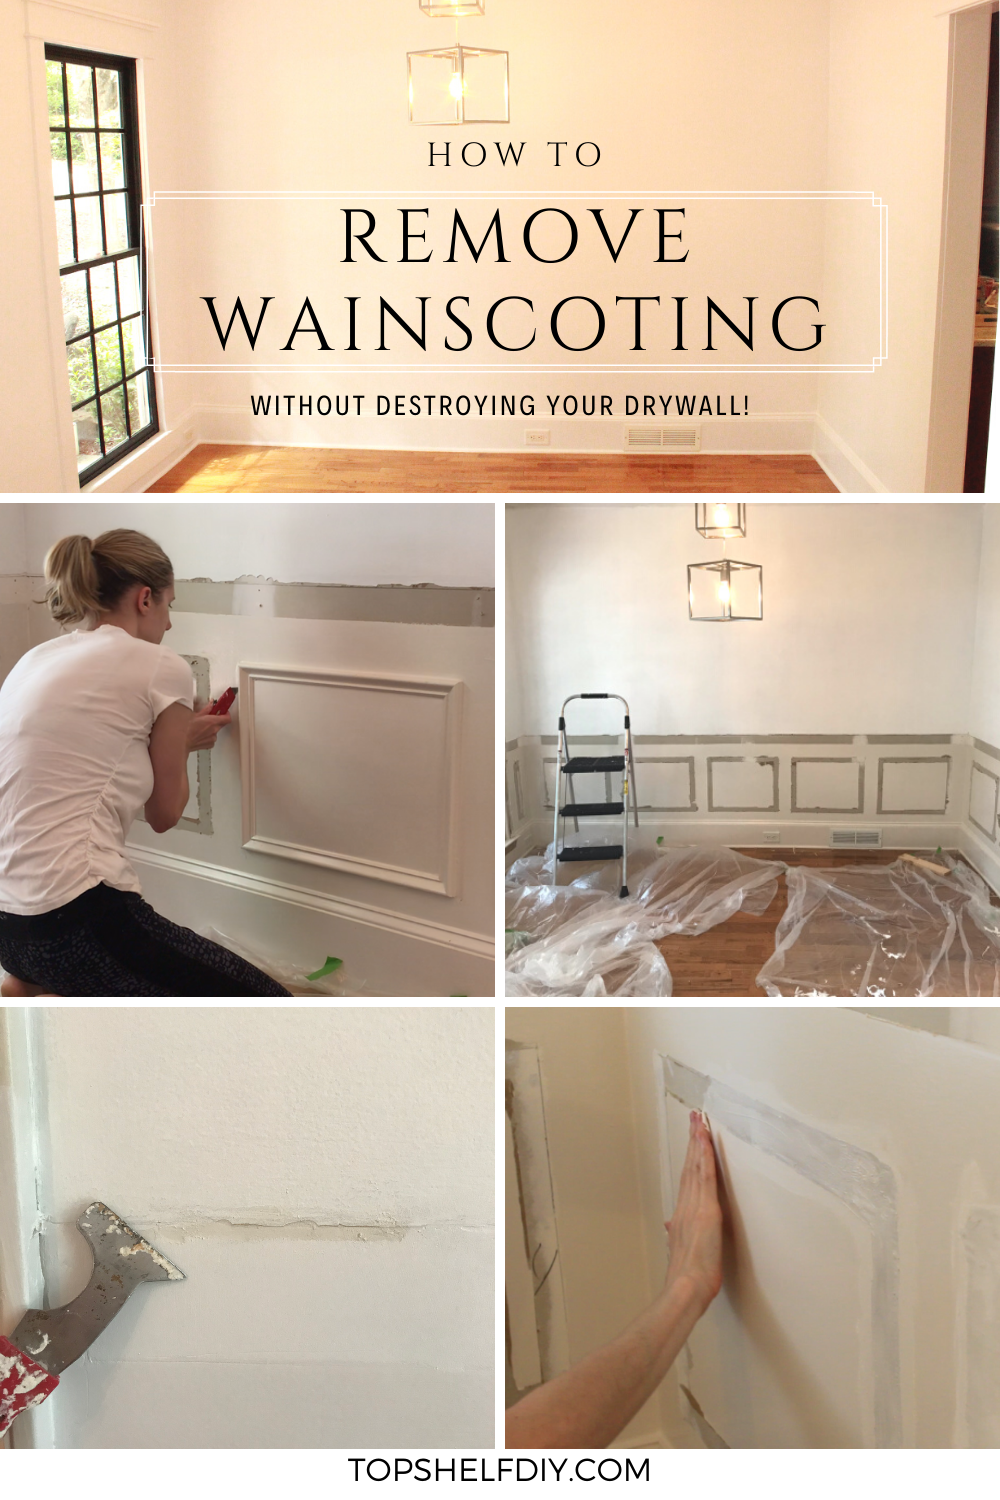
The Wainscoting Removal Process
Step 1: Score Your Trim
Your first step is to break the seal between your wall and the wainscoting. Using a utility knife, carefully score the caulked areas where your trim meets the wall.
Step 2: Gently Pry Away Your Trim
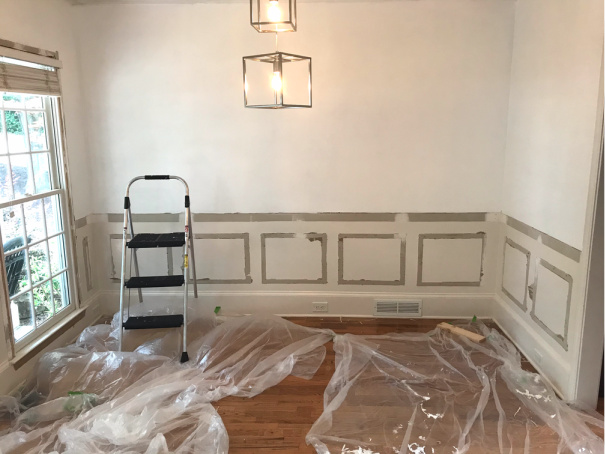
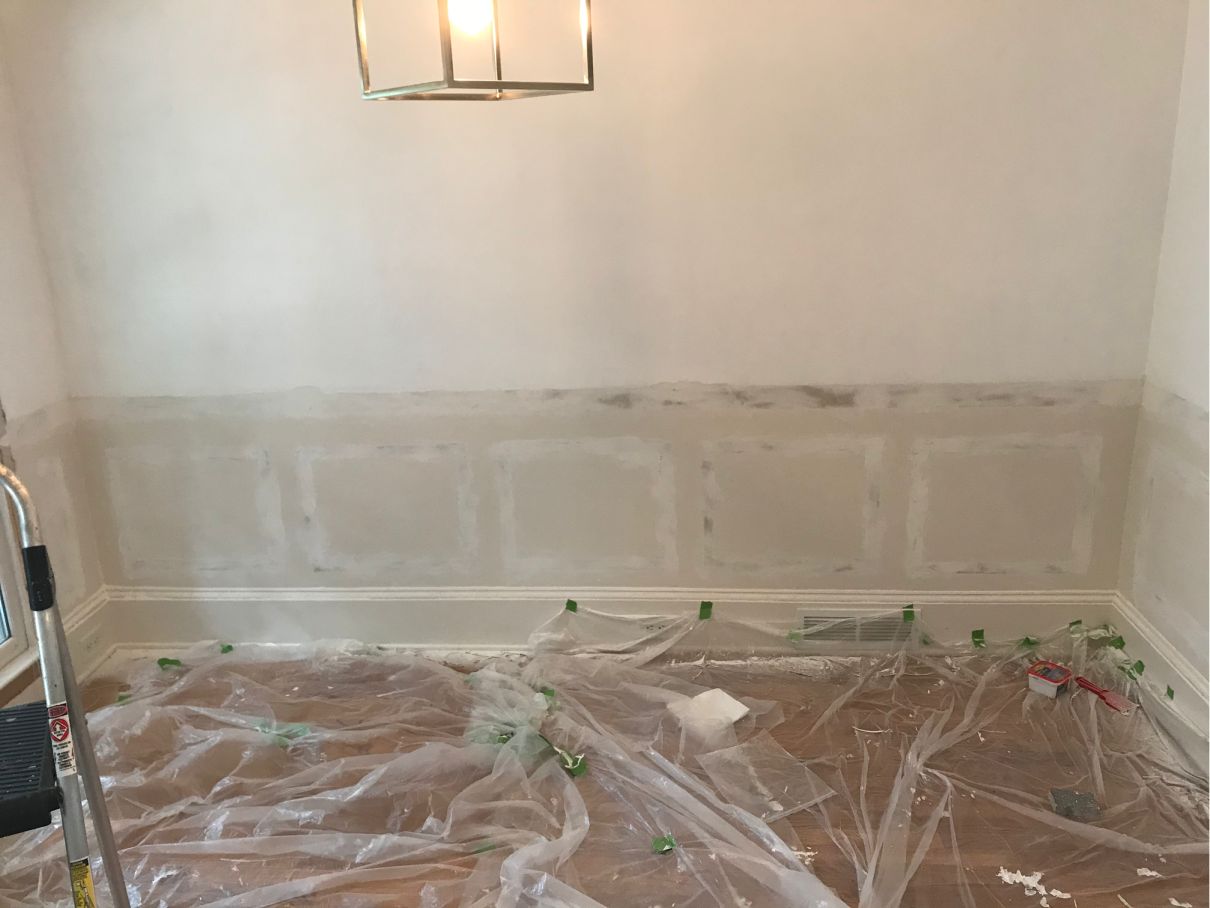
Use your hammer to wedge a pry bar under your trim. Continue tapping until you have some good leverage. Begin (carefully!) pulling your trim away from the wall. At this point you may notice areas where the trim is ripping the drywall; you may need to cut these areas a bit more with your utility knife.
Continue prying until you've managed to pull off the trim entirely.
Step 3: Scrape Away Lingering Caulk
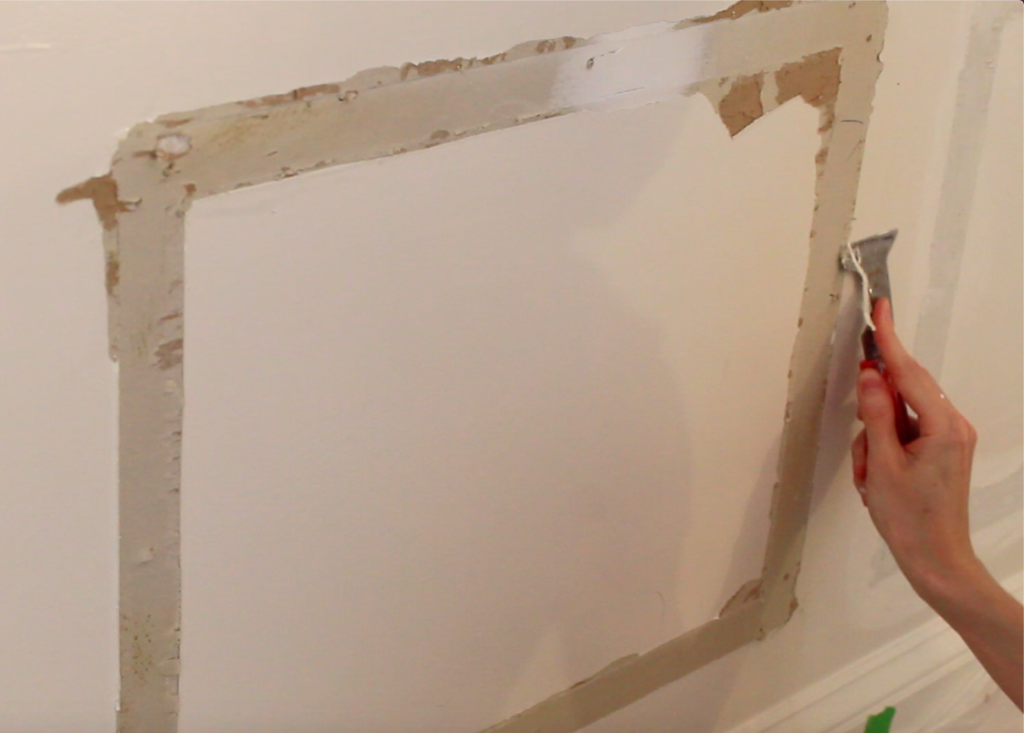
Use your putty knife to scrape off any raised portions of caulk still attached to the wall. I recommend using a flashlight so you don't miss any spots (like I did).`
Step 4: Patch Your Walls
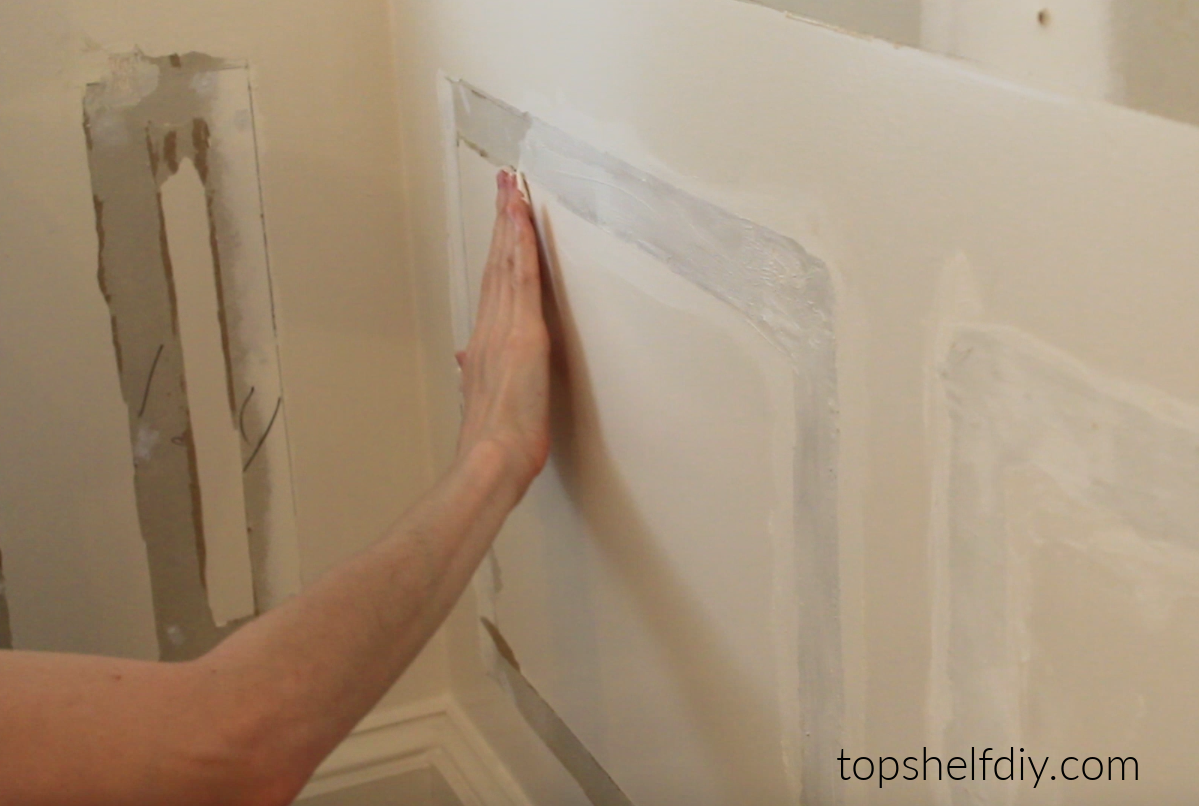
Now it's time to "frost the cake," so to speak. Scoop up a nice goop of joint compound with your bare hands. Apply said goop to wall and smear a generous layer all over. Pretend you're re-enacting that sexy pottery scene from Ghost and really let your hands get funky here. Spread out your compound evenly and let it dry overnight.
At times, your enthusiasm from Step 3 may result in some serious drywall damage. You may notice a white powdery substance resembling anthrax pouring out of the wall. Don't panic! It's just gypsum powder.
This is when drywall tape saves the day. Snip a very small piece of tape and apply to your hole, then backfill with joint compound. Sand when dry, apply more joint compound, and sand again.
Step 5: Sand and Repeat
You will eat, sleep, sand, and repeat for several days. Embrace it.
Once you've let your first layer of joint compound dry overnight, sand intensively until the wall is smooth. Reapply more compound as needed and sand again.
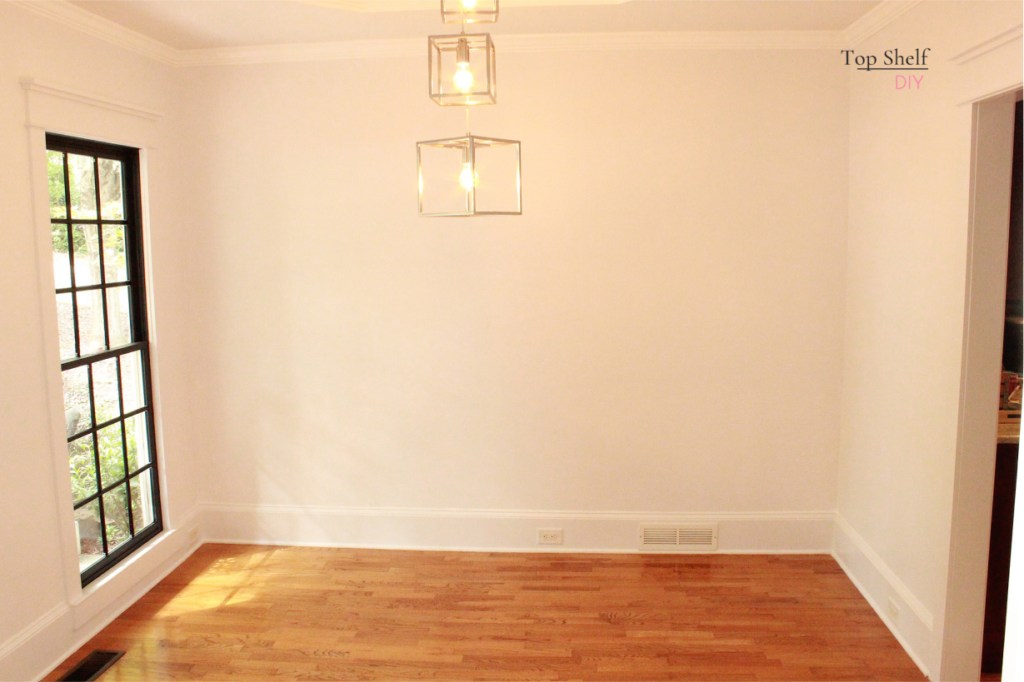
Step 6: Paint Your Walls and Rejoice!
Huzzah! You've made it to the finish line. Your walls are smooth, patched, and ready for paint. A nice, thick layer of primer followed by at least two coats of semi-gloss paint will hopefully cover any remaining blemishes.
Here's a good closeup shot of one corner after the wainscoting was removed and then after its final coat of paint.

This is not a perfect process by any means, but I don't plan on agonizing over the remaining flaws. This is a kids' playroom after all.
I invite you to follow along as I continue with this dining room renovation! Here are the links to the work done so far:
Cheers,
Erin
Leave a Reply