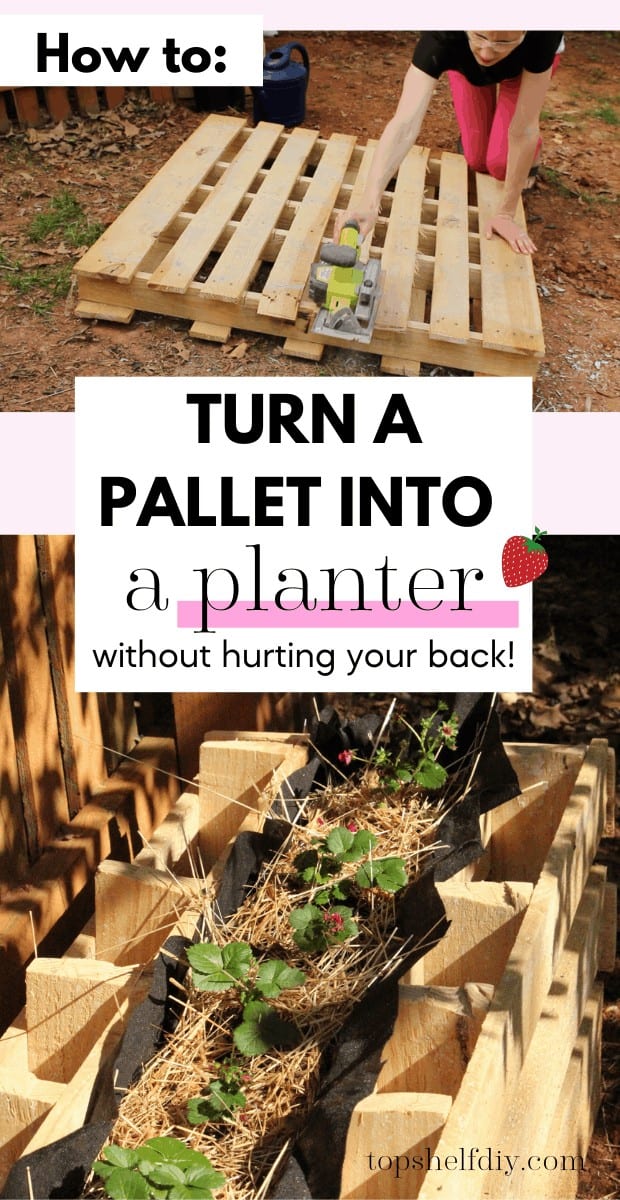
Got pallets? Here's how to turn them into planter boxes for next to nothing!
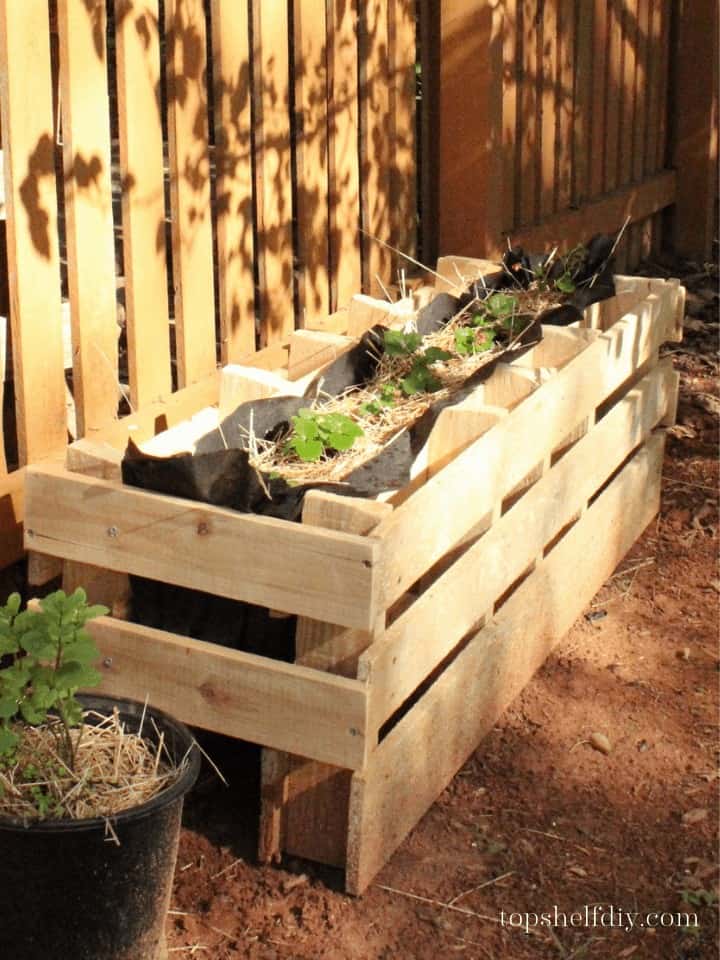
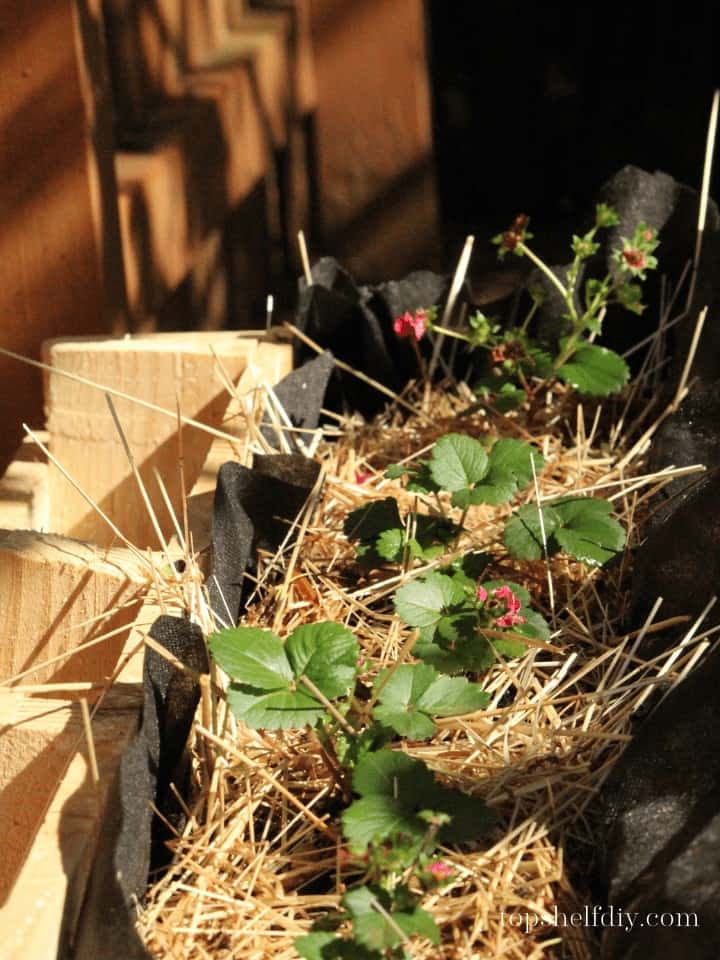
Pallets and I are in a love-hate relationship. I hate working with them, but dang it I can't resist free wood.
If you're reading this then you probably already know that pallets are stubborn as heck. They're designed to hold motorcycles and large scale pieces of art, not cute little strawberry plants.
That is, unless we bend them to our will... *prolonged cackle*
My inspiration for this project comes from Tanya Anderson's DIY Strawberry Pallets over on Lovely Greens. When I went to make my own planter boxes I noticed my pallets were constructed quite a bit differently (possibly because she's over in Europe). My pallets lacked the chunky dividers that get repurposed into "feet." Her instructions are for pallets with 6 or 9 slats. Mine have 8 🤦🏼♀️
If you're here in the States wondering how to repurpose a stubborn pallet, this tutorial should help bridge the gap.
Tools
Bear with me here!
- Circular saw
- Reciprocating saw
- Hammer
- Pry bar
- Miter saw
- Nail gun
- Drill
- Impact driver
- Staple gun
- Table saw (if you don't have any scrap 1x2)
*This list includes affiliate links, which means I will earn a small commission should you purchase any of the items recommended for your convenience.
Materials
- 1 pallet
- Scrap 1x2 cedar (if you have a table saw you can simply rip your leftover pallet wood instead)
- 3" and 2" exterior decking screws
- Galvanized brad nails
- Wood glue
- Compost
- Soil formulated for fruits and vegetables
- Straw mulch
- Plants!
Safety precautions for pallets
Pallets can be pretty dangerous if you're not careful. They're splintery, loaded with rusty nails, and possibly coated in toxic pesticides. Make sure you're wearing safety glasses, gloves, and a mask during construction. I experienced kickback a few times while cutting with my circular saw.
I would also advise being up to date on your tetanus immunizations, especially if you're accident prone or impatient like me! Better to be on the safe side.
Pallets are often marked with "HT" (heat treated) or "MB" (methyl bromide). Whereas heat treated pallets are safe, methyl bromide is a toxic pesticide used to prevent the migration of bugs into the US. Stay away from pallets marked with MB!
My pallets didn't have any markings, leaving me in a bit of a conundrum. In my research I learned that pallets in the US don't require a stamp if they're used for non-hazardous purposes. My pallets were presumably safe to use.
Steps for turning your pallet into a planter
I tried a variety of different hacks for breaking down pallets. I was so excited to try the one where the guy sticks some scrap 2x4s under the frame, taps it a bit, and the boards just come apart like butta.
Alas, my boards didn't budge. I heard the faint sound of snickering.
I tried cutting through the nails with a jigsaw. I don't have a versatile blade (one that works for wood and metal), so that got me nowhere.
Once more the boards mocked me in shame.
Here's what finally worked. Hot pink pants optional.
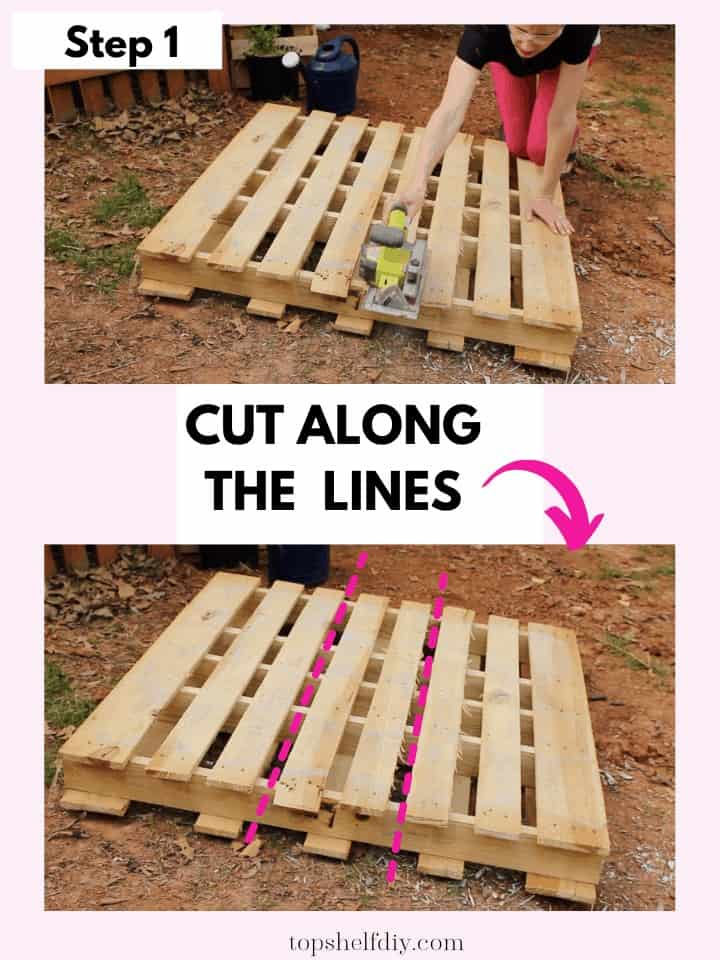
Use your circular saw to cut along the dotted lines. Flip the pallet over and repeat. My circular saw wasn't able to cut through the full depth of the pallet, so I finished the job with a reciprocating saw. A jigsaw would also work.
Once this step is complete you should be able to separate your pallet into three pieces.
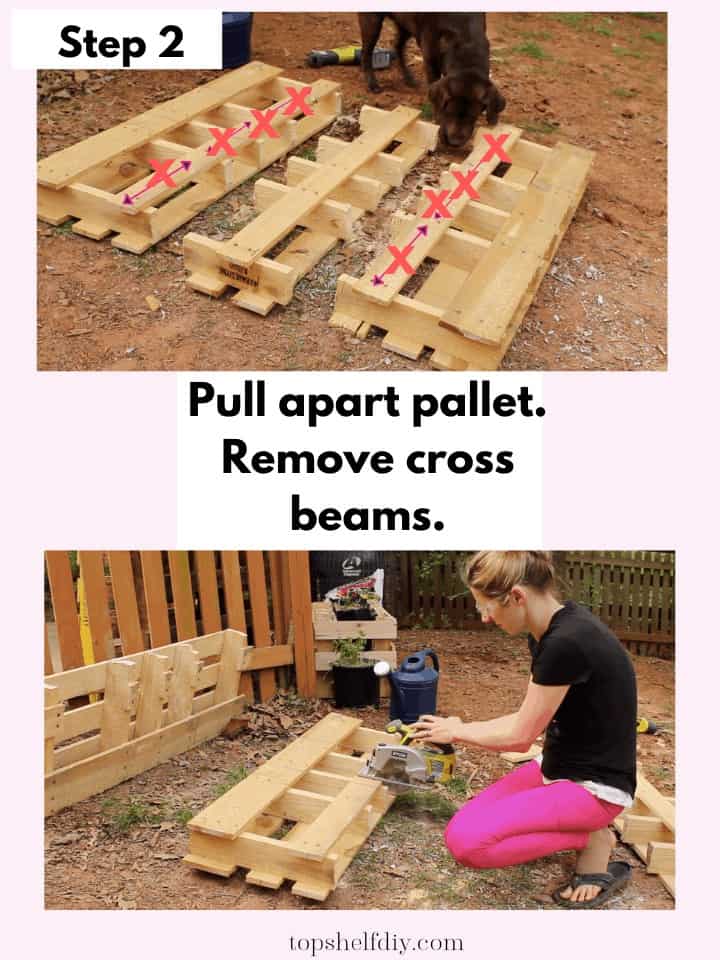
If you can remove those cross beams entirely that would be ideal, but like I said I was impatient so I just cut them with my circular saw instead. Much faster.
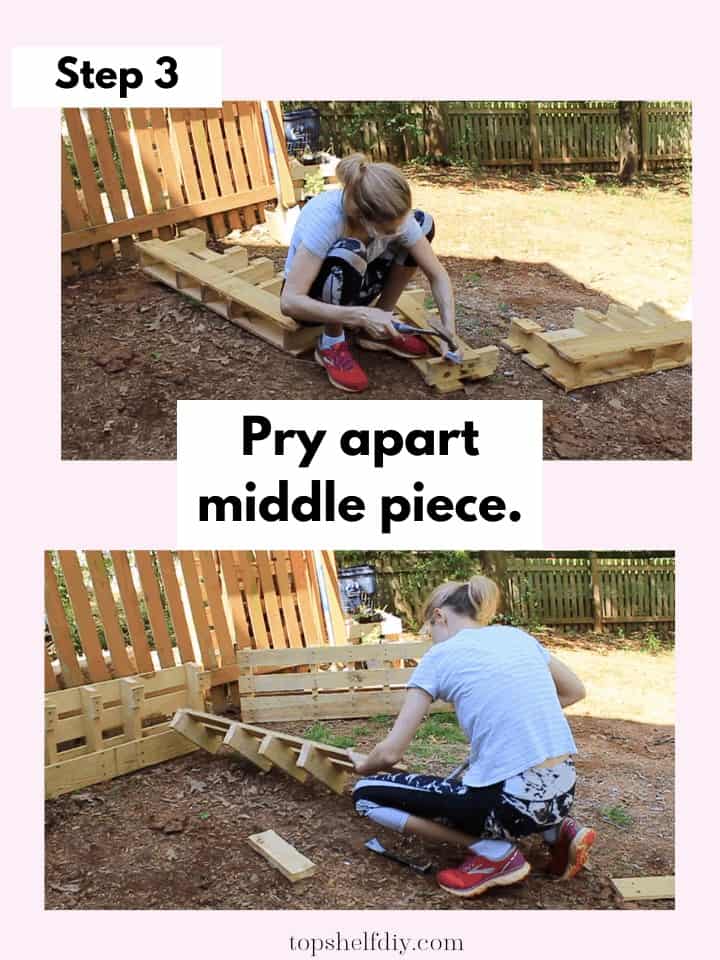
Use your hammer and pry bar to break down the middle piece into its components. Here's my quick and dirty guide to breaking down a pallet:
- Wedge your pry bar under every seam and hammer it in to loosen up the joints.
- Once you've patiently loosened all your joints, take a deep breath and kick your pallet to remind it who's boss.
- Hit your pallet with your hammer a bit just to see if you can pull off any of the boards manually.
- Begin tedious process of carefully prying and removing each board in its entirety. Set to side.
- Mumble something under your breath about never working with pallets again, only to remember you have three more waiting in the wings. Poop.
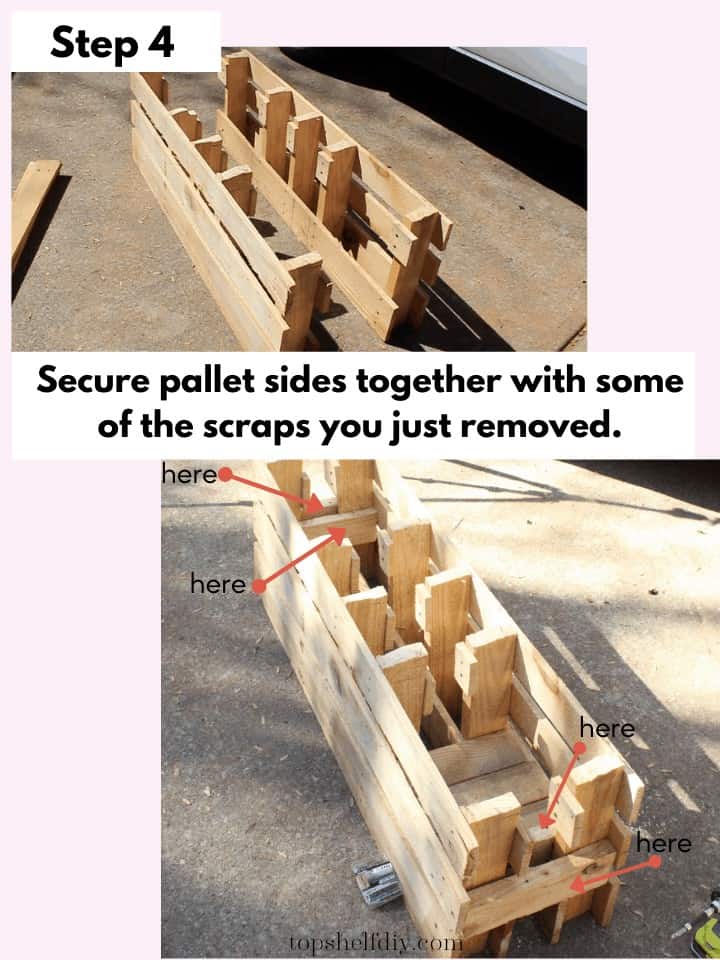
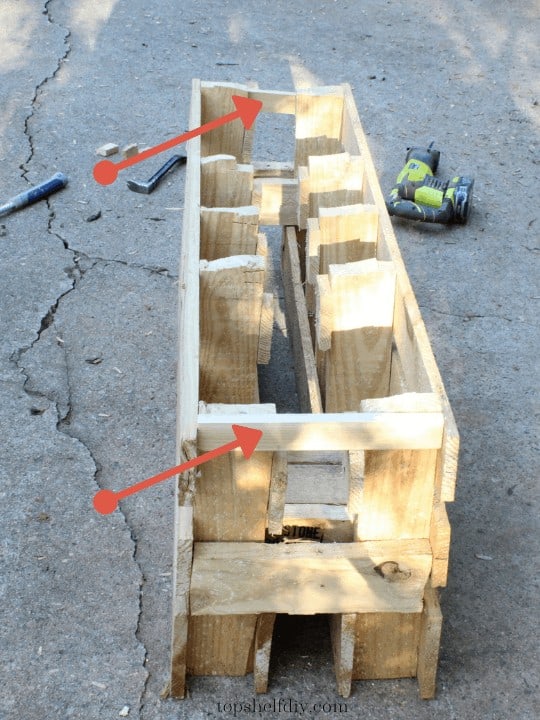
Take four scraps and use them to secure your side sections together. I used 3" exterior decking screws. I also added scrap 1x2 boards to the top of each side.
Pre-drill your holes with a drill and then insert your screws using your impact driver. I love the torque power of an impact driver, especially when working with longer screws.
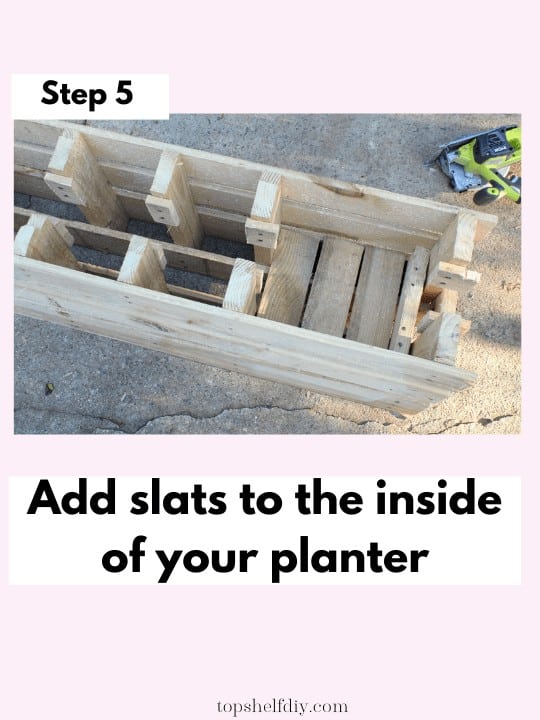
The last step in constructing your planter is to secure down slats inside the box. I used a combination of galvanized screws and wood glue + brad nails. I would have preferred to use my nail gun for the entire process but I couldn't squeeze it into some of the tight spots between the boards.
Now you're ready to move your planter to your garden! Put down a layer of landscape fabric and secure it to your planter box with a staple gun. Then add your compost, soil, plants, and mulch!
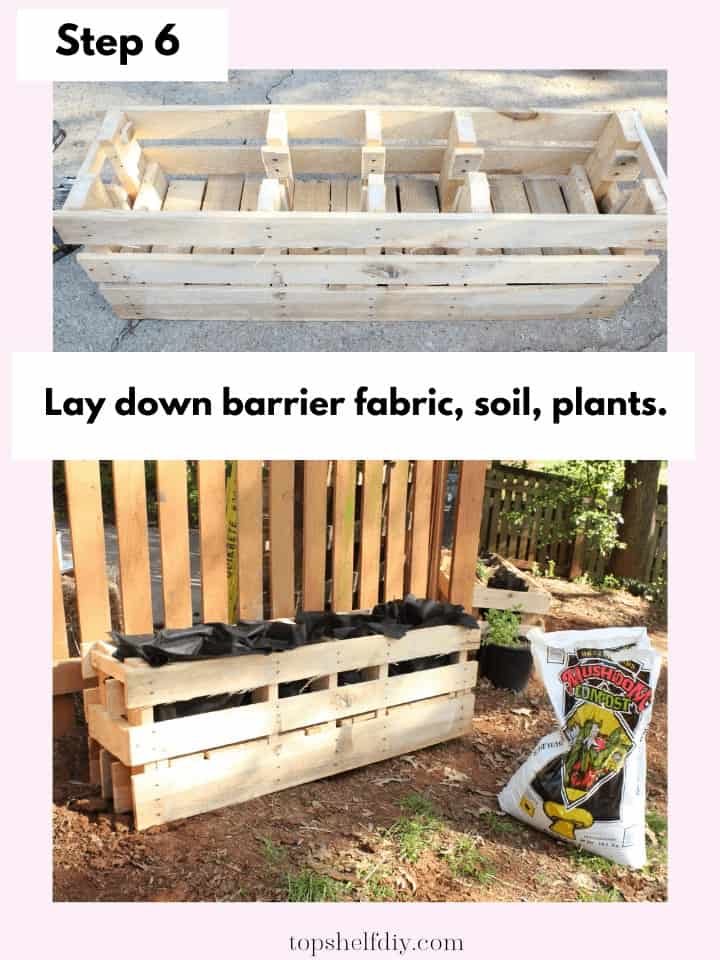
I love how pallets naturally divide your planter boxes into sections for different herbs and vegetables.
I'm using them to construct a cocktail garnish garden of sorts – so far I've planted mint, strawberry, basil, cilantro, rosemary, and kale. The mint is in its own container because it will overrun everything in its path otherwise. Just think of the amazing mojitos, basil smashes, and strawberry margaritas headed my way!
Follow me on Instagram for progress photos as the garden develops! You can also track the progress on my new climbing rose garden, which I wrote about here.
Cheers,
Erin



Leave a Reply