The products in this post were provided by The Home Depot. This post includes affiliate links. All opinions and photography are my own. Thanks for supporting the brands that support this blog.
Guys, this is it!
After 3.5 months of work, my living room is done.
To recap, back in July I landed a $5k room renovation sponsored by The Home Depot. To qualify you needed to be a Haven Conference attendee and submit a compelling video pitch detailing your plans for the space.
Long story short, they liked my pitch.
And here we are.

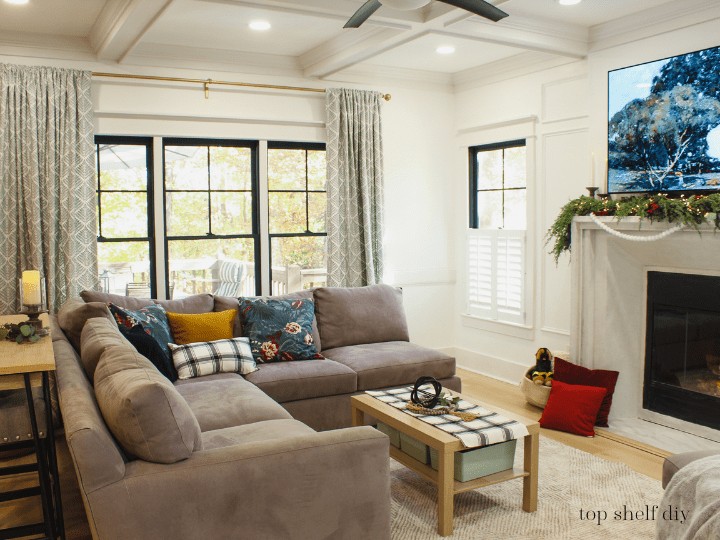
In case you're just catching up now, here are the individual projects completed in this room:
- Luxury Vinyl Plank Flooring (Weeks 9-10)
- The Coffered Ceiling (Week 8)
- DIY Cast Stone Fireplace (Part 3) – Mounting the TV (Weeks 6-7)
- DIY Cast Stone Fireplace (Part 2) – The Mantel (Week 5)
- DIY Cast Stone Fireplace (Part 1) – Demo & The Hearth (Weeks 3-4)
- DIY Black Inset Windows (Week 2)
- Painting the Chrome Finishes (Week 1)
Where it all began...
We bought this home in 2018. My immediate observation was that the living room was small, dark, and trapped in the '90s. The walls were beige and the television lived in this strange, white, futuristic entertainment unit.
It was like living in a cave, except instead of bear cubs I was dealing with young children.
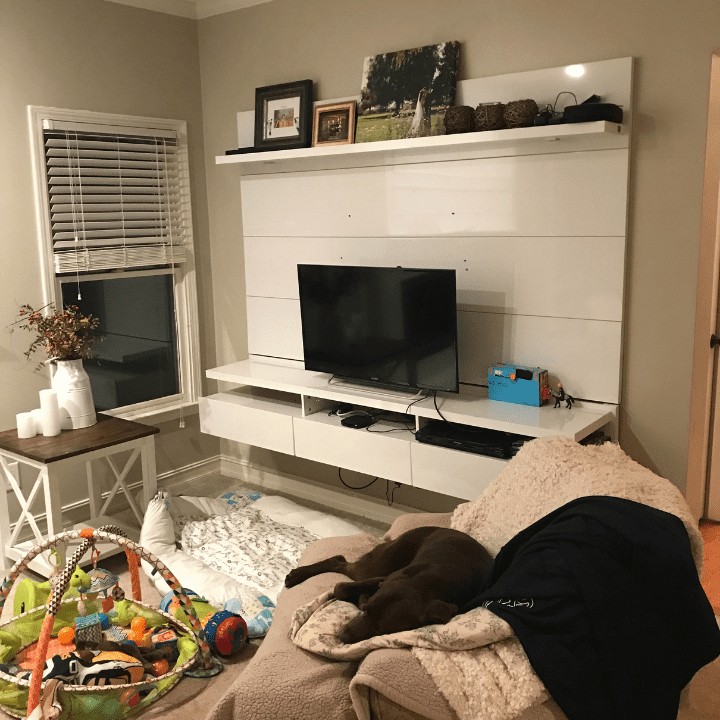
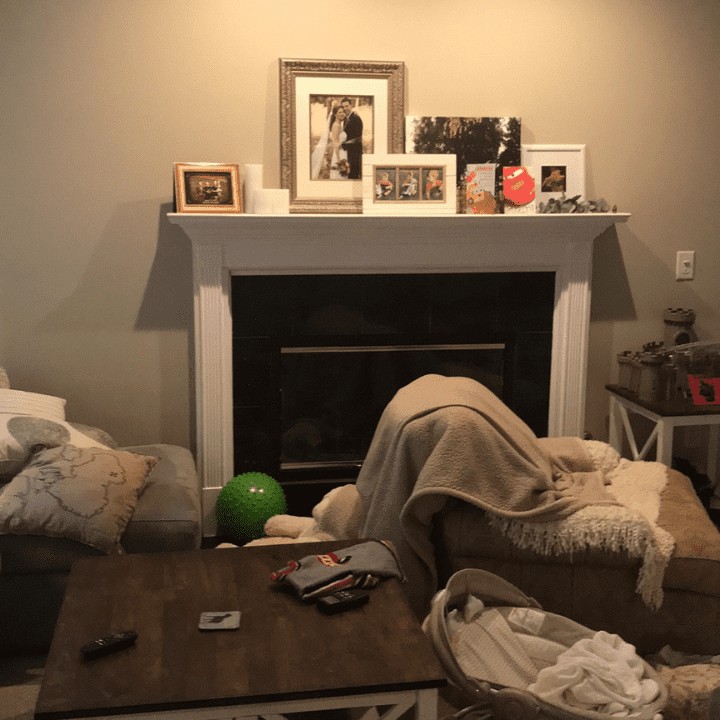
I learned to live with it. But truth be told, the room setup bugged me. There was no focal point. Toys were everywhere. It wasn't a space I enjoyed spending time in.
I believed (with ever fiber of my being) that moving the TV over the fireplace would free up a ton of space. My husband, on the other hand, opposed the idea. After many heated discussions, the entertainment center had to be removed for safety purposes. It was never securely attached to the studs and appeared in danger of crashing down on our kids' heads.
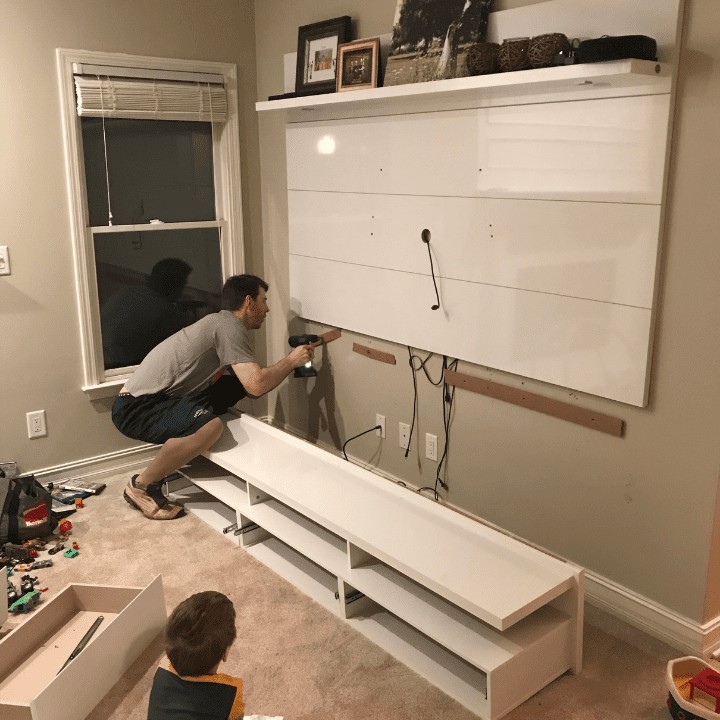
This was a big win for me. To celebrate, I threw the unit off the deck and pulverized it with a sledgehammer à la the copier scene from Office Space.

That felt good. Really, really good.
Once the entertainment center was removed, we were left with a wall that looked like this:
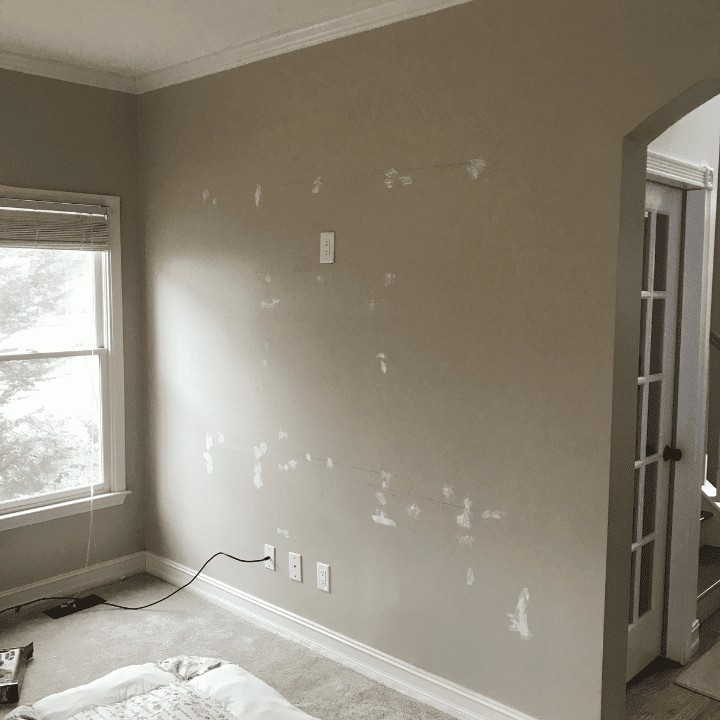
Drywall holes for days!
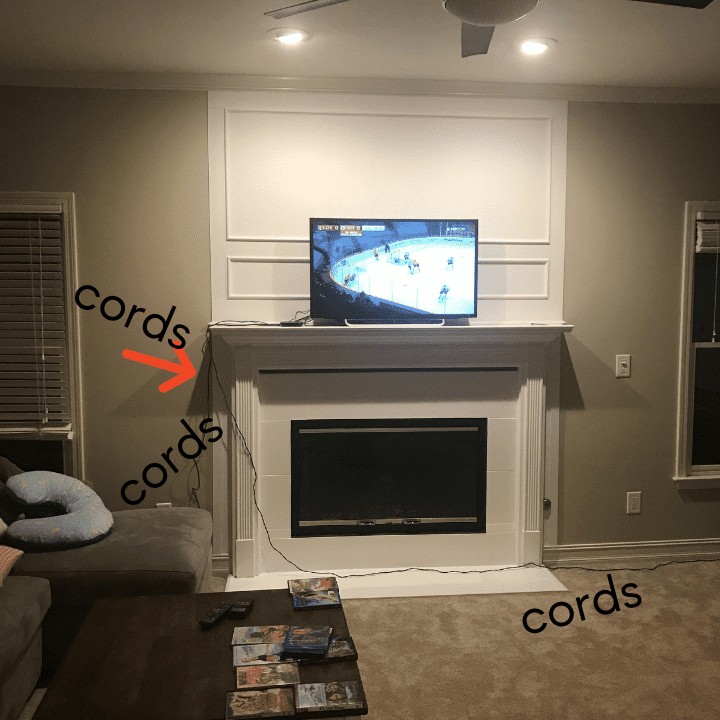
We moved our TV to a spot on the mantel, but nothing was wired through the wall. It wasn't an ideal scenario – miles of cords hanging off the fireplace with two small kids running around – but I felt like we were inching closer to finally mounting our TV above the fireplace. Once I secured the funding from Home Depot, my husband was pretty much forced to put step aside and let me pursue my dream of a modern farmhouse living room.
Okay, so that's the backstory. Still with me?
Good.
Not Your Typical Renovation...
This isn't a Chip and Joanna setup over here. My husband helped with some of the 2x6 ceiling beams for the coffered ceiling...that was about it. We hired out an electrician for the ceiling lights/fireplace electrical, as well as a plumber for moving the gas line. The rest was allllll me.
I got started pretty much right away! I signed a contract with Home Depot agreeing to have everything completed by November 12th.
The key here was pacing myself. If I could just accomplish 1-3 small tasks per day, I was happy without feeling overwhelmed. Work often bled into the weekends, but for the most part I didn't mind.
You can do a LOT with $5,000 when you're willing to do the work yourself!
Renovation Timeline
Here was the sequence of events for renovating this room from top to bottom.
July 17th: The Orange Tank Awards Ceremony. Two of us won in the 5k tier.

July 27th: Demo began.
July 28th - Sept 1st: Painted the walls Chantilly Lace by Benjamin Moore. Window trim replaced on 7 windows and insets painted black (more details on that process here). I painted the chrome ceiling fan and chrome fireplace trim black (see that process here).
Sept 2rd: Started the first major renovation project: our fireplace! We had a plumber move the gas line so we could extend the size of our fireplace by 3" on either side.
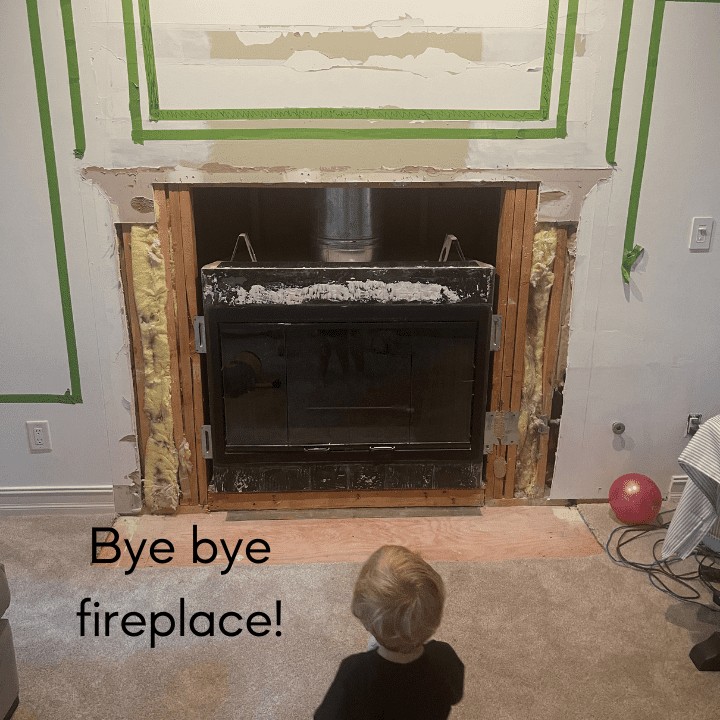
Sept. 3rd: I partially demo'd the old fireplace. Eventually I gutted the whole thing. That was a little nerve-wracking!
I remember asking myself, "What have I done?"
Sept. 10th-15th: I put down cement board and tiled a hearth! I used the Kolasus 12x24 Polished Porcelain tile from Home Depot, which is great because it's designed to look like marble. This was my first time working with tile. I was pretty pumped about the results!


Sept. 16th: Built the new mantel out of 1x8 pine.
Sept 21st: Our amazing electrician ran ethernet and electricity above the fireplace!
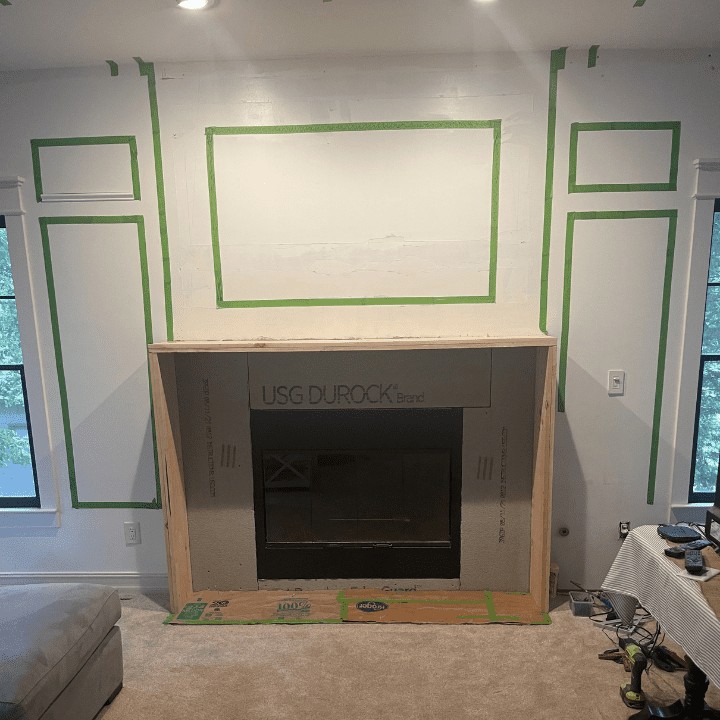
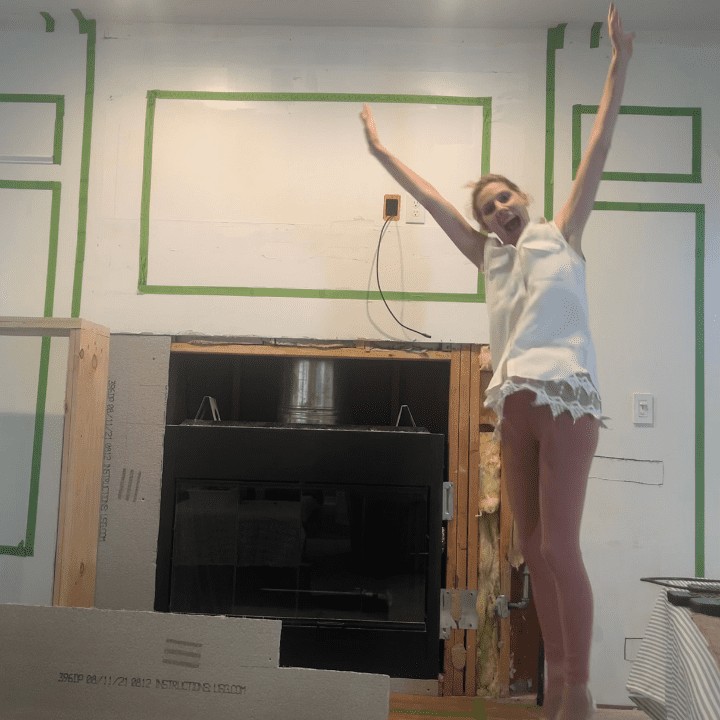
Sept. 22-25th: I installed galvanized metal studs under the mantel in order to meet code requirements for non-combustible materials near the fireplace opening. The studs were eventually covered by Durock cement board. I purchased a larger circular saw with a diamond blade in order to cut some of the cement boards with a mitered edge.
Here's what the undercarriage looked like prior to adding cement board.
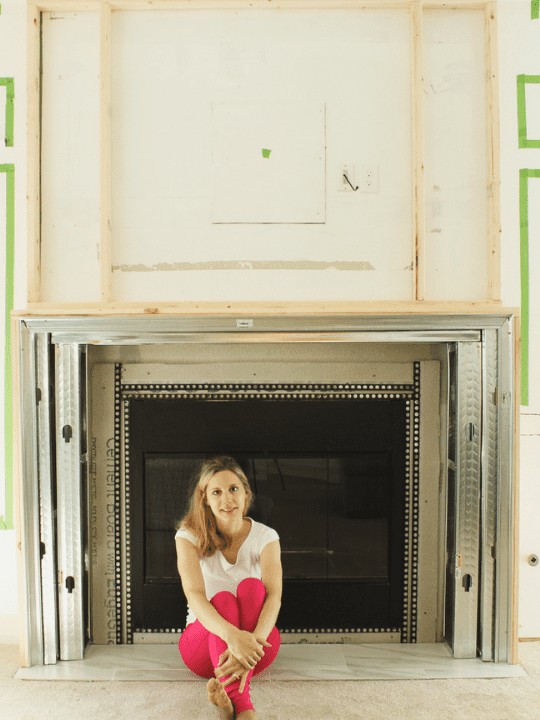
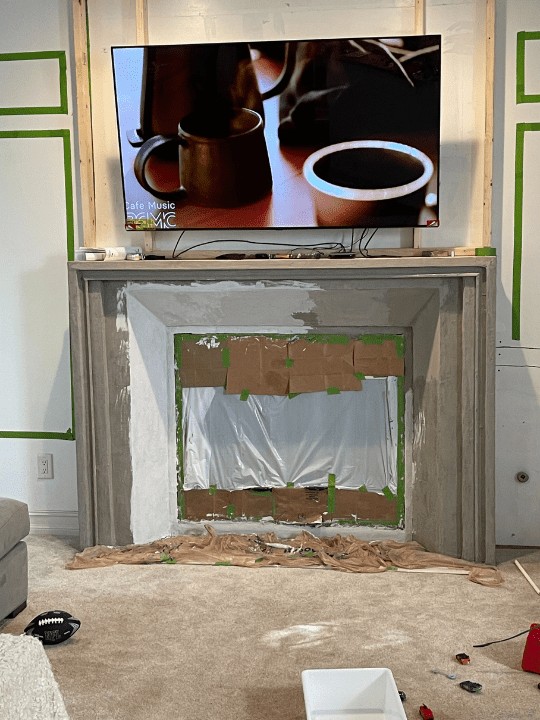
Sept 26th - Oct. 8th: I built the rest of my faux cast stone fireplace using cement board and 3 coats of Henry's Cement Feather Finish. I added white titanium dioxide cement pigment to the mix in order to achieve the final color.
At this point my husband teased me about our fireplace looking like a class art project.
Oct. 9th - 24th: I started working on our coffered ceiling! I love any opportunity to flex my crown molding skillz. I also added trim above our archway and a chair rail on the wall that was getting a wallpaper treatment (where the old entertainment center used to be).
This was the first and only project where I couldn't fit all of my supplies in the back of my SUV. Renting a Home Depot pickup truck allowed me to haul two 12-foot 2x6 boards home and start installing the ceiling framework immediately. When you're working under a tight deadline every minute counts! The folks at the counter were super helpful and it only cost $25 for the first hour. My house is 15 minutes from HD so I had plenty of time to return the vehicle in this window.
For more details, head on over to my step-by-step tutorial on coffered ceilings!

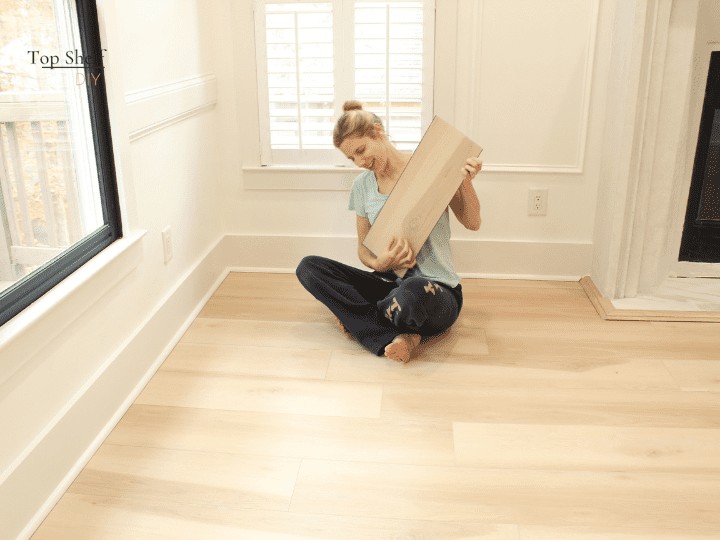
Oct. 25th - Nov. 2nd: Demo'd the old carpet, installed Lifeproof luxury vinyl plank flooring in our living room, and added this wallpaper mural from a wallpaper company called Hovia.
To see how I installed the LVP flooring, head on over this post detailing my process.
I installed plantation shutters on the lower half of our windows next to the fireplace for much-needed privacy. These are composite wood shutters from Home Depot's Veneta line.
Nov. 3 - Nov. 12: Down to the wire! I used the last week of renovation for cleaning and aesthetics: a large area rug, mantel decor, a smaller coffee table, and a console table for added seating behind our sectional.
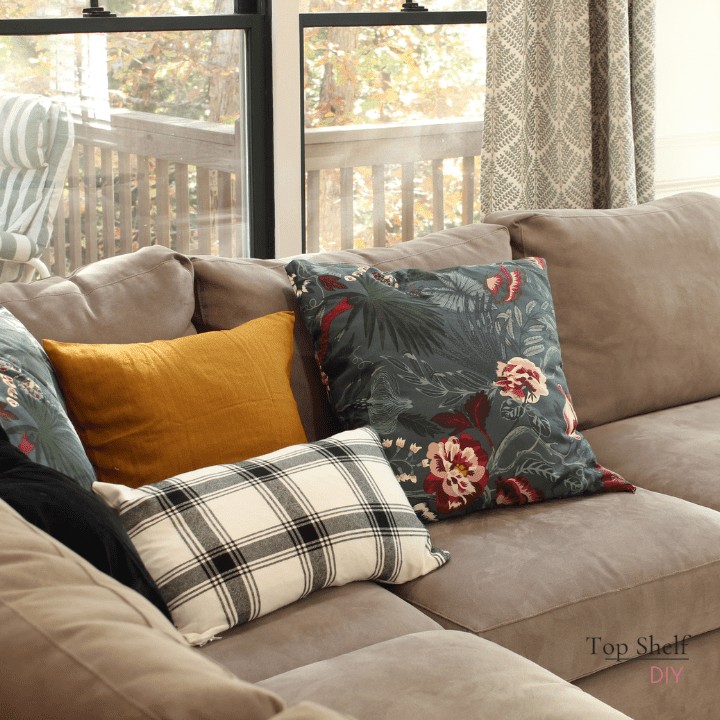
I sewed new covers for our existing pillows in coordinating colors. I basically followed this tutorial from Centsational Style.
I'm actually really surprised everything came together as smoothly as it did. I only had a few items on backorder and they were trim samples anyway.
We did go over budget on this project a bit, but considering the scale of projects completed we were okay with that!
How'd I do?
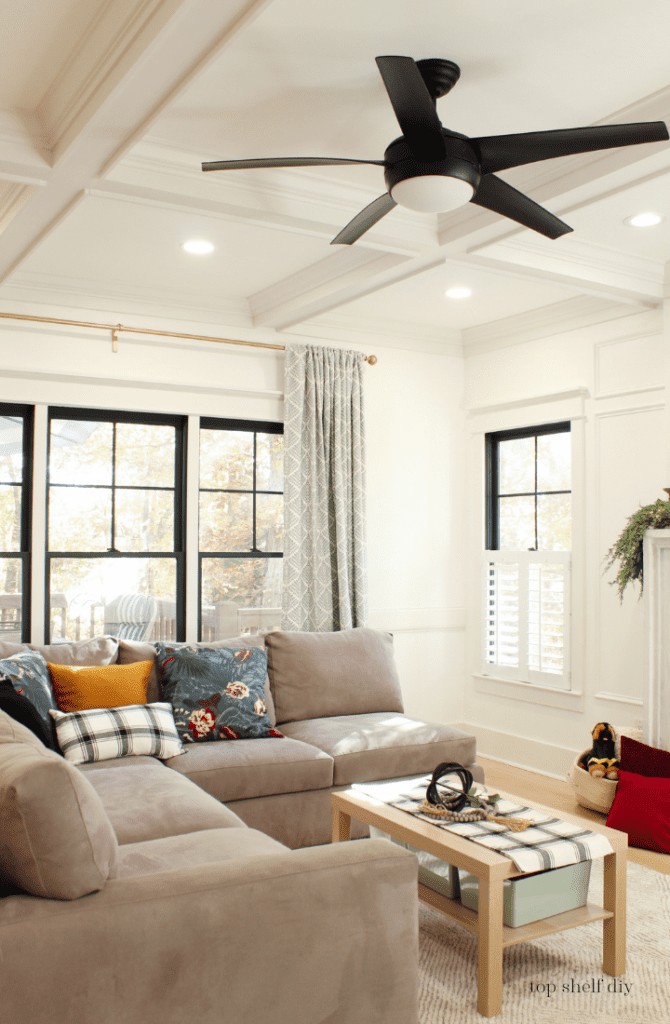
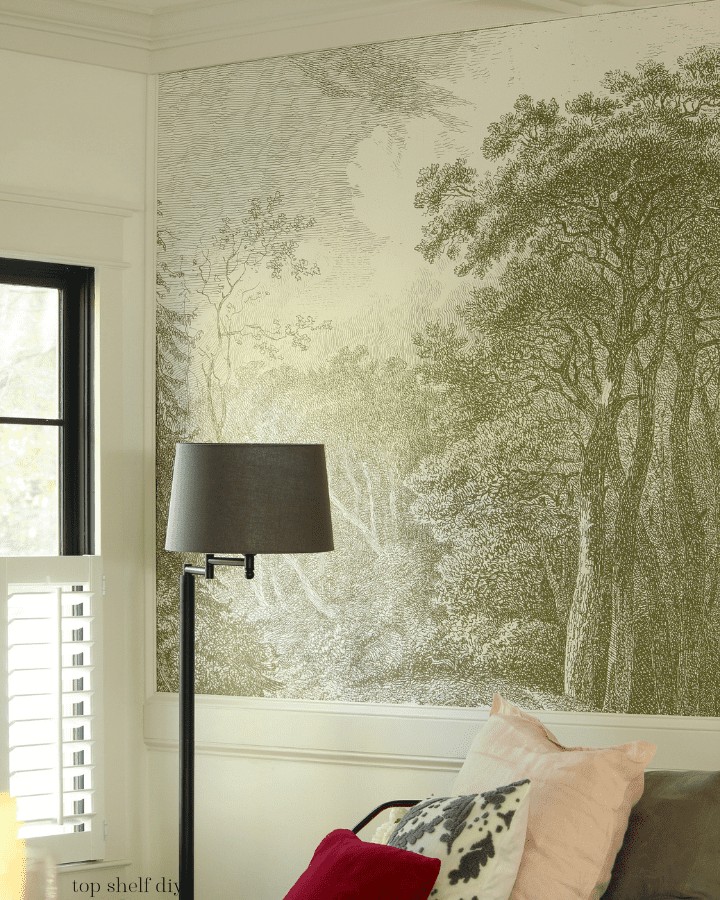
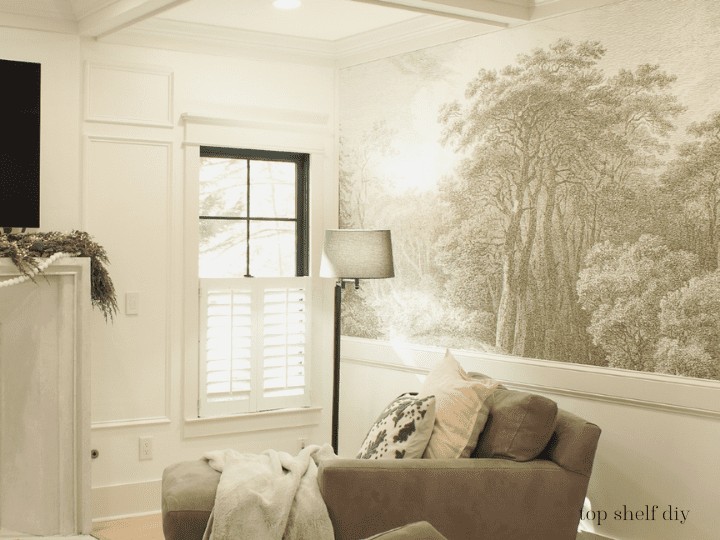
For more photos of this space make sure you head on over to the Home Depot blog, where I share how to make the best use of a small space during a home renovation.
And there you have it folks – three months of work in a nutshell! A huge thanks to The Home Depot for believing in me.
I will tell you with 100% certainty that the end product was worth all the blood, sweat, tears, and headaches of living through a renovation in our main living area. If you're debating a project of this magnitude, you have my permission to GO FOR IT!
Would you attempt any of the projects in this room? Let me know in the comment box below!
Until next time.
Cheers,
Erin





Leave a Reply