If you're a 90's kid like me, you may remember what I consider to be the greatest gift to children everywhere:
.
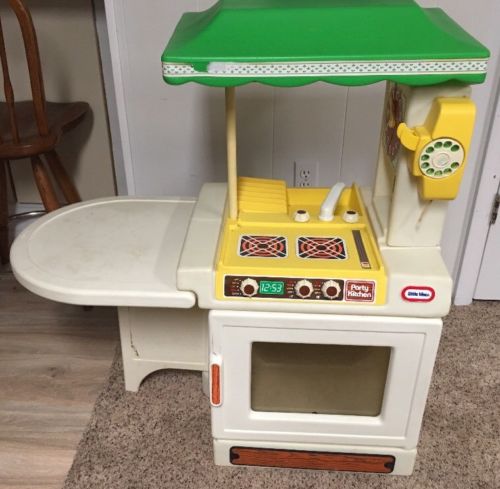
They just don't make 'em like they used to. I mean, look at the size of that oven! You could fit a turkey in there! And you'd be hard pressed to find a kitchen with a drop leaf table like that nowadays...or would you????
*or would you.*
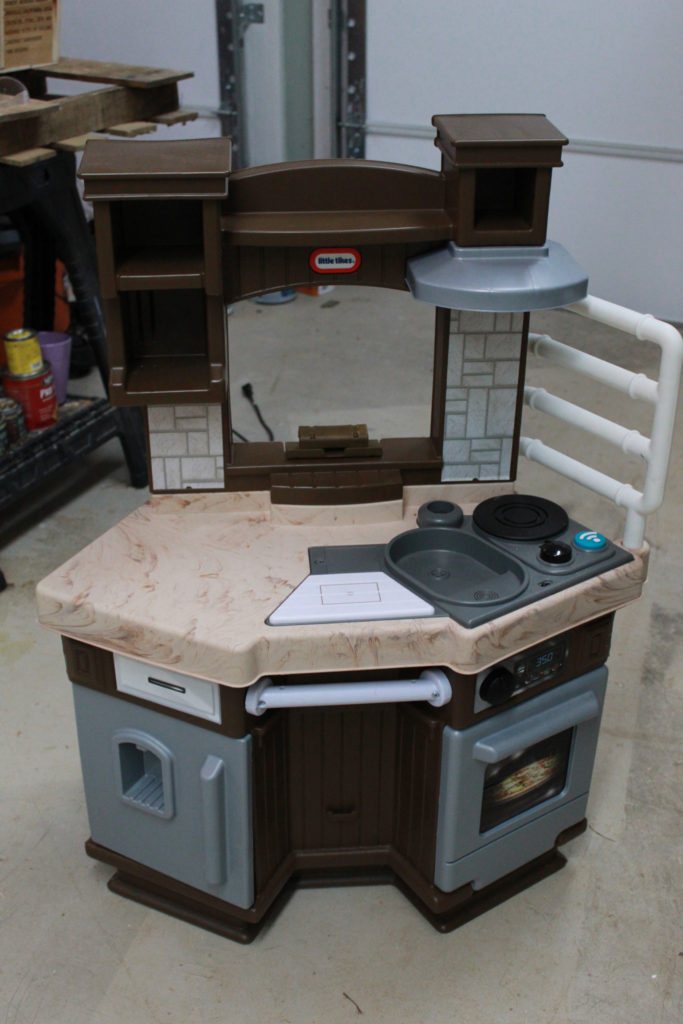
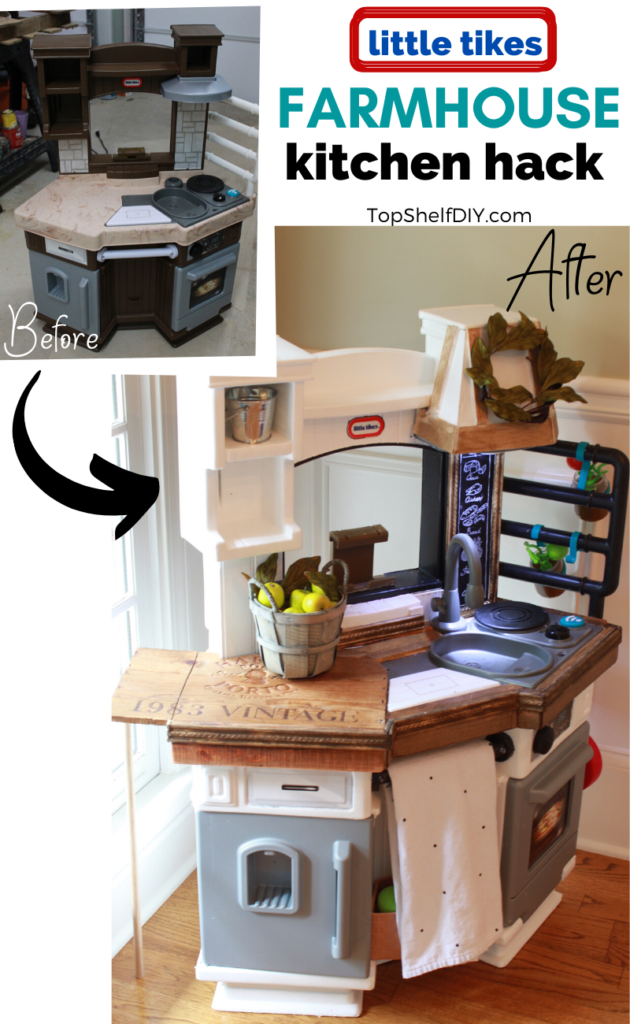
It pays to be a crazy crafty lady. Because I took a "builder grade" kitchen my son received for his birthday, which started out like this:
.
.
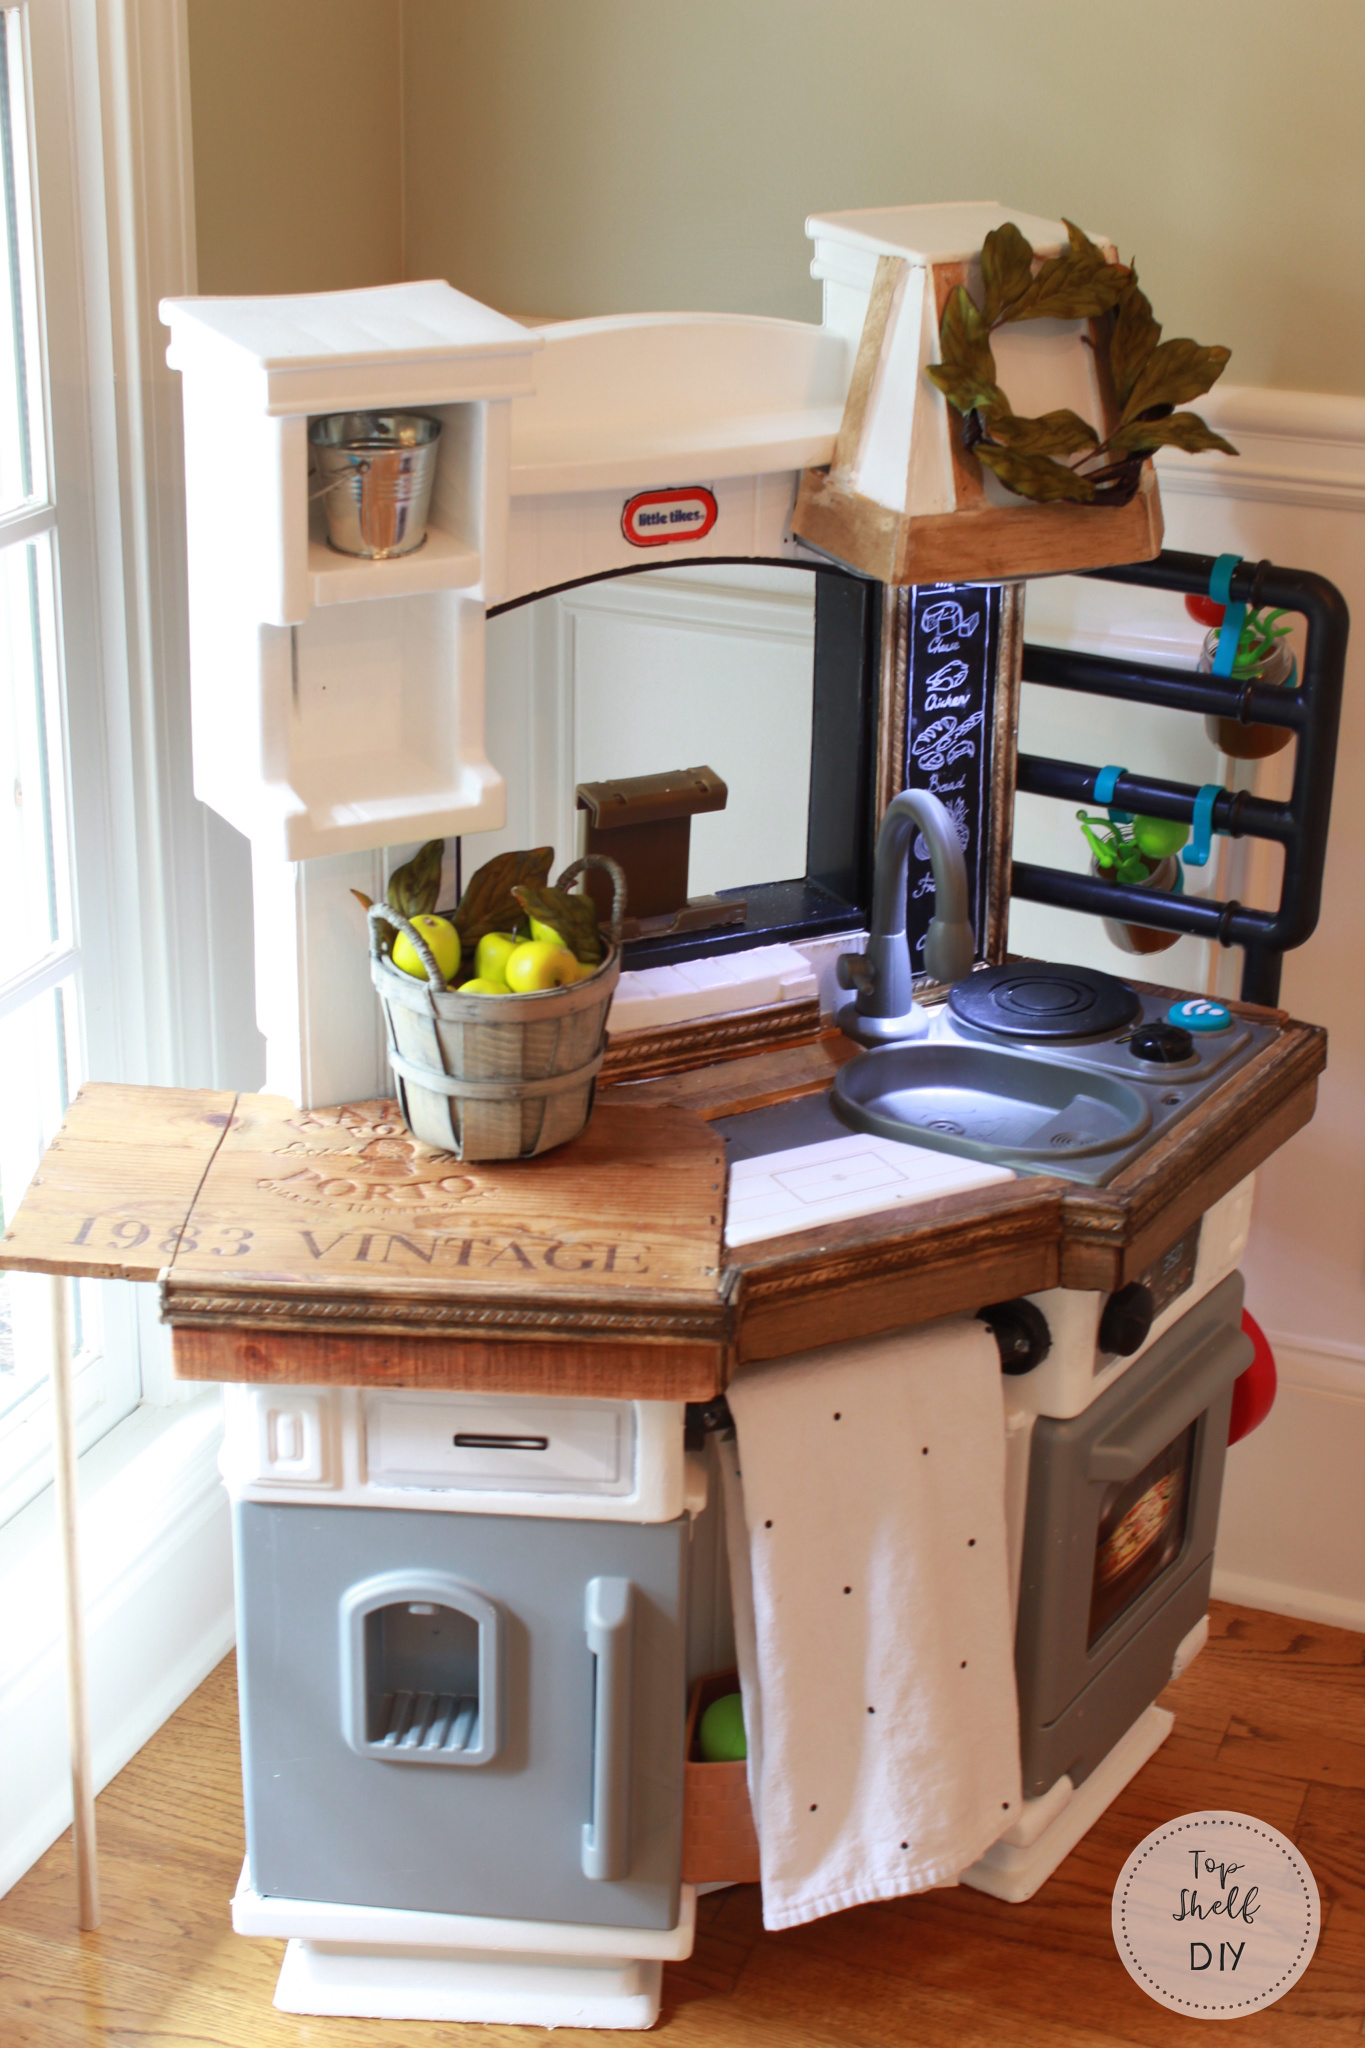
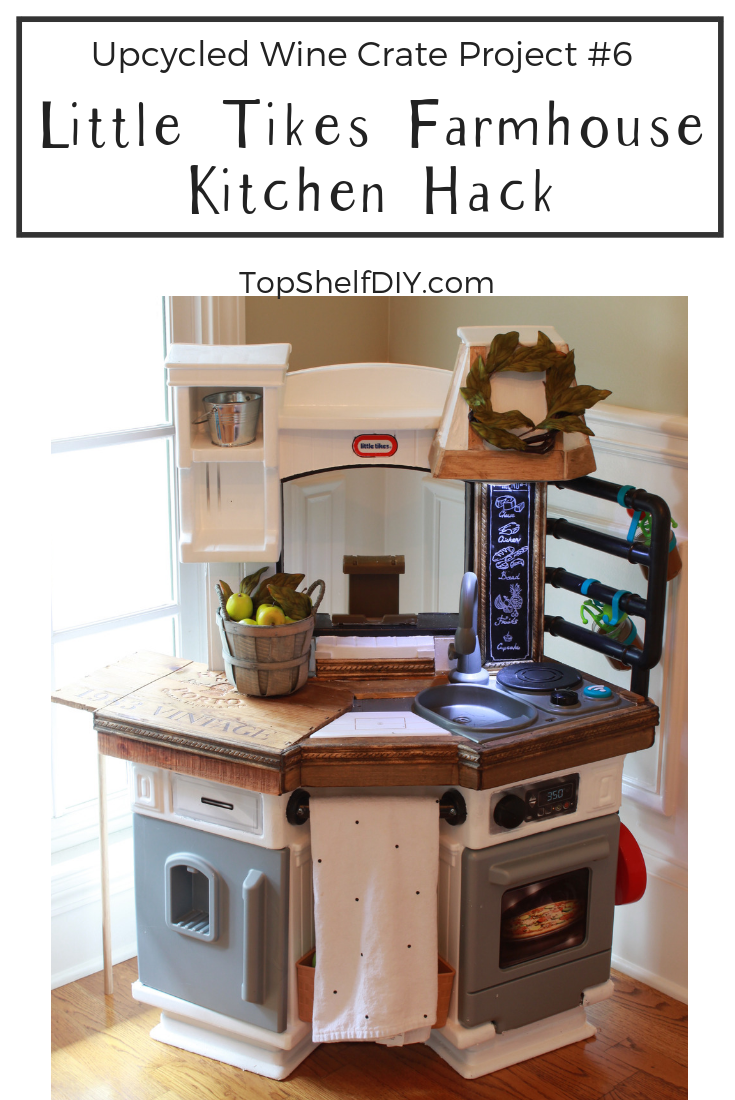
And turned it into a Farmhouse Dream.
.
.
In case you're catching up now, this table was one of 6 DIY projects I completed using deconstructed wine crates. Wine crates are as versatile as pallet wood, but way prettier! Here's the full list of projects completed over the span of one week:
Day 1: An Essential Oily Shelf
Day 2: A Farmhouse Tool Caddy
Day 3: A Decorative Vase
Day 4: A Herringbone Tray
Day 5: A Lantern
Day 6: A Drop Leaf Table for my son's play kitchen
Once I added the drop leaf I decided to just keep going and take that ole brown kitchen from drab to fab.
Ready to tackle this project?
"Let's. Go." (dramatic Whoopi Goldberg moment from The Lion King)
.
How to Add a Drop Leaf Table to Your Child's Play Kitchen
Supplies:
- one wine crate
- one play kitchen (Kmart Cubby house, Fisher Price, Little Tikes, etc)
- a reciprocating saw or jigsaw for deconstructing your crate
- a jigsaw for making small notches on your table surface
- stain/paint of choice, depending on the look you're going for. I used Minwax Dark Walnut.
- nail gun (I use an 18v Ryobi)
- 1 1/4" or 2" brad nails
- miter saw or table saw
- Titebond wood glue
- a dowel rod
- one 1/2" diameter CPVC Wing Tee
- butt hinges
- polycrylic protective finish (if you think there's a chance your surface will get wet!)
.
Directions:
- Start by deconstructing a wine crate. A reciprocating saw works best, but a hand saw or jig saw will also work in a pinch. Side note: don't make my mistake of using a coping saw -- it's too flimsy and you'll just end up breaking the blade. Eek!
.
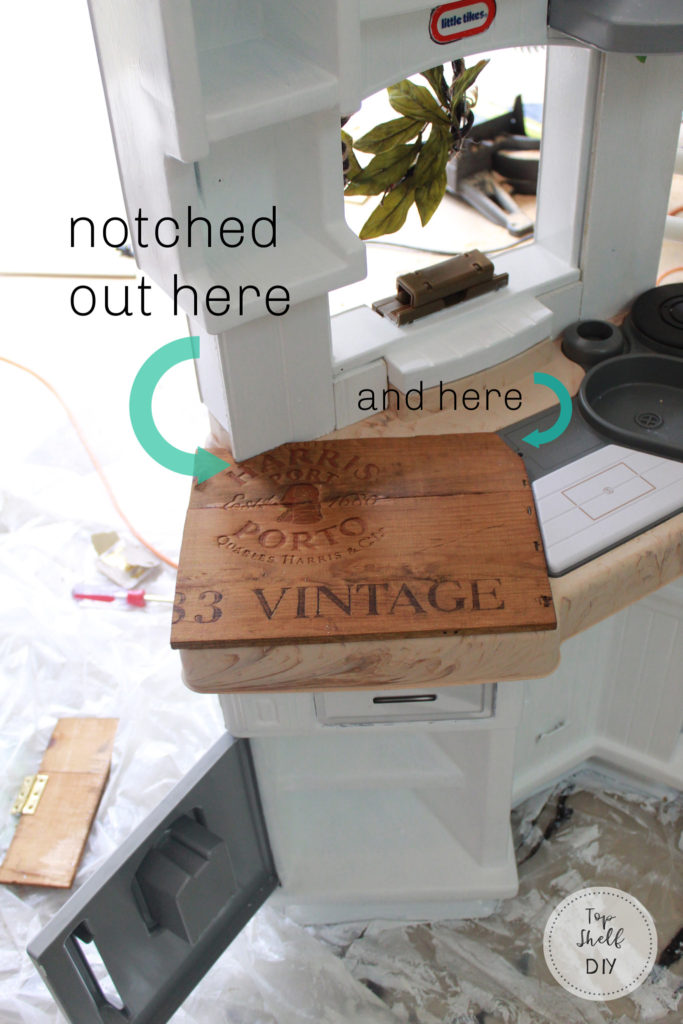
2. Take one of the boards from your crate and cut it to the length of your countertop (set the excess aside - this will eventually form the overhang of your drop down). You may need to carve or notch out a few spots with your jigsaw to get it to fit in place just right. Secure your "countertop" with nails and glue.
.
.
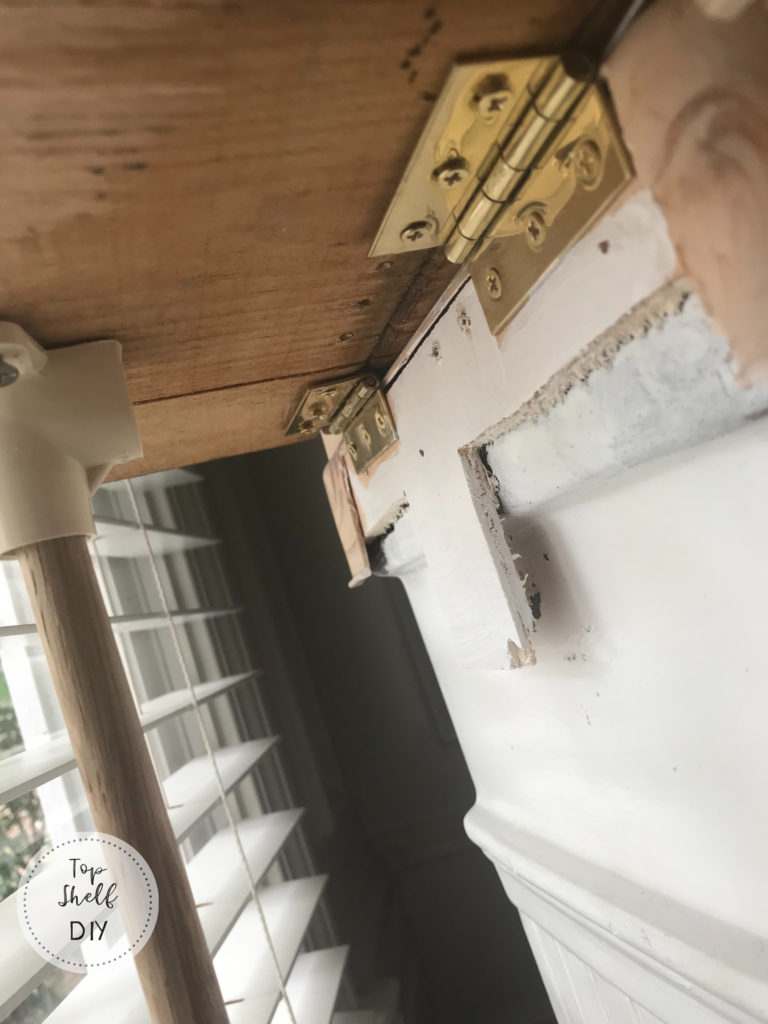
3. Add butt hinges to the underside of your drop leaf piece. I added two -- the leaf was a bit wobbly with only one.
. .
.
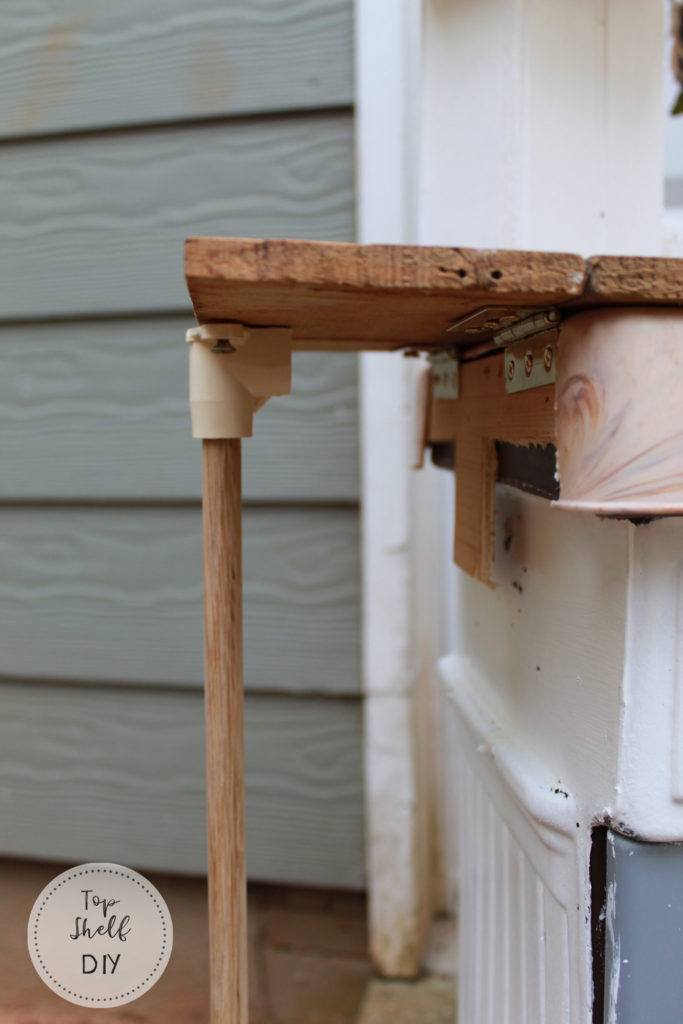
4. Screw your CPVC Wing Tee to the edge of your drop leaf.
.
. .
.
5. Cut your dowel rod to length so that it supports the weight of your drop leaf (at a height level to your counter) when inserted into your wing tee.
.
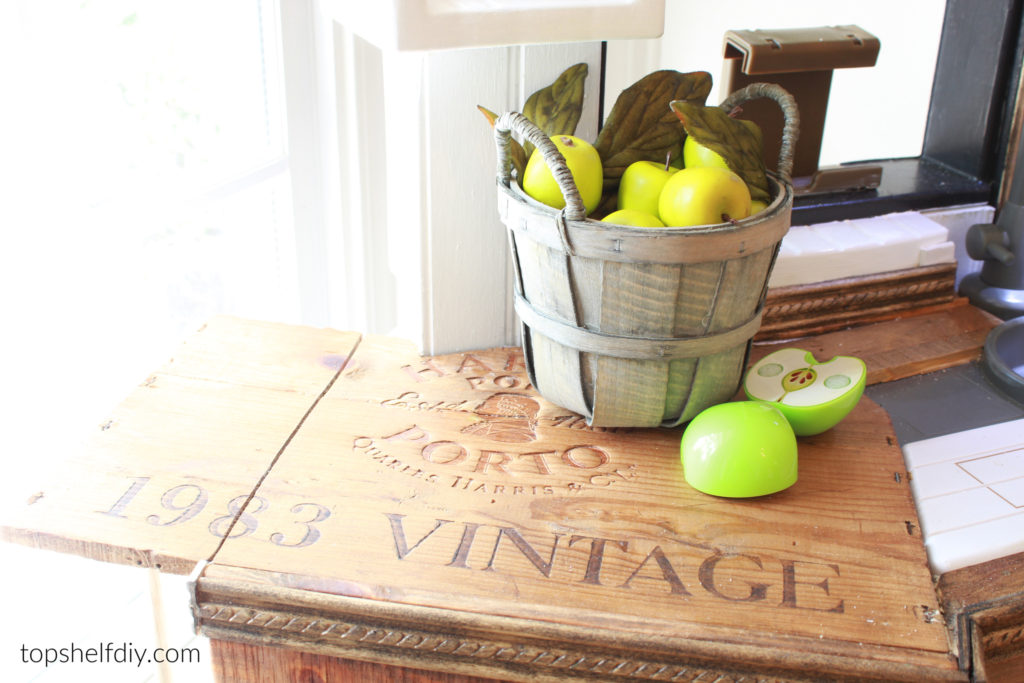
6. Once your pieces are in place feel free to stain them and also add a few layers of polycrylic protective finish.
.
That's it!
Side note: I initially tried a different method for this project -- making a "T" piece to support the weight of the drop leaf when upright -- but this approach wasn't compatible with the design of the existing counter. I was sitting there in despair, wondering how else to do a drop leaf, when Ken goes, "Hey, what's this rod for?" (referring to the dowel rod). I had planned on using it for a curtain rod, but my window was too small for curtains anyway!
.
Just perfect.
.
Here are a few more glamour shots:
..
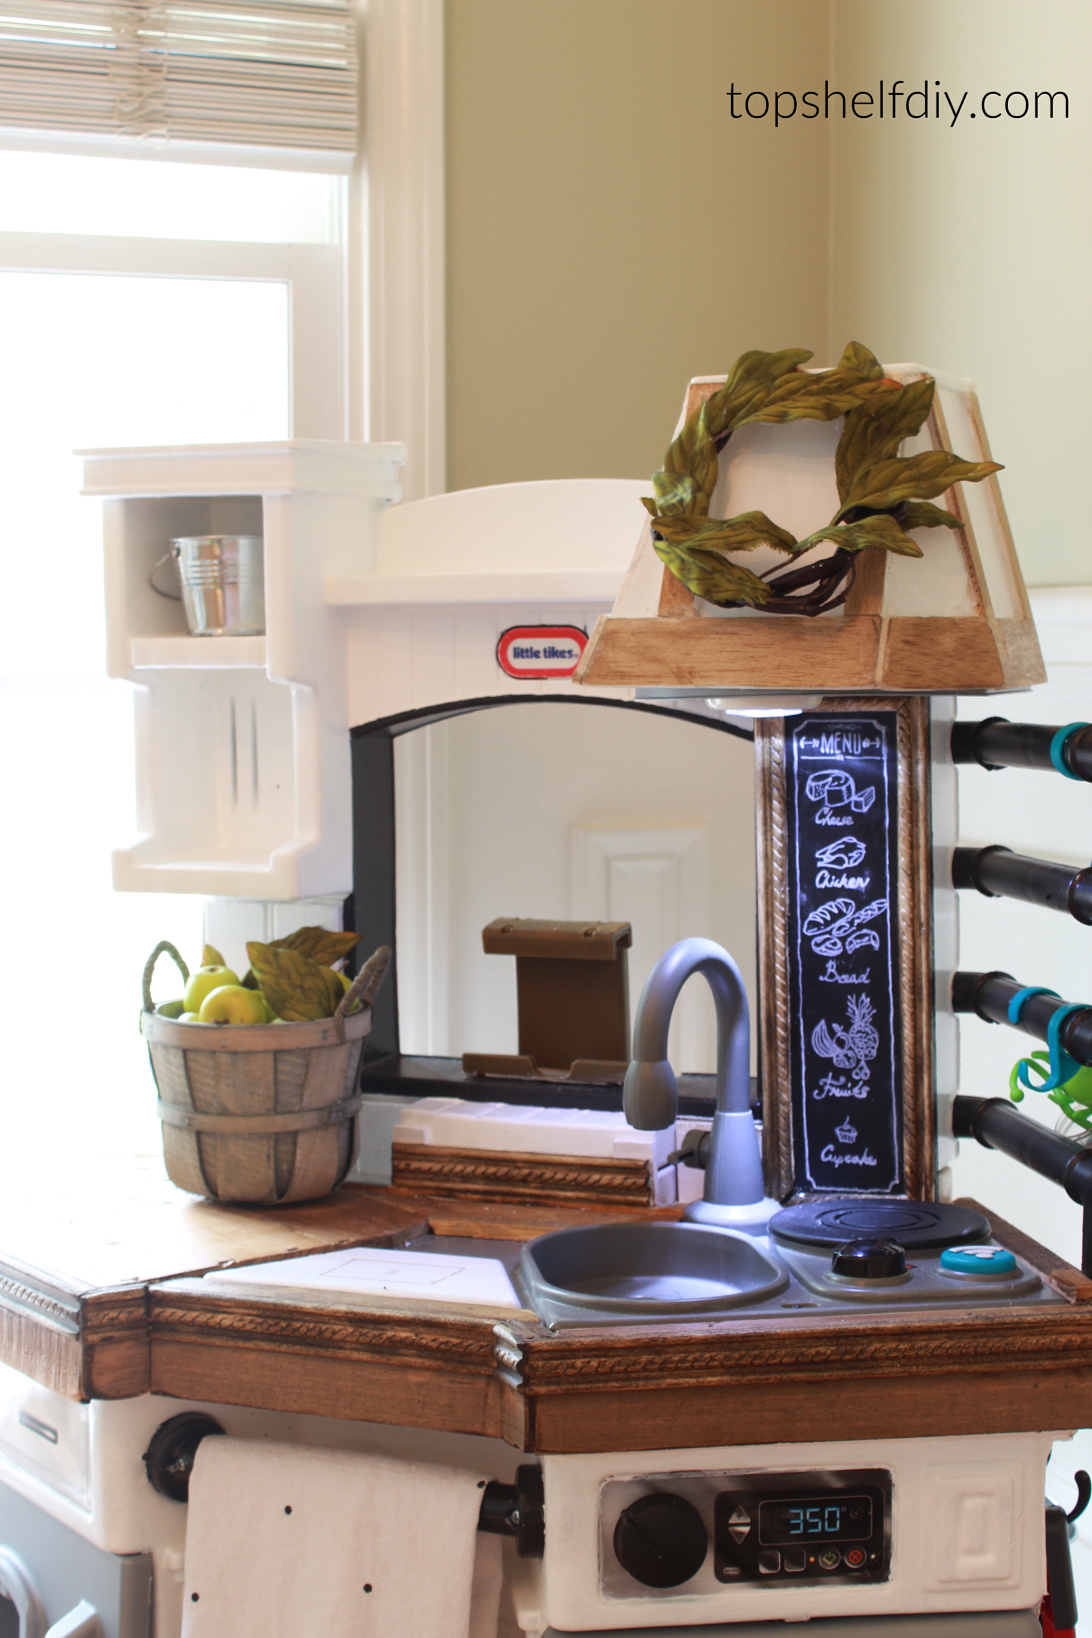
And I just so happened to have a $3 RAMSTA light left over from my Billy Bookshelf built-ins.
.

Related: My Easy Chalkboard Transfer Process
(because I can't draw to save my life)
..
..
Now go ahead and relive your old playhouse glory days... solo cup optional 😉
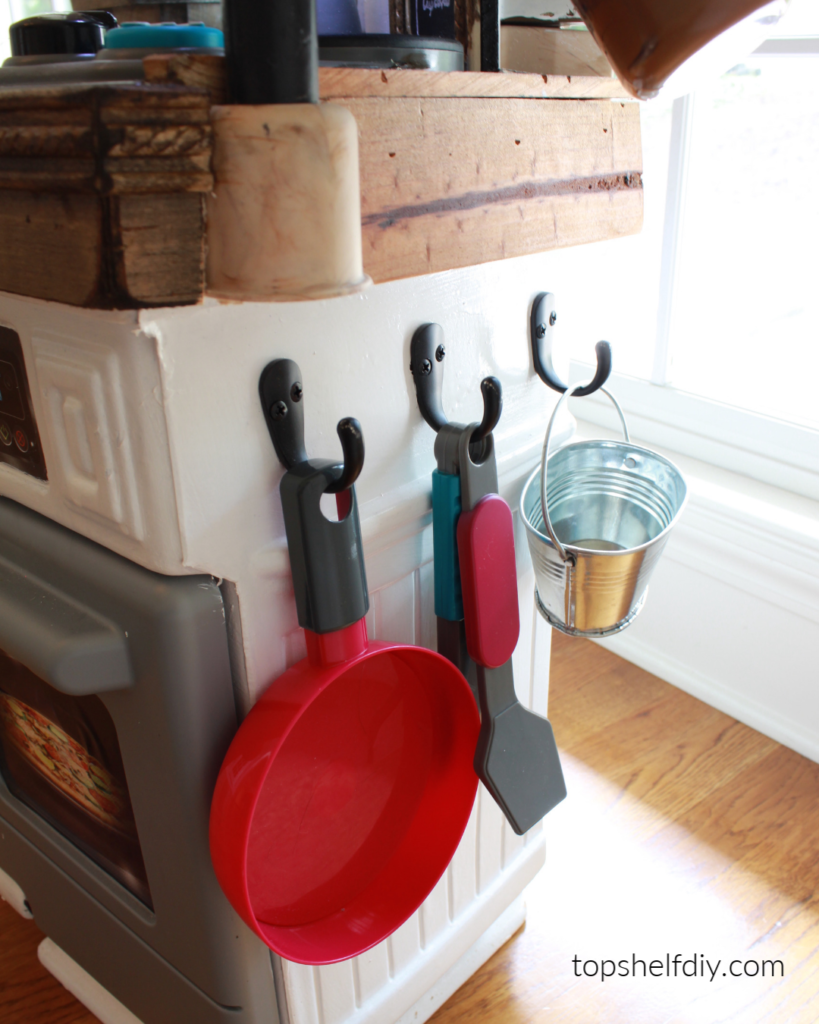
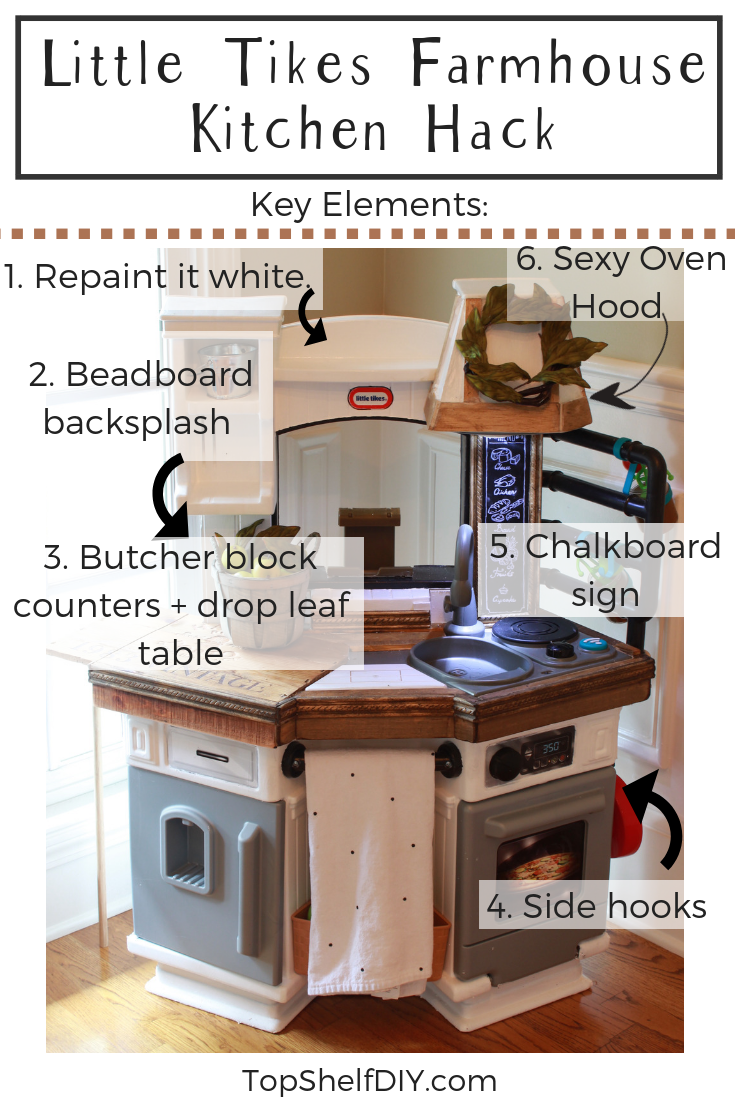
Finishing out the rest of the kitchen wasn't difficult, but boy was it tedious! Here's a visual breakdown.
.
Cost to Upgrade this Kid's Kitchen:
The drop leaf cost me about $13 in supplies, and the rest of the upgrades about $30 (chalkboard paint, hooks, and accessories like the apple basket). Other materials like the wood scraps and paint were "free" since they were already in my garage.
.
Time spent on this Farmhouse Kitchen Hack
I added the drop leaf table in about two hours. The rest of the kitchen was completed over the span of three nights after Evan went to bed (first night was spent painting, second night: butcher block counters, third night: chalkboard sign and oven hood).
For more tips and great info, head on over to the Top Shelf DIY Handywoman Facebook Community — it’s a great place to ask questions and feel supported. If building stuff is your jam, we’d love to have you!
Cheers,
Erin


Leave a Reply