Spruce up your home with air dry clay and polymer clay decor
Tis the season for hardcore crafting, going the distance, and pushing the DIY envelope.
In a world of nutcrackers, be a sugarplum fairy.
For the next six weeks, that’s exactly what I’ll be doing. I’ve teamed up with blogger April Reade from If Only April to bring you amazing home décor projects outside our comfort zone. We’ll be working with a variety of crazy new materials – macramé, felt, cement, and so on, until our knuckles bleed peppermint goo.

While woodworking skills may be needed at times, it won’t be anything too involved since we have a very small window of time to complete these projects.
Let’s be honest here – one week is not enough time to master a new crafting niche. This is pure, light-hearted dabbling for the venturesome DIY’er. Come along with us, and if you feel pulled in a certain direction – who knows – maybe you’ll get hooked!
There’s always room for more hobbies!
Pretty sure that’ll end up on my tombstone.

Moving along, this week we’re delving into the beautiful world of clay.
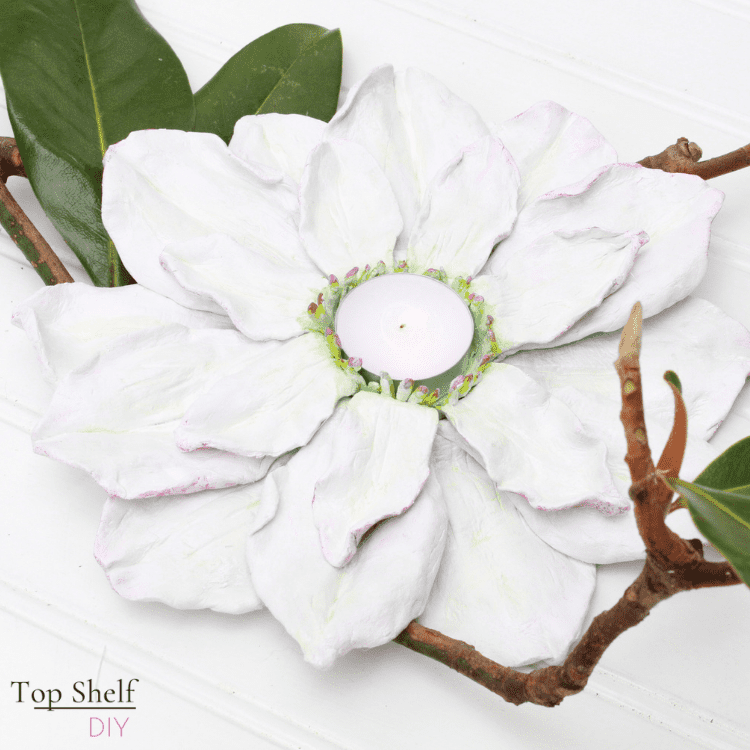
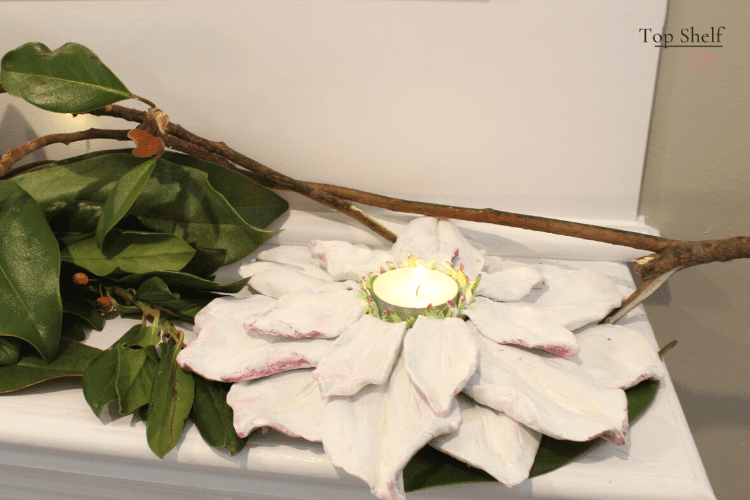
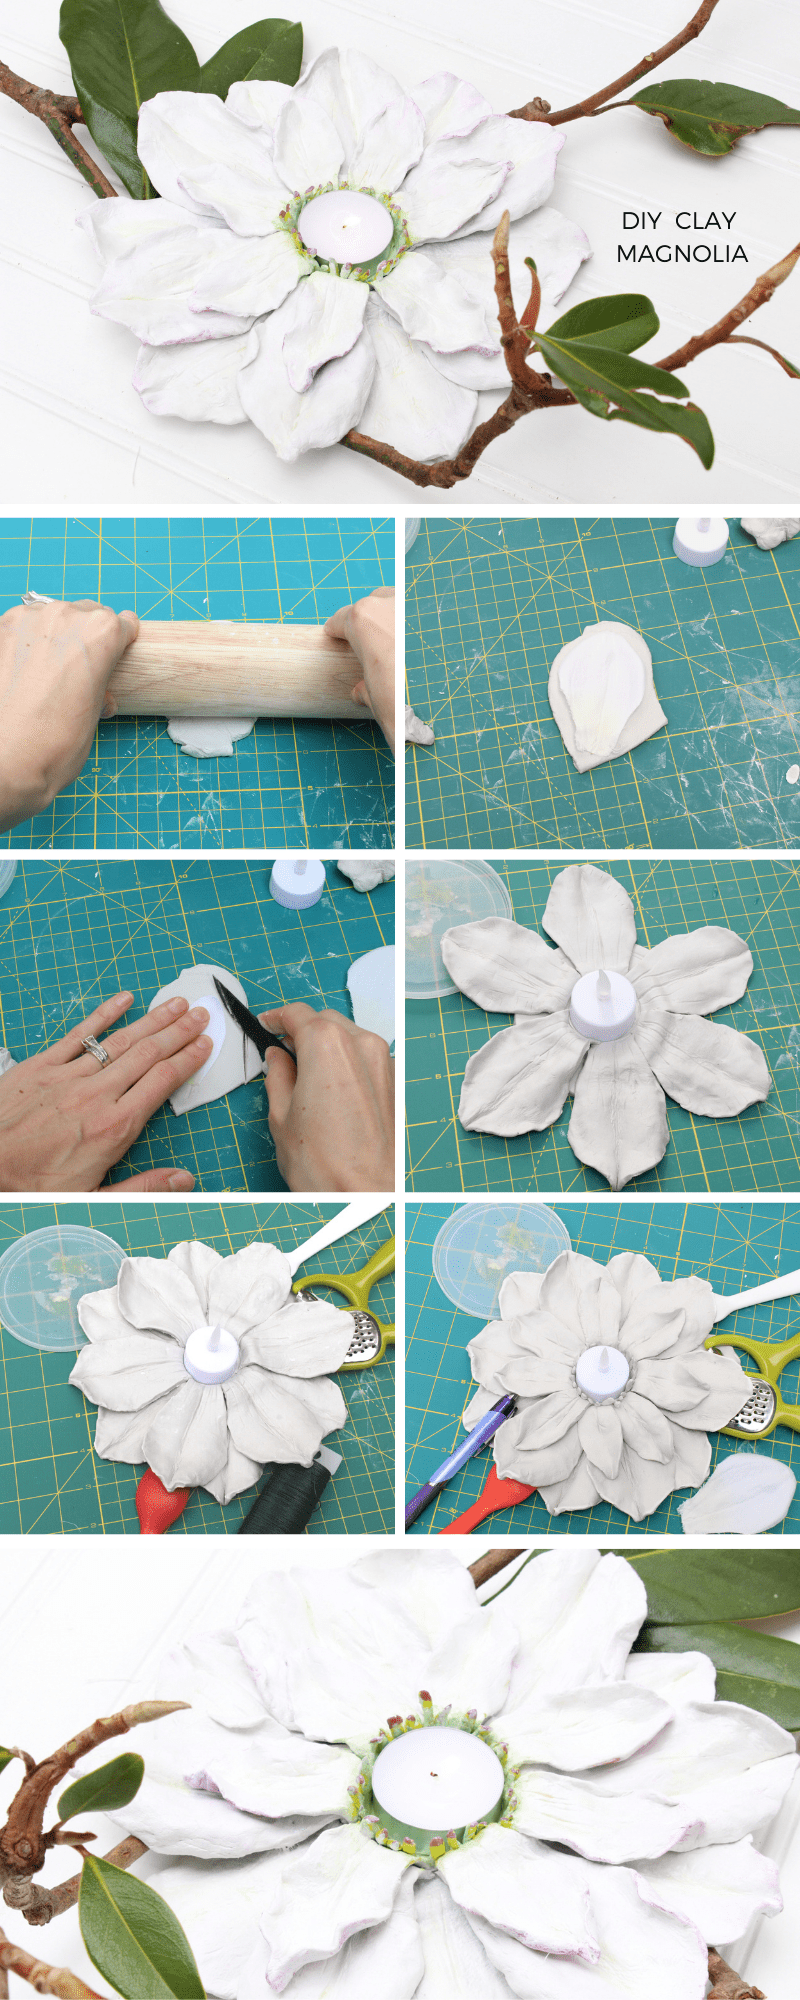
This is my first time working with air dry clay. I’m pretty pleased with the outcome! I got inspired last week while painting our marble fireplace and installing farmhouse trim. I started thinking about holiday mantel décor – something like a magnolia garland would be pretty! I thought. I lurked rambled about the neighborhood and subtly hijacked one of the magnolia trees in our HOA playground (for science, I reasoned). Once that was finished I thought it needed a little something more… like a tea light.
While the clay flower was drying I made a handprint ornament for my 7-month-old. I also helped my older son make a name ornament out of polymer clay. More on that below.
Before you start, here’s some basic knowledge about working with clay. In this post, you will learn:
- The benefits of air dry clay versus polymer clay
- Accessories needed for working with clay
- Five easy homemade air dry clay recipes
- Three simple clay projects for your Christmas home decor
Air Dry vs. Polymer Clay: Which is Easier?
Both options have their advantages and disadvantages. I found air dry clay to be softer, more pliable, and in general more enjoyable to work with. It's like Play-Doh for adults. BUT – and this is a big “but” – you must be patient. Projects typically take anywhere between 36-48 hours to dry. My magnolia took a solid 36 hours to dry plus a few passes with my hair dryer.
Maybe three days isn’t a long time for you. For me it felt like ages!
Polymer clay, on the other hand is stiffer and harder to roll out. I found a rolling pin to be essential, and a box cutter to be the most efficient for cutting out shapes. However, once your shapes are made you can throw them in the oven and have a finished product in 15-20 minutes. Polymer clay came in a much wider assortment of colors than air dry versions, which could possibly eliminate the need for acrylic paint if you’re short on supplies.
Both clay products were inexpensive, fun, and easy to work with; your choice will probably come down to personal preference and the scope of your project. A simple search on YouTube will yield all the elaborate ways to level up once you’re feeling confident with your skills.
And I don’t mean the steamy pottery scene from Ghost!
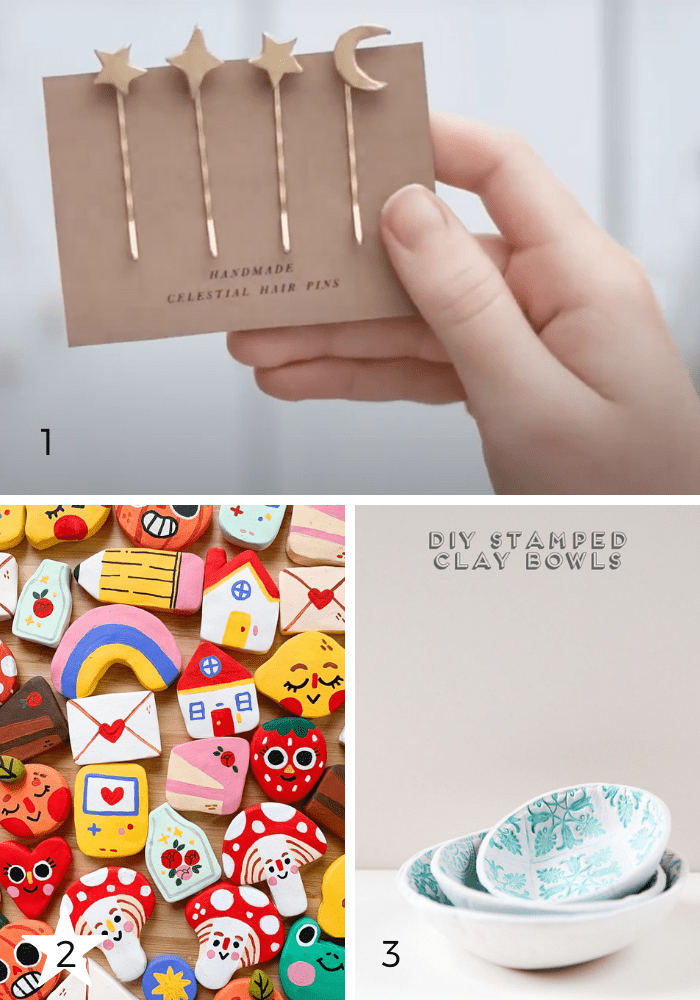
What kind of accessories do you need to work with air dry clay?
Chances are you already have everything you need. A rolling pin, a straw, some pens, and nimble fingers go a long way. With these tools you can make jewelry, hair pins, clothing pins, dishes, and more.
The Michaels near my house carried a TON of fancy accessories like jewelry molds, cutting utensils, and all sorts of shaping tools for hobbyists. I don’t think any of it is necessary in the beginning.
As far as where to source your clay, you can order online or purchase at any of the big chain crafting stores. If you're worried about minimizing your Covid exposure, you can also mix your own air dry clay using basic household ingredients!
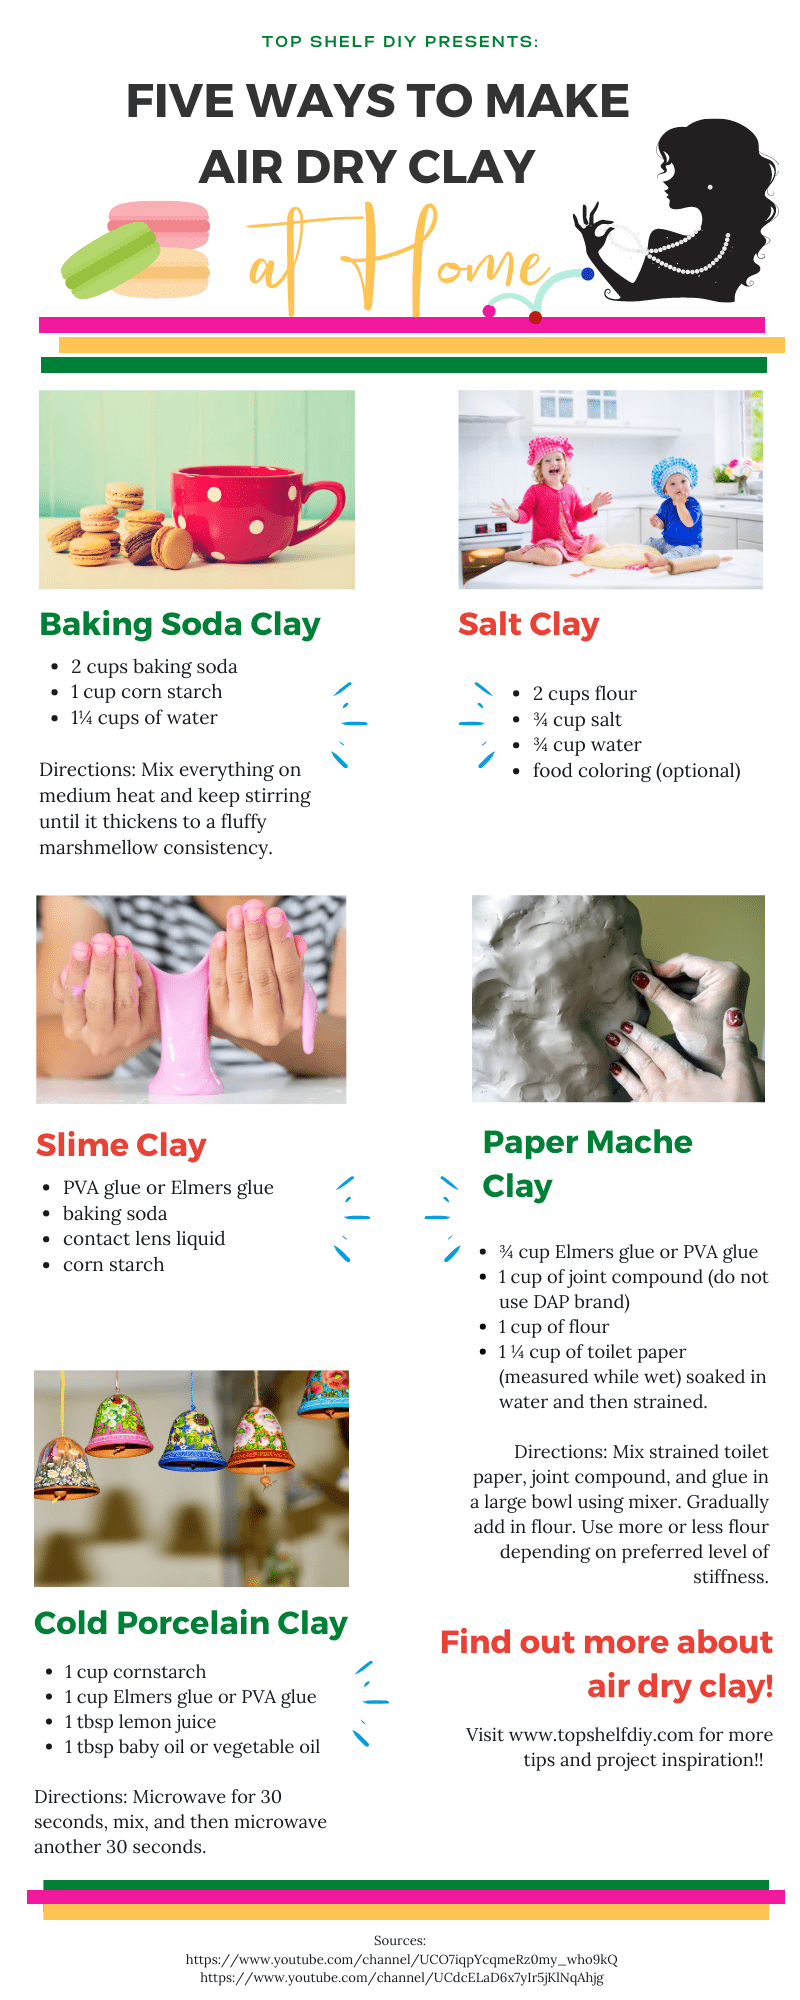
Air Dry Clay Recipes: Five Easy Recipes Using Ingredients Right in Your Pantry
Option 1: Baking Soda Clay
- 2 cups baking soda
- 1 cup corn starch
- 1 ¼ cups of water
Directions: Mix everything on medium heat and keep stirring until it thickens to a fluffy marshmellow consistency.
Option 2: Salt Clay
- ¾ cup water
- ¾ cup salt
- 2 cups flour
- Food coloring (optional)
Option 3: Slime Clay
- PVA glue or Elmers glue
- Baking soda
- Contact lens liquid
- Cornstarch or cellulose powder
Option 4: Paper Mache Clay
(source: Ultimate Paper Mache)
- ¾ cup Elmers glue or PVA glue
- 1 cup of joint compound (do not use DAP brand)
- 1 cup of flour
- 1 ¼ cup of toilet paper (measured while wet) soaked in water and then strained.
Directions: Mix strained toilet paper, joint compound, and glue in a large bowl using mixer. Gradually add in flour. Use more or less flour depending on preferred level of stiffness.
Option 5: Cold Porcelain Clay
(source: Maqaroon)
- 1 cup cornstarch
- 1 cup Elmers glue or PVA glue
- 1 tbsp lemon juice
- 1 tbsp baby oil or vegetable oil
Directions: Microwave for 30 seconds, mix, and then microwave another 30 seconds.
My DIY Air Clay Magnolia Flower Votive
Here’s how I made the beautiful magnolia flower sitting on my mantel. Start by gathering the following materials:
*Note this list includes affiliate links, which means I may receive a very small commission at no additional cost to you should you purchase any of the items recommended below. This helps me cover the costs of this blog! For more, see my disclosures.
- Air dry clay (one package makes two flowers)
- Rolling pin
- Lid, bowl, or circular cookie cutter
- Tea lights or battery-operated tea lights (if you have small children like me)
- Plastic cutting and shaping tools (a pencil or kitchen knife will also work)
- Cutting mat or clean table
- Flower petal template (available below)
- Wax paper
- Acrylic paint
- Paint brushes
- Gloss or semi-gloss acrylic paint sealer
Clay Magnolia Flower Cutting and Assembly
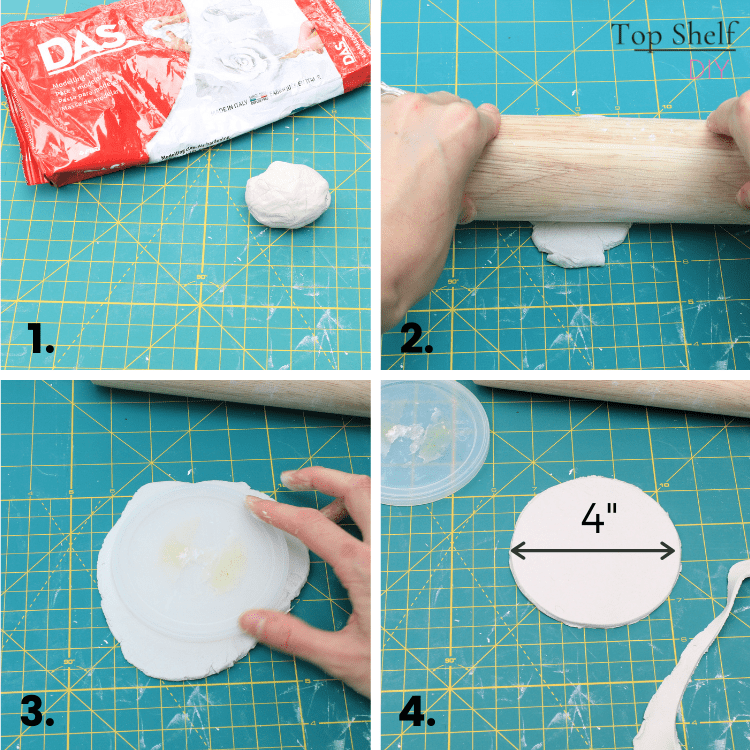
The first step to every clay project is rolling out your dough. You’ll need enough clay to make a circular base that is 4 inches in diameter. Roll it out to roughly 1/4” thick.
Next, take your circular object and use it to cut out the mold of your votive plate. Smooth over rough edges, using a bit of water to blend the clay if necessary.
Download the magnolia petal template included in this post. Trace and cut out your template from stock paper, cardboard, or some kind of heavy paper. Lay your template down onto another piece of rolled out clay.
Cut out shape from clay.
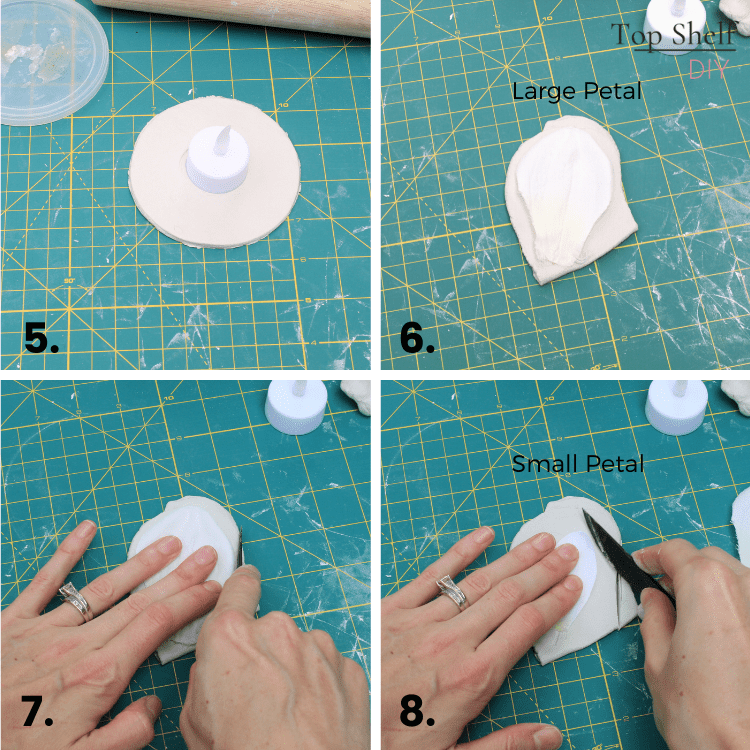
Now bend each petal to give it dimension and movement. I used a pencil-shaped tool to fold the underside of each petal. I also thinned the clay along the edges so I could roll them over and under a bit. Add a bit of texture by marking veins inside your petals. Repeat this process 11 times for a total of 12 large petals. You’ll want to have two layers of six petals.
Here's what that looks like.
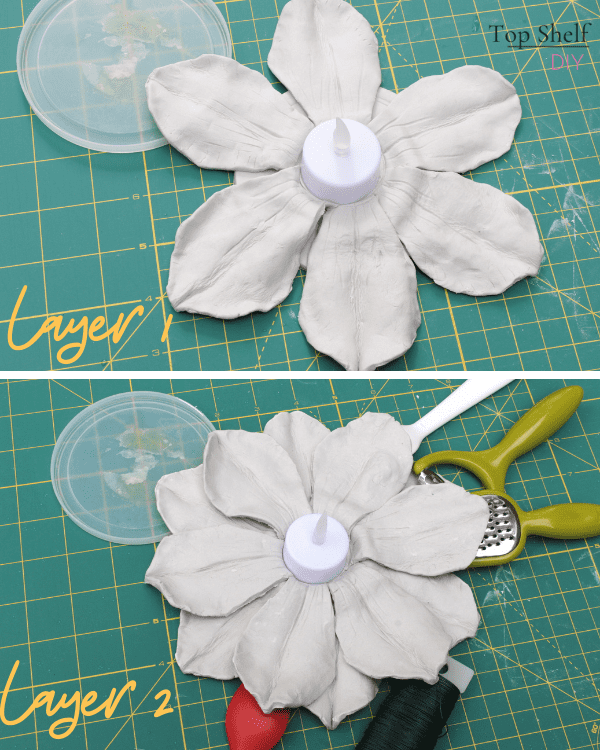
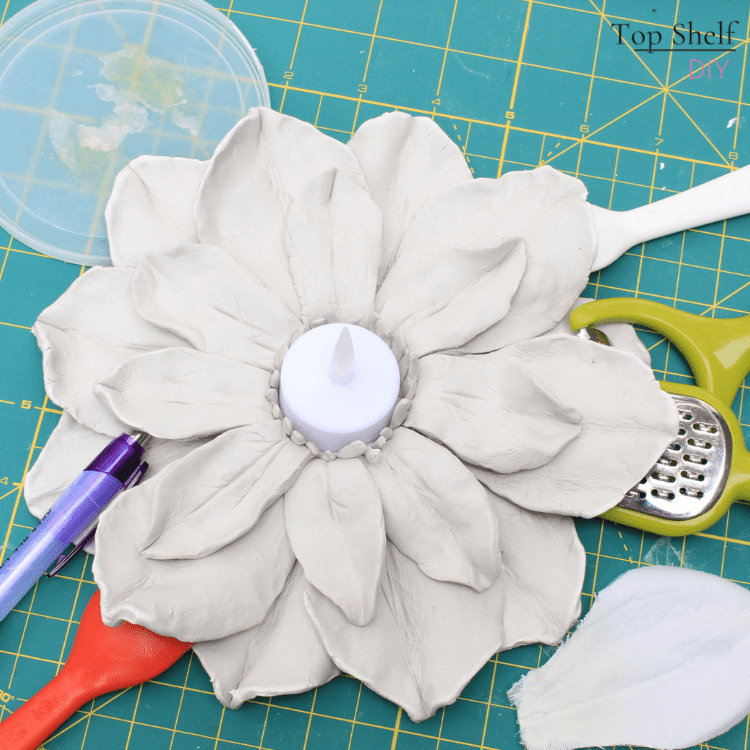
Trace and cut clay from the smaller petal template. You’ll need 8 copies of the smaller petals. Shape your smaller petals the same way you shaped your larger petals. Smooth with water as necessary.
Arrange all 8 petals in a single circular layer, making sure to leave room for your votive.
Lastly, roll out very small strips of clay and arrange them around the inner circle created by your votive space. These will form the “stamens” of your flower. The flame of your candle is meant to represent the “carpel” of your magnolia (the beautiful yellow bud inside the flower).
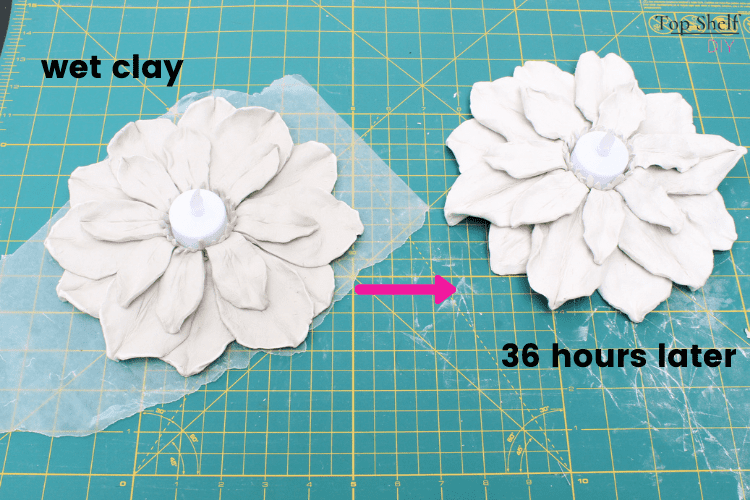
Allow your clay to dry for 36-48 hours. Using a hair dryer will help move things along on the last day. Here's a side by side comparison of a new magnolia and a dry magnolia.
Paint your flower using acrylic paint, then seal with an acrylic sealer. There are numerous aerosol sprays as well as liquid sealants available (such as Modge Podge).
That's it! Light your votive candle – or turn on your switch if it's battery powered – and enjoy.
Project No. 2: DIY Clay Baby Handprint Ornament
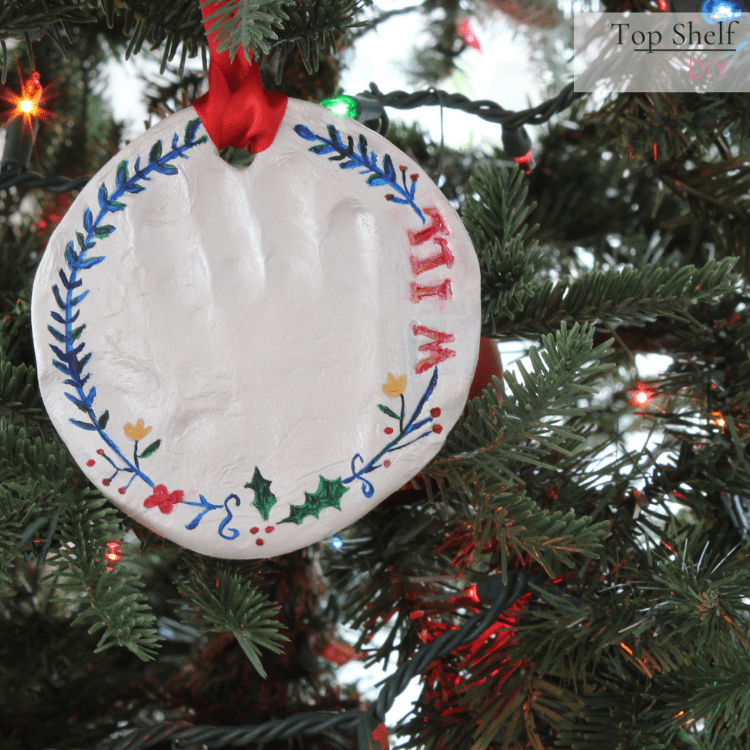
This project was super duper easy and turned out just as nice as the pre-fab kits available in craft stores. For this project you’ll need:
- air dry clay
- Rolling pin
- Large straw or pencil
- Lid, bowl, or circular cookie cutter
- Stamps (optional)
- Ribbon
- Acrylic paint
- Acrylic paint sealer
Roll out your clay into ¼” thickness as before. Using the same circular mold from your magnolia project, cut out a circle 4 inches in diameter from your clay.
Make a small hole in the top of your circle using a straw or pen.
Press your baby’s hand into the middle of the circle. Add their name using stamps or a writing utensil.
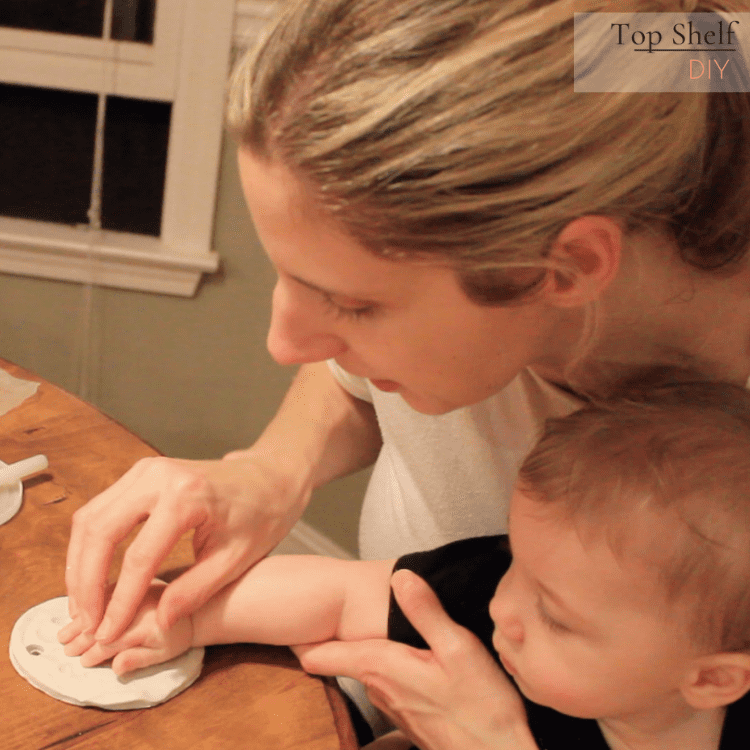
Allow clay to dry for 36-48 hours. Paint when dry if so desired. String ribbon through your clay hole and hang from your Christmas tree.
Project No. 3: DIY Child’s Name Ornament

For this project you’ll need:
- Polymer clay in an assortment of colors
- Rolling pin
- Large straw or pencil
- Alphabet letter template or stencils
- Butter knife
- Ribbon
- E6000 craft glue
Roll out your clay. Lay letter templates on top of your clay, and cut them out with a knife. Put a hole in two of the letters using the straw.
Bake clay in the oven according to package directions. Once cool, glue letters together using E6000 craft glue. Allow the glue to set for 24 hours. Thread ribbon through your holes and hang the ornament from your Christmas tree.
My older son loved helping me roll out the polymer clay even though it was a bit harder to smush compared to air dry clay. I love adding DIY ornaments to our tree because kids grow up so fast! Someday soon those little hands and feet will be grown and the boys will be ready to transition into full-time bodyguards 😍
Looking for more clay craft ideas? Head on over to If Only April and check out the beautiful DIY Clay Jewelry Holders she made this week for our challenge!
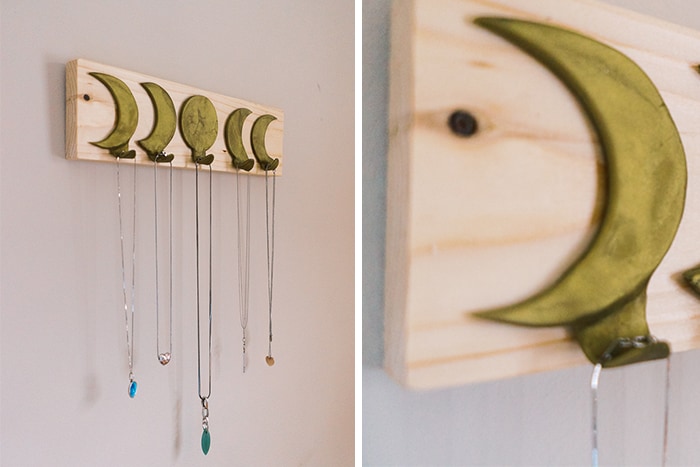
Stay tuned to see what we make with macrame next week!
Cheers,
Erin




Leave a Reply