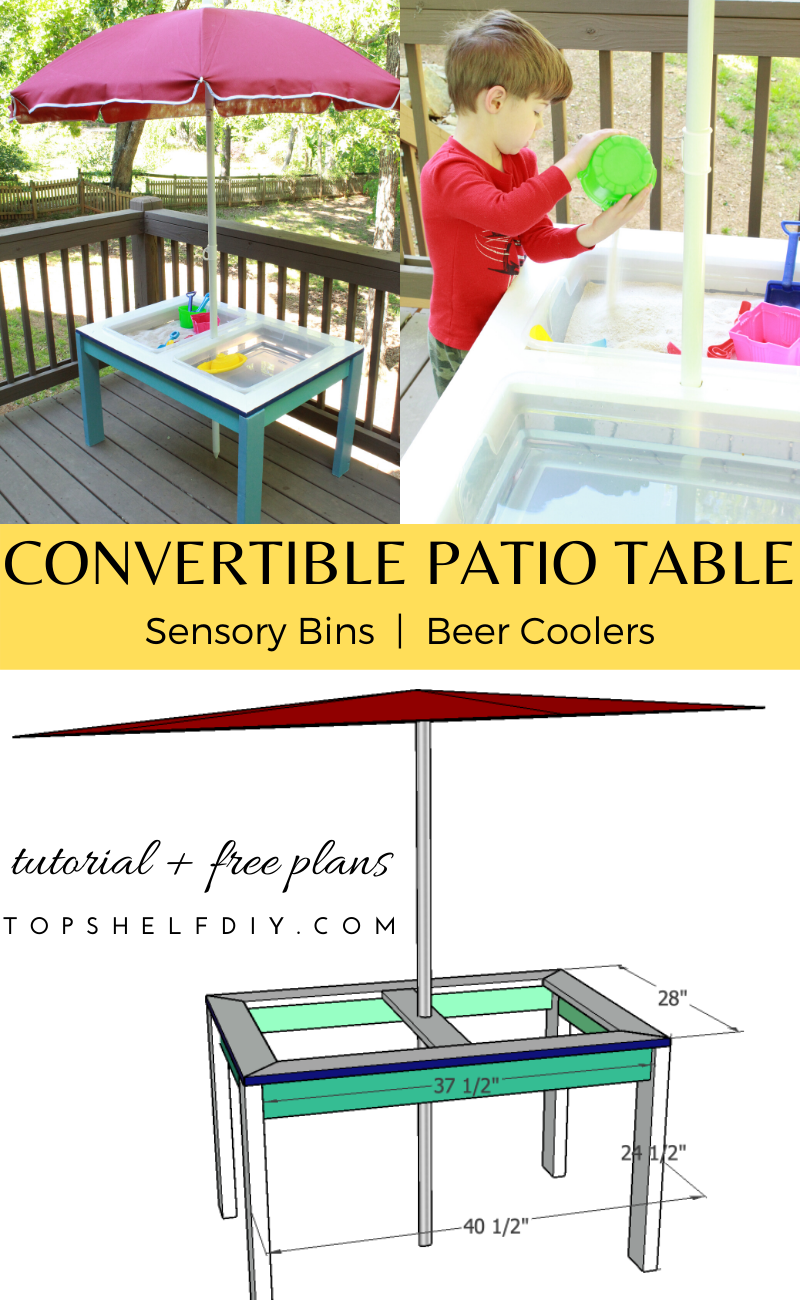
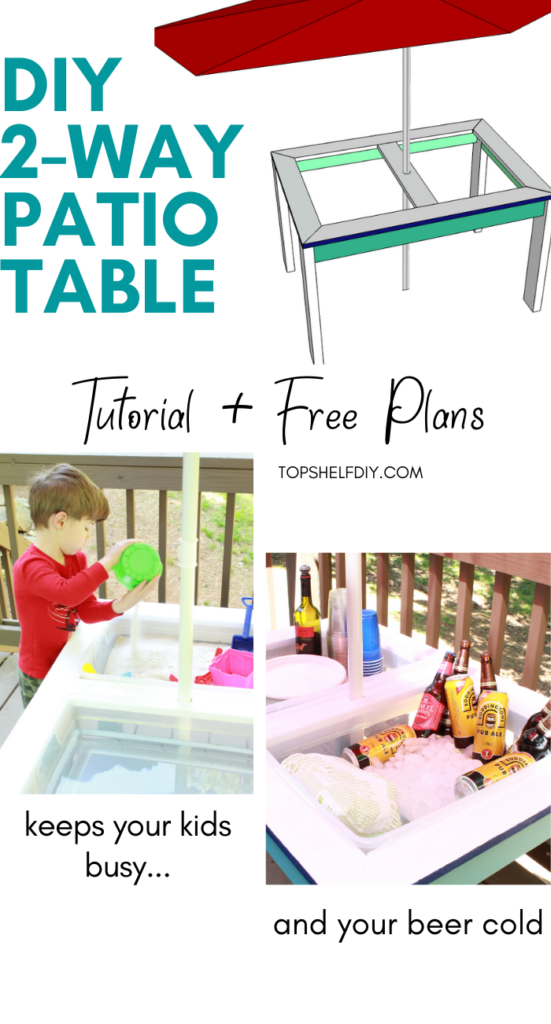
Deck table does double duty as babysitter and bartender on hot summer days
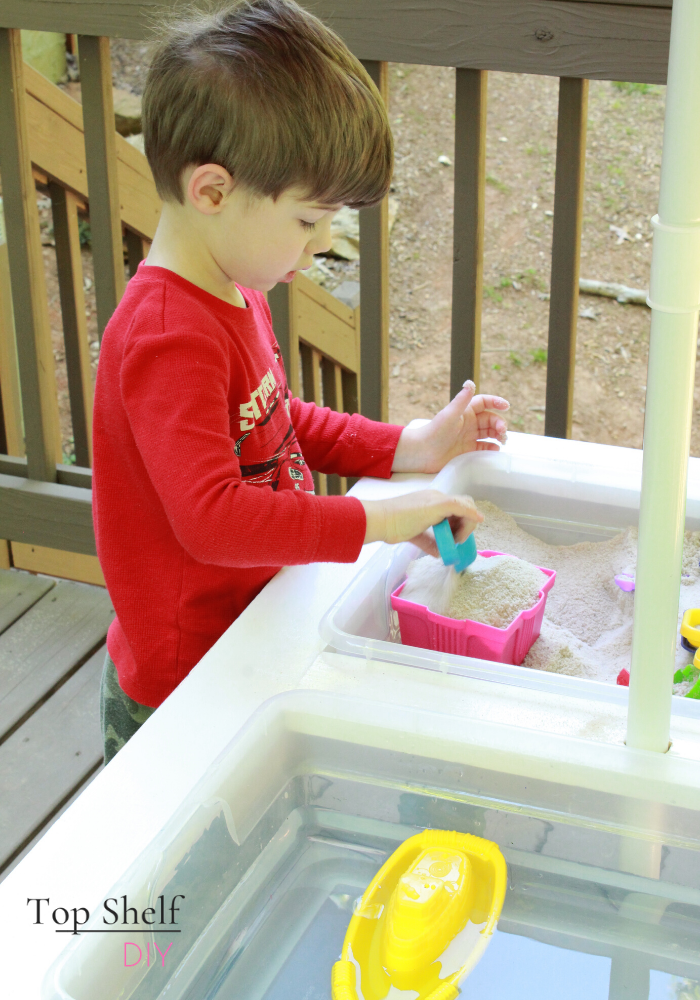
Most days, I'm desperate to keep my three-year-old son quietly occupied while I wrangle my newborn or get work done. Sensory bins are a great option, but Evan's ability to keep rice confined to a plastic tub is spotty at best.
Most sensory bin activities involve making a mess – that's part of the fun! Taking it outside means less stress and time spent cleaning up afterward.
Never heard of a sensory bin, you say? Allow me to share God's gift to moms everywhere.
Sensory Bin Play Ideas
The concept is surprisingly simple: pour one kind of raw material in a bin, and let your kids manipulate it in 500 different ways. Sensory play engages their motor skills, ability to focus, and imagination. The only rule is to keep the contents of the Tupperware in the container. Here are just a few options:
- bubble foam with a 2:1 ratio of water to bath soap, whipped to perfection
- rice + measuring cups
- a "car wash" for toy cars
- a mud bath "demolition derby" for toy cars
- sand + beach toys
- play dough
- science experiments (think vinegar + baking soda, salt + ice melt)
For more ideas I encourage you to check out Susie Allison over at Busy Toddler -- she has a huge range of sensory bin ideas for all seasons!
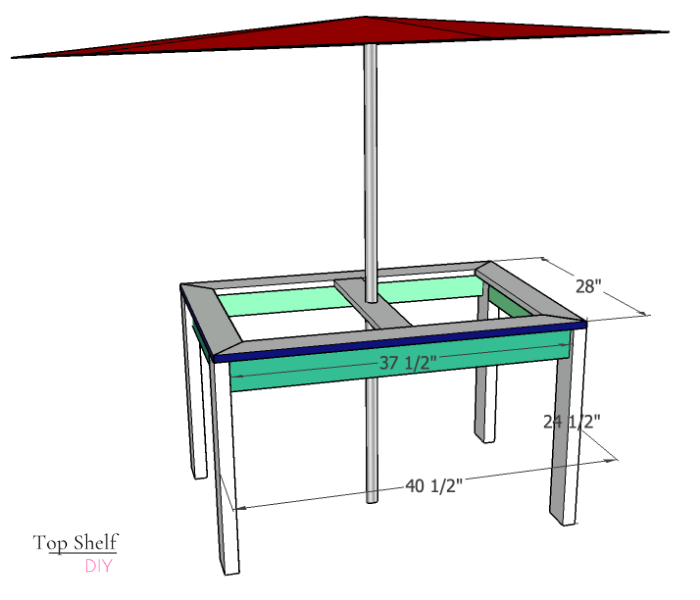
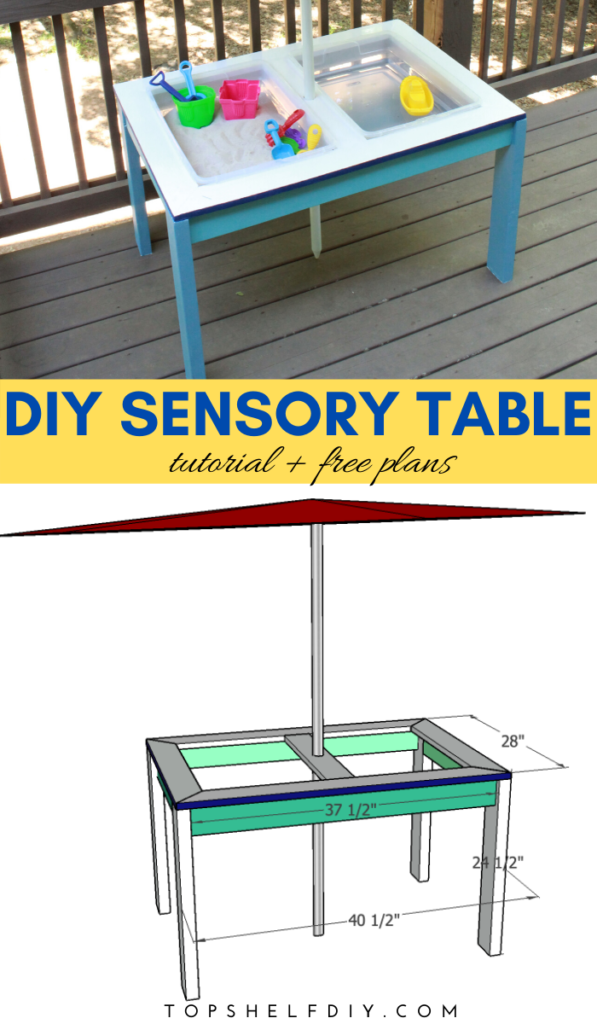
My DIY Sand and Water Table Design
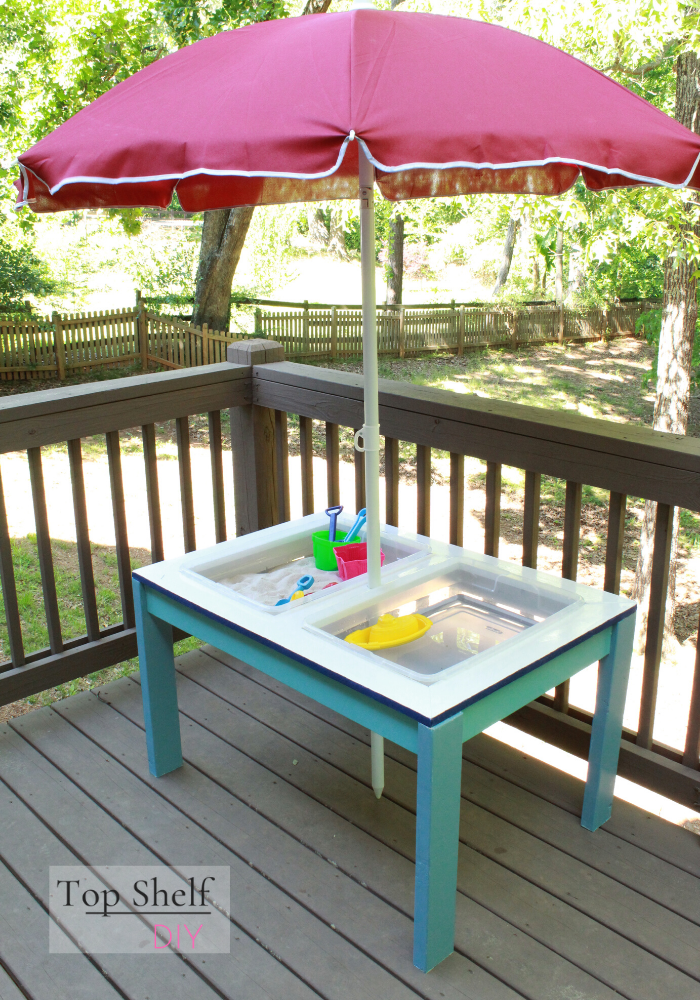
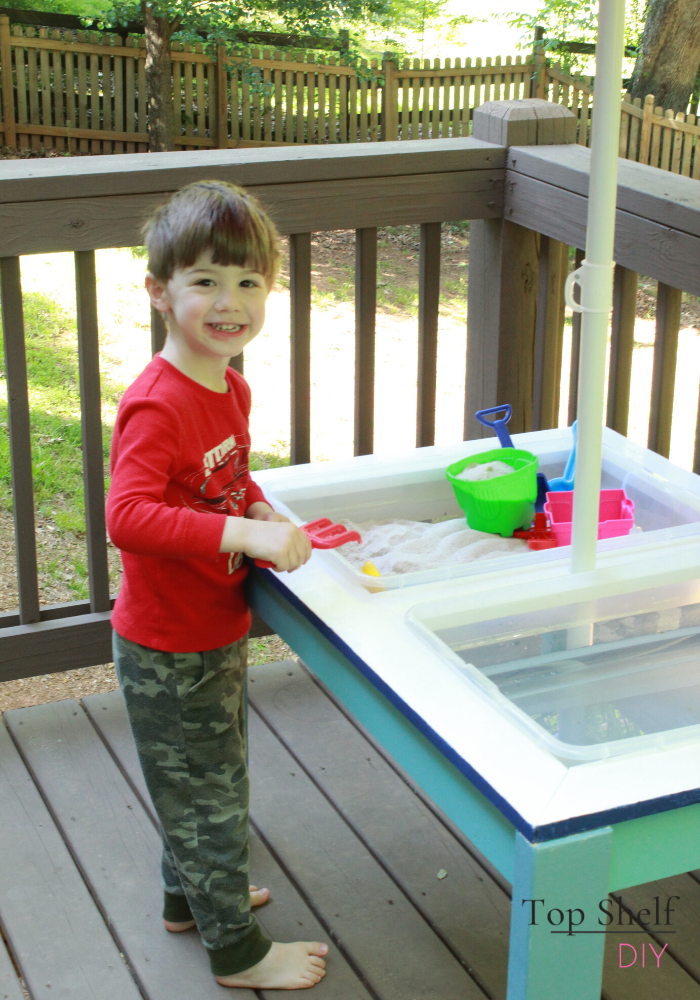
I designed this table to hold two under-the-bed, 28 qt Tupperware containers. My son is tall; the final height measures 24 1/2 inches. I also added a beach umbrella to block out the sun since Georgia summers can get quite hot. The table is sealed with two coats of exterior paint, followed by a few pretty colored paints that I had in the garage.
The entire structure is made out of scrap wood and pocket hole joinery, making it an excellent option when you're stuck at home!
Checkout the video tutorial wherein you can see my son's reaction to the table reveal!
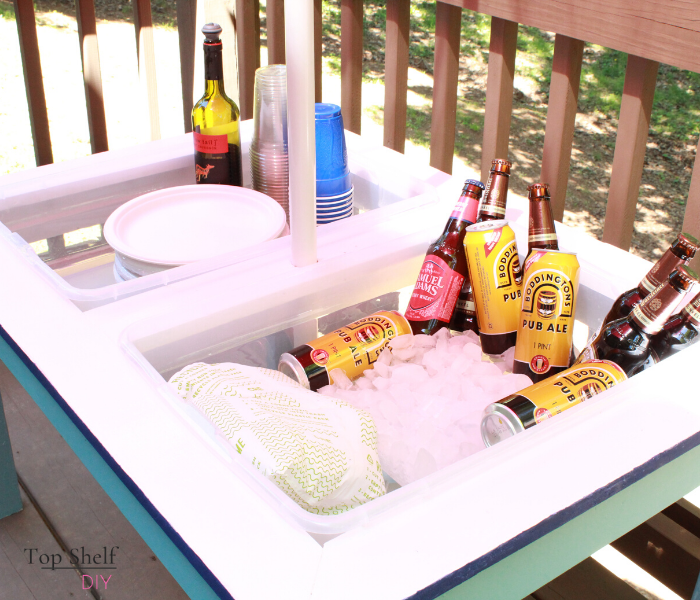
Not gonna lie -- the whole beer cooler option was a total accident. My father-in-law suggested the idea, and I have to say this father-of-five knows a thing or two! My advice would be to keep a few extra bins handy for after the kids go to bed, fill them with ice, and throw in a few brewskis to celebrate a well-earned break.
Convertible Sand and Water Table Plans
The good news is that I've taken out the guess work for measuring your table top trim. The plans below will accommodate two 28-qt bins perfectly. In case you own a few bins in a different size, here's how I calculated the fit.
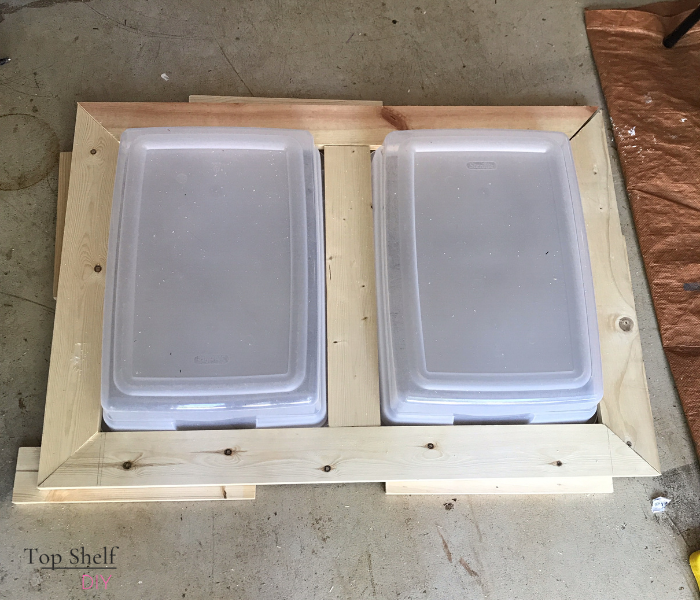
Once you've made all of the cuts for your table top, secure the pieces to each other using pocket hole joinery. It's very important to use clamps during this process, as the pieces will have a tendency to "jump" while you're drilling in your pocket screws.
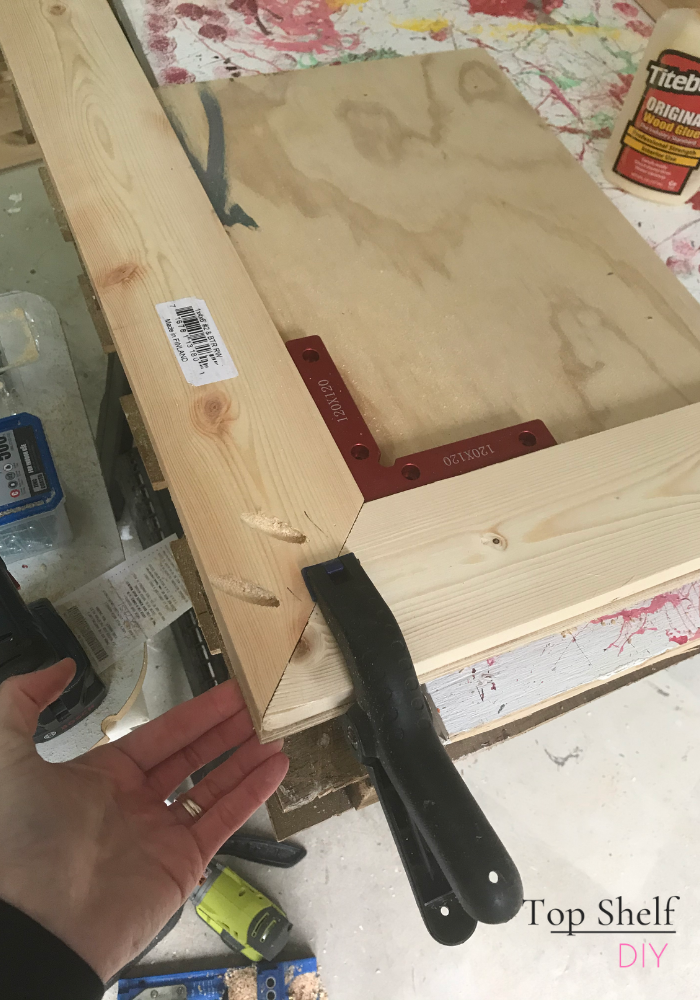
Here's what it should look like finished.

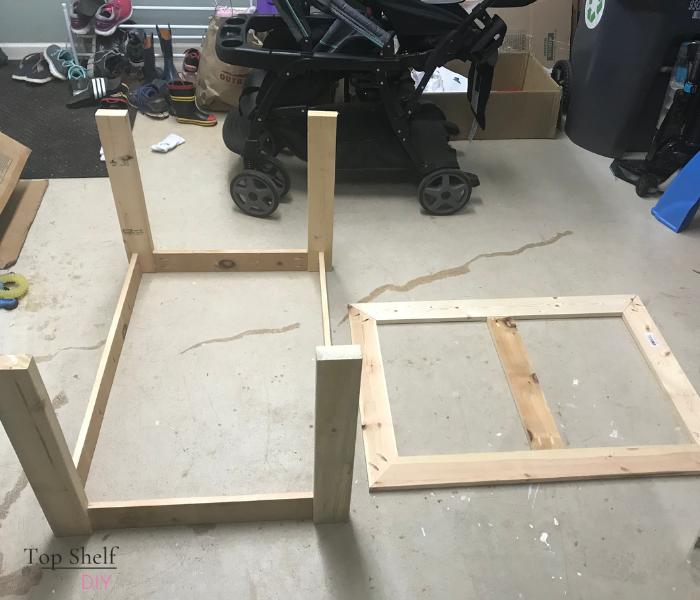
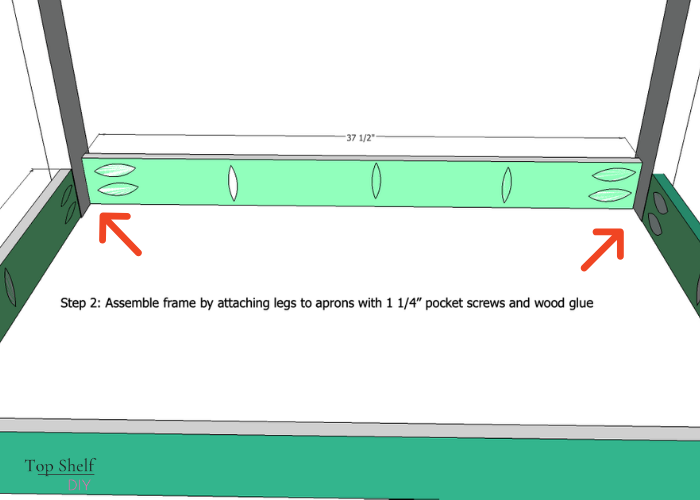
Next, assemble the carcass or leg framework. Secure the 1x4 apron to the legs with pocket hole joinery. To give the aprons a recessed look, I used a piece of scrap 1x4 as a spacer. Once again, clamps are your best friend.
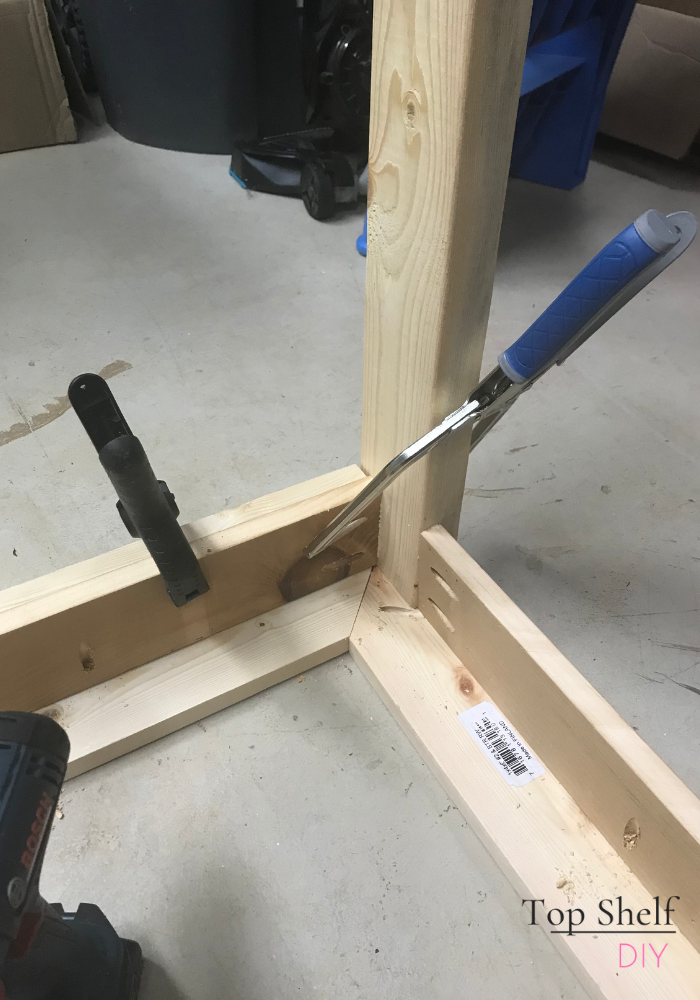
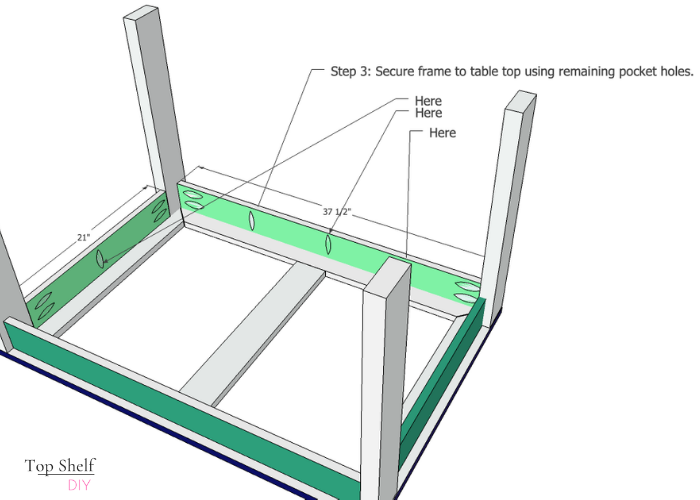
Once your legs are screwed to your aprons, attach the entire framework to your table top using the remaining pocket holes.
Fill in any blemishes with wood filler. Sand, sand, sand until the entire piece is free of splinters. Especially where there are sharp corners.
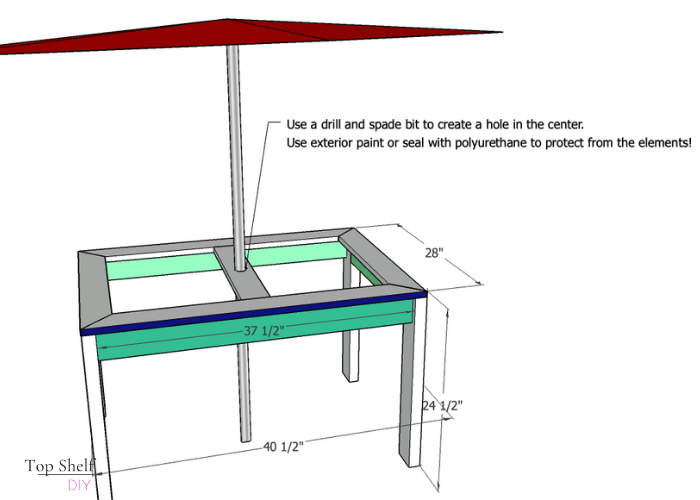
If an umbrella is desired, drill a hole in the center piece using a drill and spade bit in the same diameter of your umbrella pole. I opted to seal the piece with two coats of exterior white paint. I realized just how thick this stuff is when I tried to wash it off my paint brush...what a gooey mess!

Want to save this build for later? Download the free printable plans

As you can see, my son was happy with the final product.
Ready to make one?? Here's what you'll need.
DIY Convertible Water and Sand Table Dimensions
Preparation
Supplies
- 1 - 2x4 @ 8'
- 3 - 1x4 @ 8'
- 1 1/4" pocket hole screws (approx. 16)
- wood glue
- Sterilite 28 qt under the bed containers
- exterior paint
- beach umbrella
- play sand
- sand toys
Cut List
- (4) 2x4 @ 23 3/4"
- (2) 1x4 @ 37 1/2"
- (3) 1x4 @ 21"
- (2) 1x4 @ 40 1/2" cut with 45 degree angle
- (2) 1x4 @ 28 cut with 45 degree angle
Instructions

I hope this build serves you well!
Cheers,
Erin

You are a very capable person!
Thank you so much!