It all started with free kitchen cabinets.
Innocent enough – until I installed those cabinets and finally organized my tools.
No more dealing with tools covered in sawdust.
No more tools cluttering up my work space.
My eyes were opened to the possibilities! Time to take things to the next level.
Follow along as I share my garage renovation series here on Top Shelf DIY, which I've lovingly dubbed The Take Back My Garage Renovation Series.
For the last three years I have fought for workshop space in our garage. Baby wipes shared space with a gasoline can and my husband’s smelly hockey gear encroached on my work bench.
When you spend as much time in your garage as I do, these things matter!
If you're willing to roll up your sleeves, one week can make a HUGE difference.
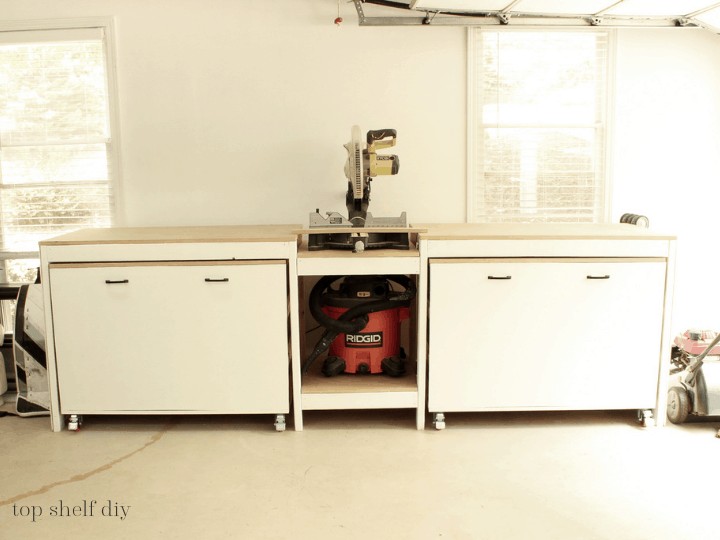
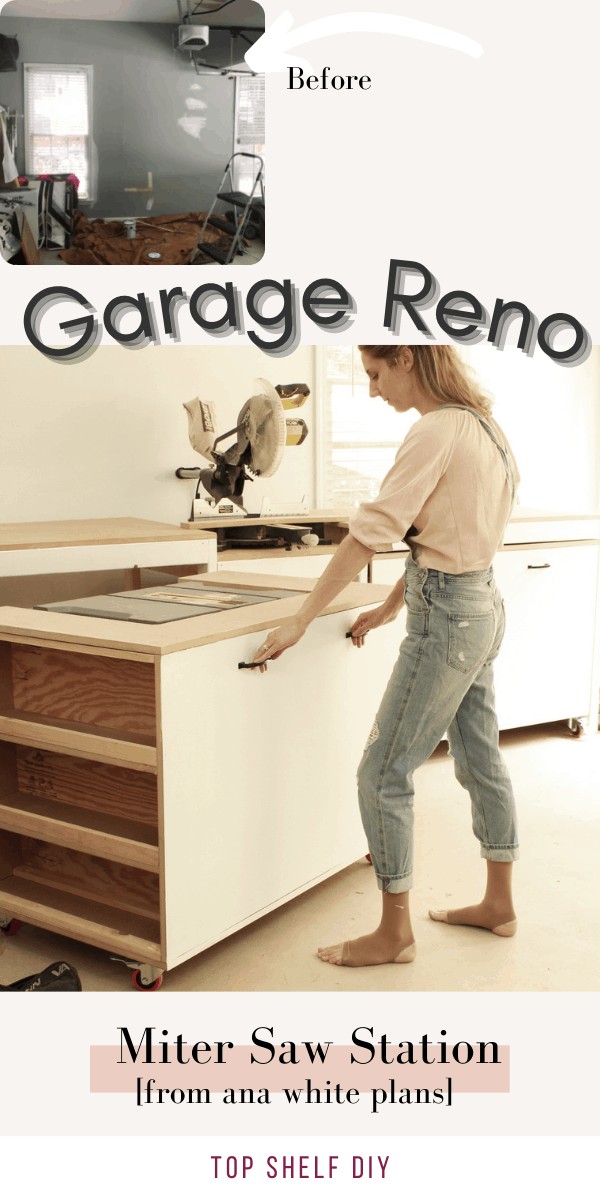
Here's the same spot a week ago.
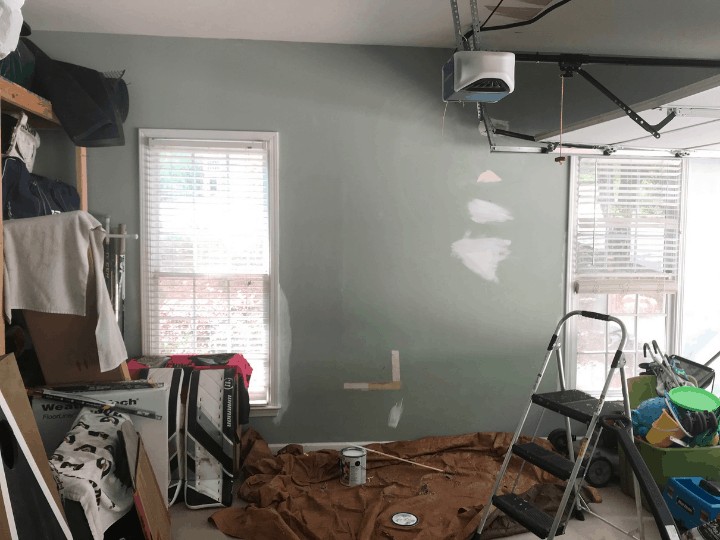
I started by painting the wall white.
Once the wall looked brighter I wanted to add a miter saw stand. I've been using my miter saw on the cement garage floor for the last six years. It's clunky to move around and a safety hazard near the kids' stuff.
I wanted something that would stand the test of time.
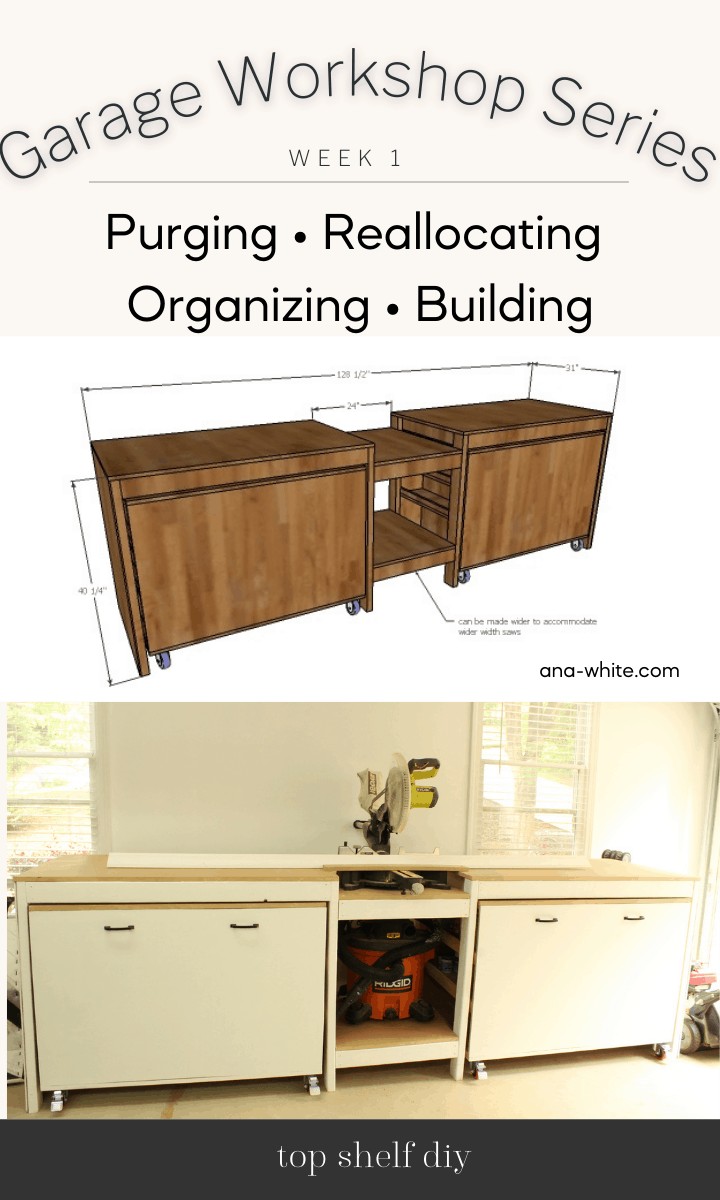
Enter: The Ultimate Roll Away Workbench with Miter Saw Stand by Ana White.
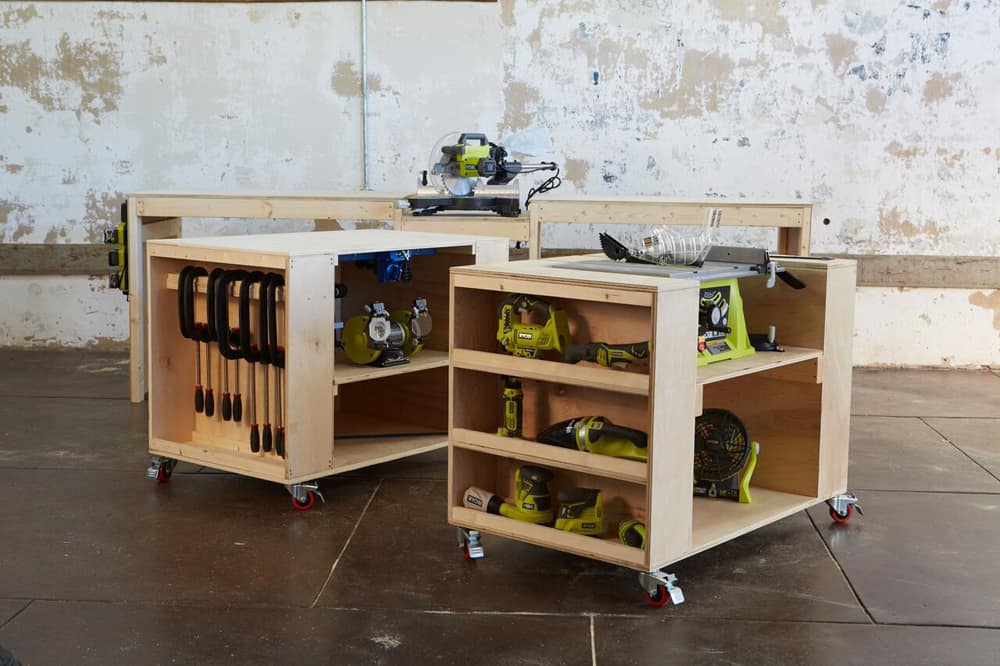
Recently, my friend April from over at If Only April built a miter saw station using these plans. They turned out amazing!
So the first step was to paint the wall Chantilly Lace by Benjamin Moore. Who says you can't have lace in a garage?
Then I built this stand using Ana's plans.

You can get the full details over on her site, but here are a few modifications that I made:
- I used MDF instead of 3/4" plywood. Plywood is really, really expensive right now. I was quoted $70 for just one sheet of 3/4" plywood, and the plans call for 4! MDF, on the other hand, was only $50 a sheet. Though slightly less durable, MDF is free of knots and accepts paint with a clean finish. So MDF it was going to be.
- I assembled the carts using pocket hole joinery. I noticed someone else mentioned this in the brag posts on her site, and it was well advised. The construction was solid with pocket holes + wood glue.
- I added a crown stop to the top of my miter saw stand. This will need to be removed if I'm not using a particular type of crown molding. Eventually, I'd love to add a T-track with a stop block system to speed up repeat cuts.
Related: Coped Crown: 5 Mistakes You Might be Making - I painted the front of my miter saw station to match the wall.
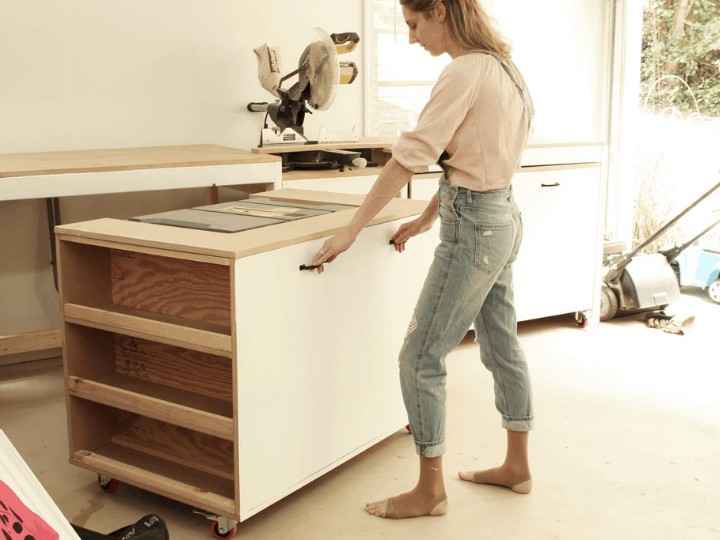
- Ana uses her miter saw station for storing tools. I'm already storing my tools in second-hand kitchen cabinets, so I'll be using the carts for storing everything else on my workbench!
Total cost of the garage makeover to date: $500
Time spent: one week
Here are the remaining projects on my list:
- Clear out entire garage and purge/donate unused items.
- Maximize vertical storage by adding overhead bins made from 2x4s and 1/2" plywood. Something like this.

- Add french cleat storage system to wall above miter saw station. I love french cleats and much prefer the look over peg board. This will be used for clamps and small hand tools.
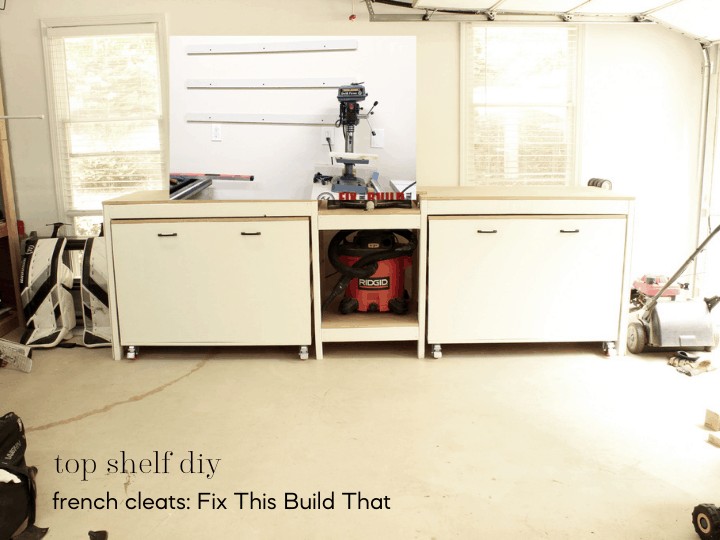
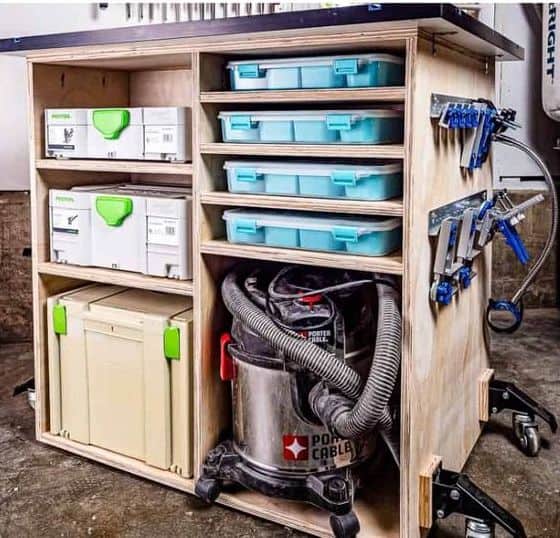
- Move hardware, extra tools, etc. to my work bench carts. This will likely entail adding customized storage shelving from 3/4" plywood. Something like this:
Lastly, I need to move my husband's hockey gear and gardening equipment to the corner where my hardware/tools/scrap wood live. I'll be adding a plastic partition to protect his gear from sawdust.
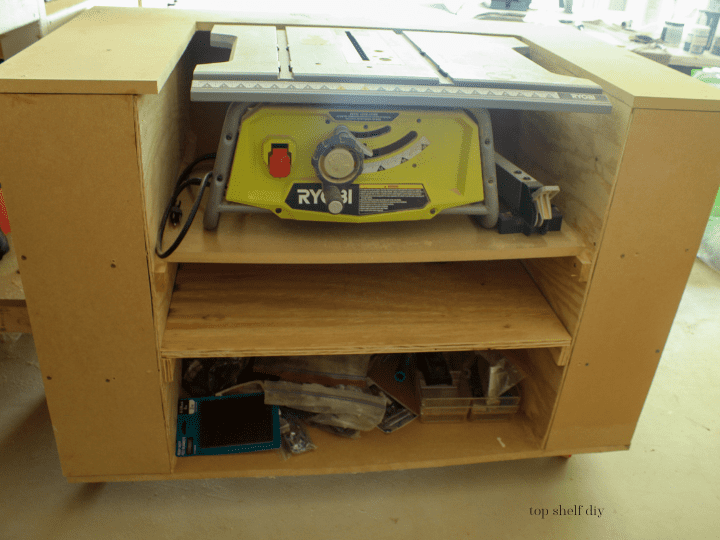
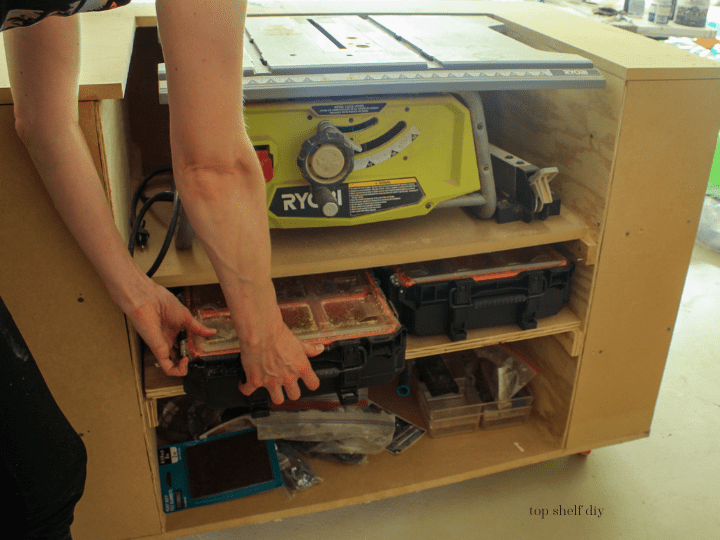
Update: I finally added shelves to hold ALL my screws and nails inside my table saw cart. I simply added some cleats made of scrap wood and a piece of 3/4" plywood cut to width. Here's how it's looking now:
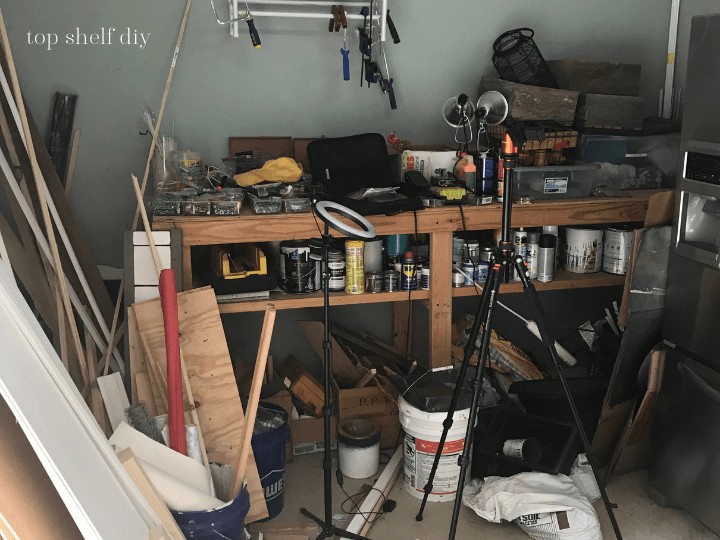
Here are a few "Before" photos of the garage to give you an idea where we started.
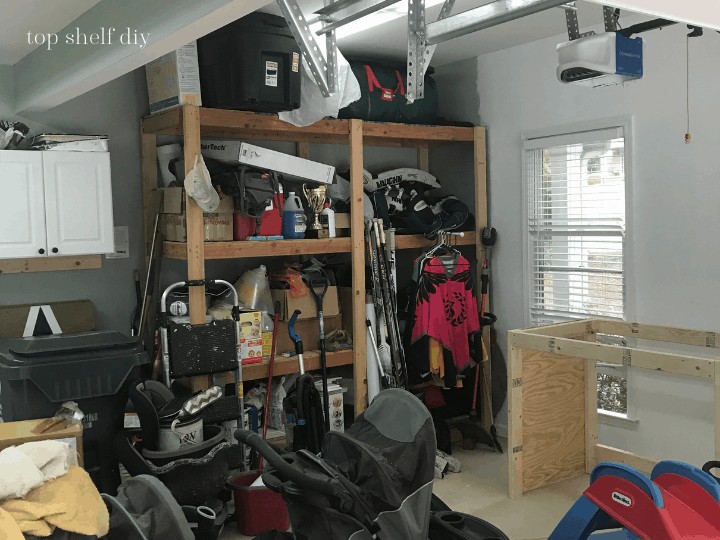
Do you have a messy garage? With the weather warming up, now is the perfect time to revamp your space.
Go for it!
My advice for planning a garage makeover
- Give yourself at least a month for projects, especially if you're only committed to working weekends.
- Clear out the entire garage before you get started.
- Designate certain zones for certain functions.
- Dedicate specific zones to specific members of your family.
- Research is key! Don't buy any organization systems until you have a clear plan.
More posts in this series:
- Garage Makeover with Added Storage (Week 2)
- DIY French Cleat Lumber Rack
- Fun Ombre French Cleat Wall
- Scalloped Spray Paint Storage
Cheers,
Erin



Holy smokes this is brilliant! I’ve been needing to do both, my garage and my office. Full time finance & project-teer over here. I’ve need some inspiration for the garage, esp what to do my miter saw that has jumped from tool box top to stores furniture, etc. but this is it! Thank you! My dad had an industrial wood shop when I was in high school and I’ve never had the time to recreate the awesome workstations he had, but this is it! (The office part comes in with your helpful hints at the bottom - so thank you for those!! It’s a mess between Christmas gift wrap, 2 computer stations, 5 sewing machines, endless craft supplies and 4 empty ikea storage systems I bought on a whim 🤣 )
Thank you again for the inspiration! Not enough ideas out there about a garage reorg! Keep it up!!
You're very welcome! My office closet sounds a lot like yours LOL.
Hi, I’m very impressed with this project. I’m going to try and start organizing my garage but at 75 years old this will be a lot harder and slower. But your ideas are great. Love it
Cathy M