(This post is part of the Crown Molding 101 series)
Working with crown molding can be a real bear, especially when you’re dealing with inside corners.
But with a little practice and LOTS of patience, you can save literally hundreds on overhead by installing crown molding yourself; professional installers charge $50-$100 per hour on average, according to the folks over at Ownerly.
Follow me along in the Crown Molding 101 Series as I share the hacks I’ve accumulated over the years! It'll feel like climbing Mt. Everest with a veteran sherpa and unlimited oxygen tanks. Here’s what we’re going for today:
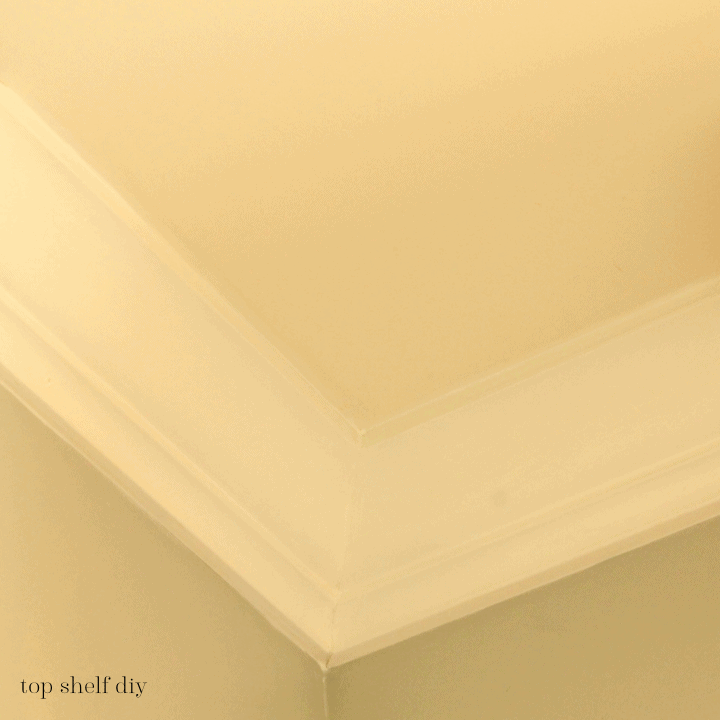
This inside corner was a quick mockup created for the purposes of today’s post. It was a good exercise for me because I worked on streamlining my processes with jigs and systems designed to improve accuracy.
Soon this corner molding will be replaced with 3-piece-crown molding around a window cornice and built-in bookshelves.
But FIRST, let’s talk about inside corners.
What is an inside corner, and why does it need to be coped?
An inside corner is where two pieces of crown molding come together – usually at a 90-degree angle – and your options are to either miter both pieces of crown or create what’s called a coped joint.
If you choose the first option, both pieces of crown will need to be cut at a 45-degree angle in the nested position (upside-down and backwards) on your miter saw.
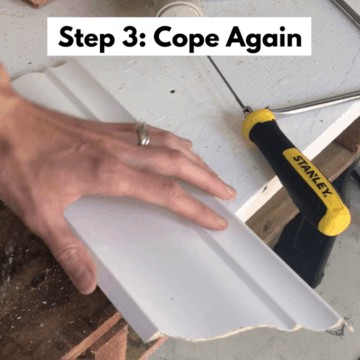
If you choose the second option, one piece of crown will be cut at 90-degrees and run all the way to the wall. The second piece of crown will be cut at a 45-degree angle, and then you’ll need to remove everything behind the edge of your profile using a coping saw.
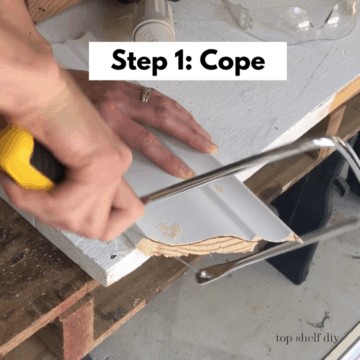
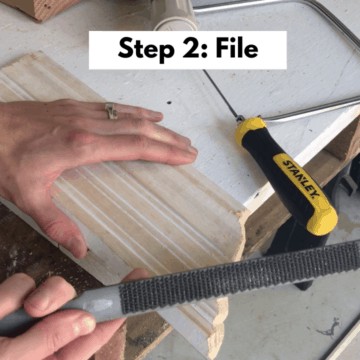
Coping is really just a fancy term for back-cutting all the wood behind the edge of your crown molding.
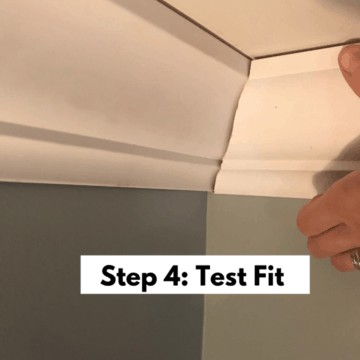
Isn't it easier to just miter both pieces and avoid the hassle?
You're right – mitering both pieces of crown is faster and far less tedious. Just know that mitered corners are prone to cracking at the seams. With seasonal changes comes settling in your home from shrinking and expanding wood.
A coped corner allows for flexibility and movement.
“Coped joints move like a knuckle, allowing these slight changes to occur without the joint opening up.” – Clayton Dekorne, author of Trim Carpentry and Built-Ins
In addition to settling, ceiling corners often stray from the ideal 90 degrees when walls aren’t level or square. A coped corner can compensate for a corner being two degrees out of square in either direction.
For a more forgiving joint and professional quality finish, cope your inside corners and don't look back.
Like most things in the realm of woodworking, a systematic approach to crown molding will reduce wasted time and money.
If you’re spending lots of time coping your molding only to have awkward gaps at your joint, here are five reasons why you might be having a problem.
Mistake #1: You're cutting your molding at the wrong angle
Crown molding is the only type of trim cut at a compound angle. Here are the two angles we care most about:
- The mitered angle: or angle cut across the face of your crown, and
- The spring angle: the angle at which your crown sits when installed between the wall and the ceiling. This angle determines your wall and ceiling projection, and is usually (but not always) 38, 45, or 52 degrees.
First, let's talk about getting the mitered angle right.
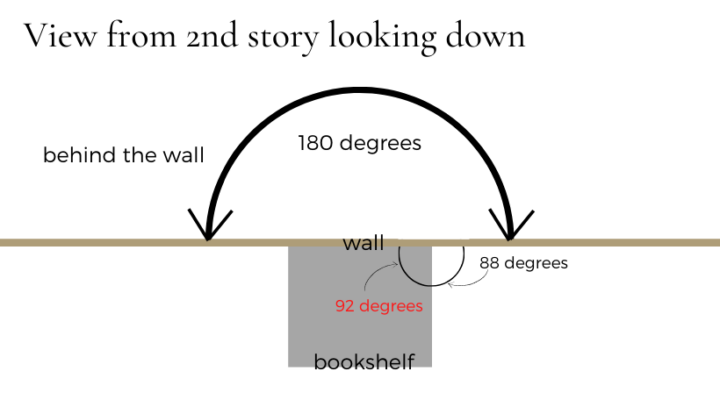
Unfortunately, we can’t assume every corner is a perfect 90 degrees. Walls and ceilings shift due to settling as mentioned earlier. If you take a closer look at your corner, you may also notice lumps where layers of drywall compound and tape have caused bulging.
Solution: measure your angle with a protractor!
*note, this post includes affiliate links, which means I will earn a small commission if you purchase any item at no additional cost to you.
For a mere $7 you can have all the accuracy you need to get the job done.
Simply set your protractor in your corner, subtract your finding from 180 degrees, and divide by two. This is the angle you’ll need to dial in for your coped piece of molding.
Related: Six Essential Tools to a Seamless Crown Molding Install
Now let's address the oft-overlooked yet equally important brother angle – the spring angle.
If you're just throwing a piece of crown molding up on the miter saw and not paying attention to the spring angle, you're bound to have problems.
Solution: create an auxiliary fence on your miter saw!
Rip a piece of wood to the width of your projection (i.e. how far your crown juts out across the ceiling), and then use this gauge block to build an auxiliary fence for your miter saw.
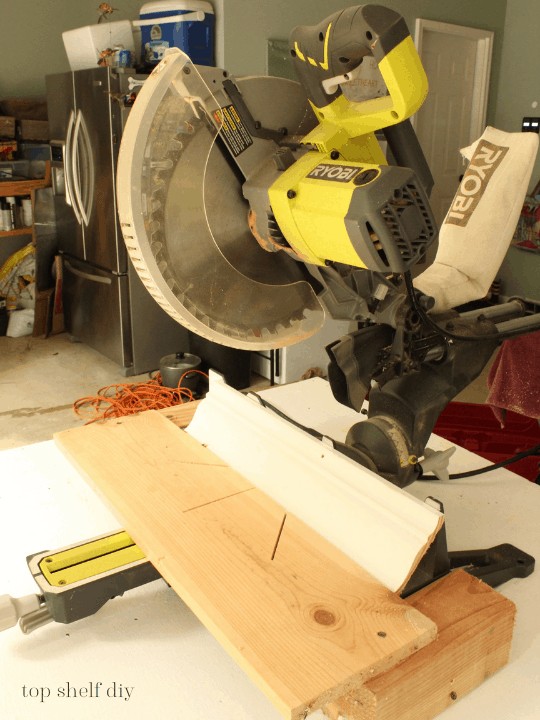
**Remember that when your crown is flipped upside down the base of the saw is acting as your ceiling. Hence why we need to know the ceiling projection.**
I got this idea from the legendary Gary Katz at This is Carpentry, and it works like a charm!
Adding a secondary fence to your saw ensures that your crown always sits at the correct spring angle when flipped upside down, AND that the bottom lip of the crown sits flush against the fence with every cut you make.
And now we have a more than a snowball's chance in hell at getting consistent cuts every. single. time.
Mistake #2: Not accounting for a vaulted ceiling
Pretty much every crown molding tutorial on the web is written with the assumption that you are turning your crown along a flat ceiling, i.e. along a horizontal plane.
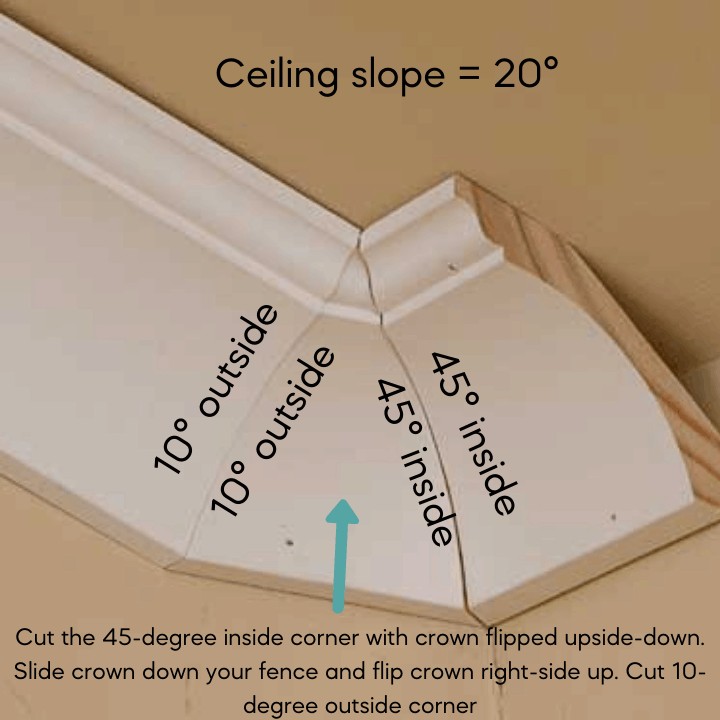
However, if you have a vaulted or cathedral ceiling, you’re turning your crown along a vertical plane. The process will look very different from your standard inside corner.
Inside corner turns for vaulted ceilings are a bit more complicated, so I won’t go into too much depth here. But the main idea is to know your ceiling slope so that you can make a transitional piece of crown between your horizontal and cathedral ceiling. This transitional piece will have an outside corner on one side and an inside corner on the other.
This ensures that the spring angle doesn’t change.
Mistake #3: Your miter saw is not properly calibrated
Miter saws get thrown out of whack from time to time. This can lead to a number of things – your miter saw blade is no longer square to the table, the fence, or both.
Either scenario could throw off your cuts by several degrees.
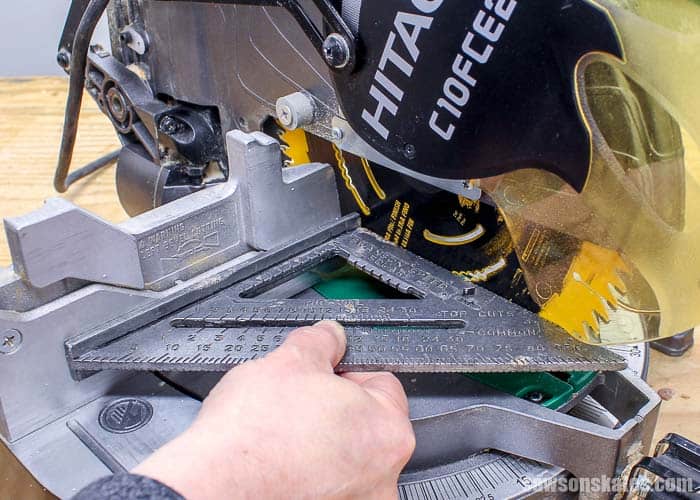
When was the last time you replaced your miter saw blade? If you’re like me, probably never. A dull or bent blade can lead to tear out, which can throw off the angle of your cuts and cause corner gaps.
Scott over at Saws on Skates has an excellent tutorial on how to check for square with your miter saw settings. Always remember to disconnect the power before adjusting your saw, and follow the parameters specified in your owner’s manual!
Mistake #4: You haven't coped your piece enough
So you measured your corner angle with a protractor, you’re using an auxiliary fence set to the appropriate spring angle, your ceiling isn’t vaulted, your saw is square, and your inside corner STILL isn’t looking right.
Chances are that you need to remove more wood from the backside of your molding.
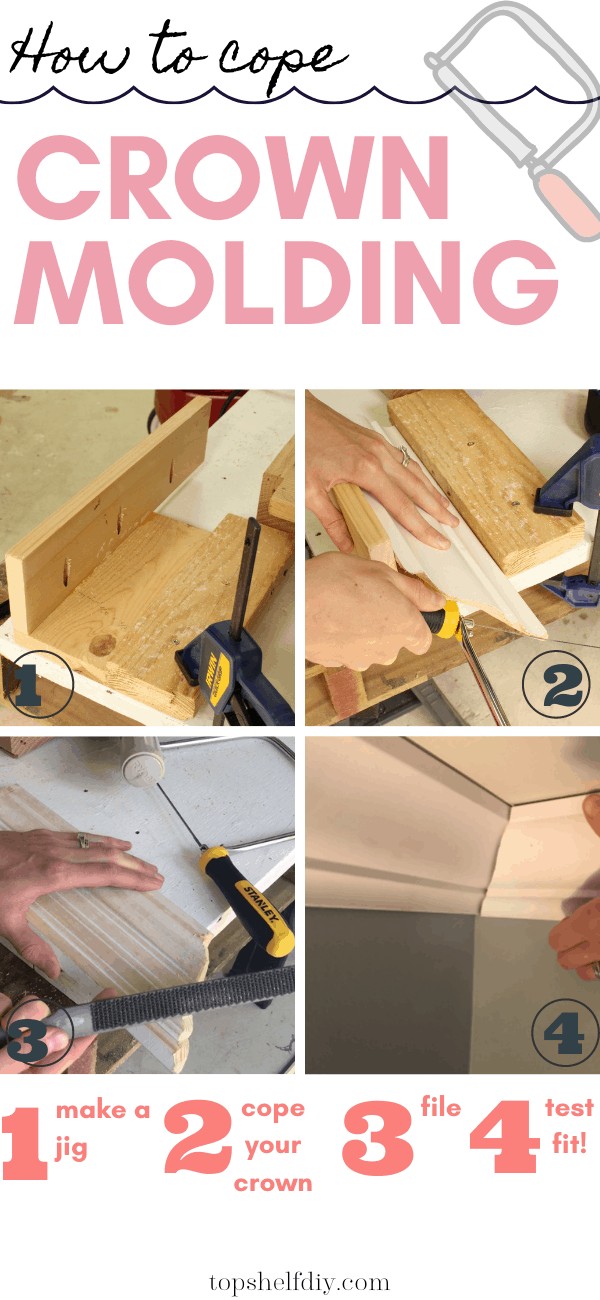
Solution: build a coping jig!
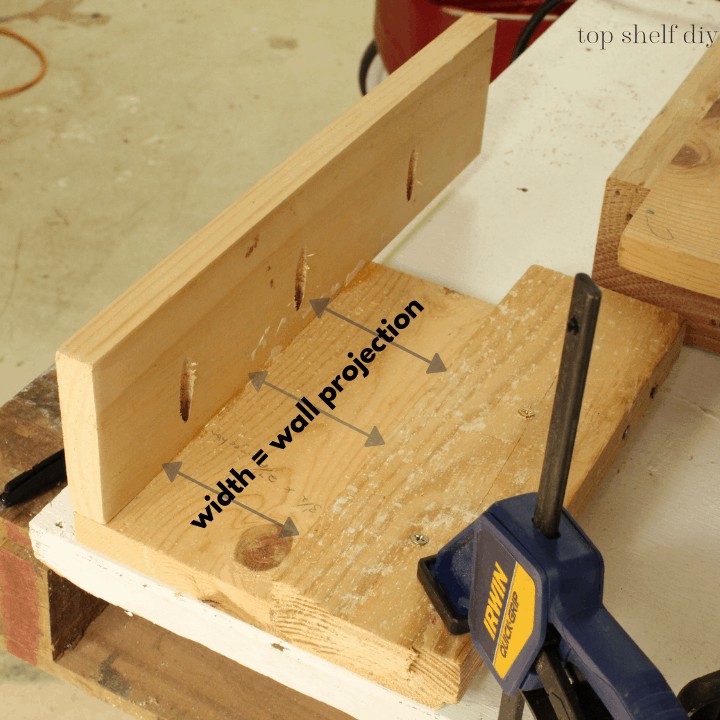
You don’t need to spend a lot of money on fancy materials to make a coping jig. A few pieces of scrap wood secured with screws will do.
A jig is designed to hold your piece of molding upright and at the correct spring angle to make your coping process easier. Cutting at an angle as opposed to flat also helps you look straight down the profile edge from above, so you’ll know if there’s any “meat” remaining.
When you calculate your spring angle you’ll know the “run” of your molding. In my case, the molding ran 3.5” down from the ceiling when held at the correct spring angle.
Once you have this measurement, simply create a box with a floor width set to the width of your run.
After you’ve assembled your jig, clamp it to your work surface.
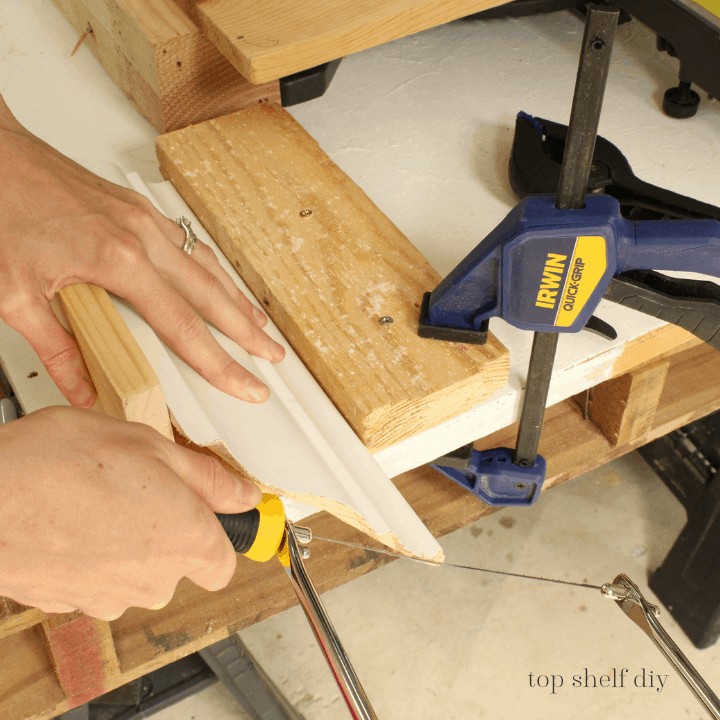
This jig would work to hold your molding as you cope with an angle grinder or a Collins coping foot (an accessory that can be fitted to most jigsaws). The ultimate goal is to cut backwards at a 90-degree angle through the full-thickness of your crown.
Coping is a bit awkward at first, but like anything else gets better with practice. I highly recommend using a wood file to soften any hard edges.
Moral of the story: just when you think you’ve coped enough, cope a little more.
Mistake #5: Some moldings simply can't be coped
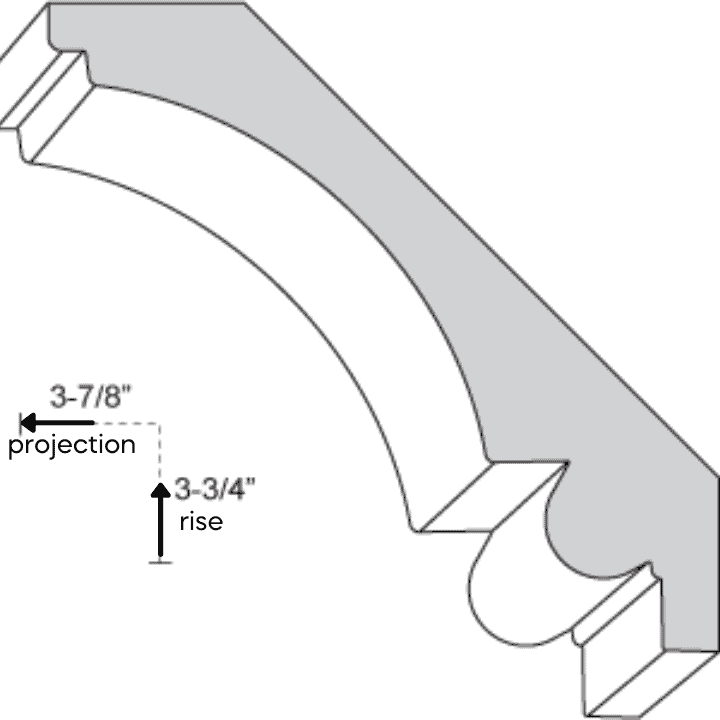
In rare instances you’ll have certain kinds of crown molding that can’t be coped. This usually happens when you have a beaded profile to work around, simply because back-cutting leads to an almost paper-thin profile.
Solution: miter both pieces of crown rather than doing a coped joint.
If you’ve already butted one piece flush to the wall, cope your piece by hand and fill in any shallow areas with caulk to reinforce your leading edge.
Closing thoughts
When all else fails, I live and die by this time-tested motto:
“Do your best, then caulk the rest.”
Yep, I said it.
Progress is better than perfection.
I hope this post was helpful and gave you lots of valuable tips for installing crown molding!
I know it can feel overwhelming at first, but I promise it gets easier the more you work at it.
Feel free to leave questions and comments below, and don’t forget to subscribe for future updates in this series!
Cheers,
Erin




Leave a Reply