Truth: I hate math.
I’m the kind of girl who prefers curling up with a good book over crunching numbers.
But man, I will make the time for math when it comes to craftsman trim! Suffice it to say I'm obsessed.
I recently revisited my old cheat sheets and modified my simple formula for measuring trim. Also, I've narrowed down your design choices to four simple prototypes collected from some of my favorite fellow lady bloggers.
Visual learner? Keep reading for a video tutorial included in this post.
Two years ago I updated the windows in our His and Hers Farmhouse Office Renovation. More recently, I upgraded the interior doorway trim as well as windows in our dining room as part of our Playroom Renovation Series.
.
Here's what to know BEFORE delving into the multitude of craftsman trim tutorials out there.
.
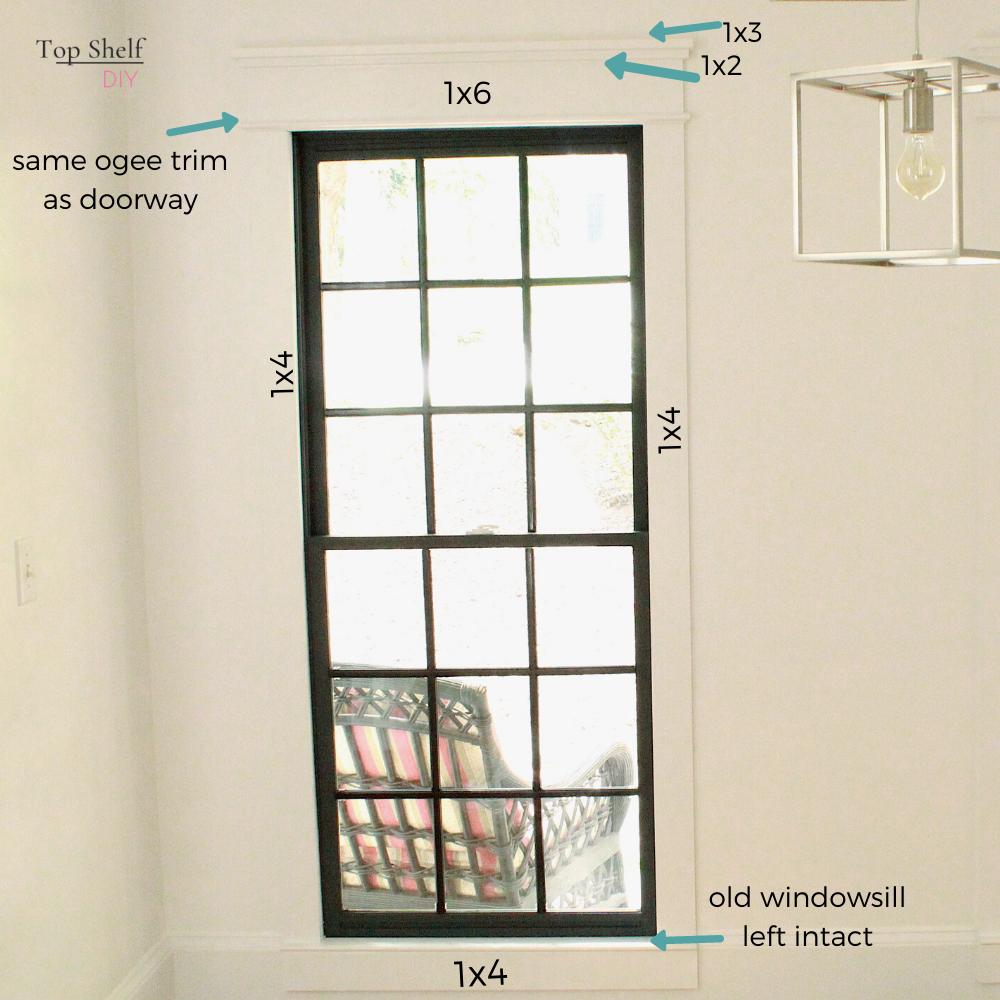
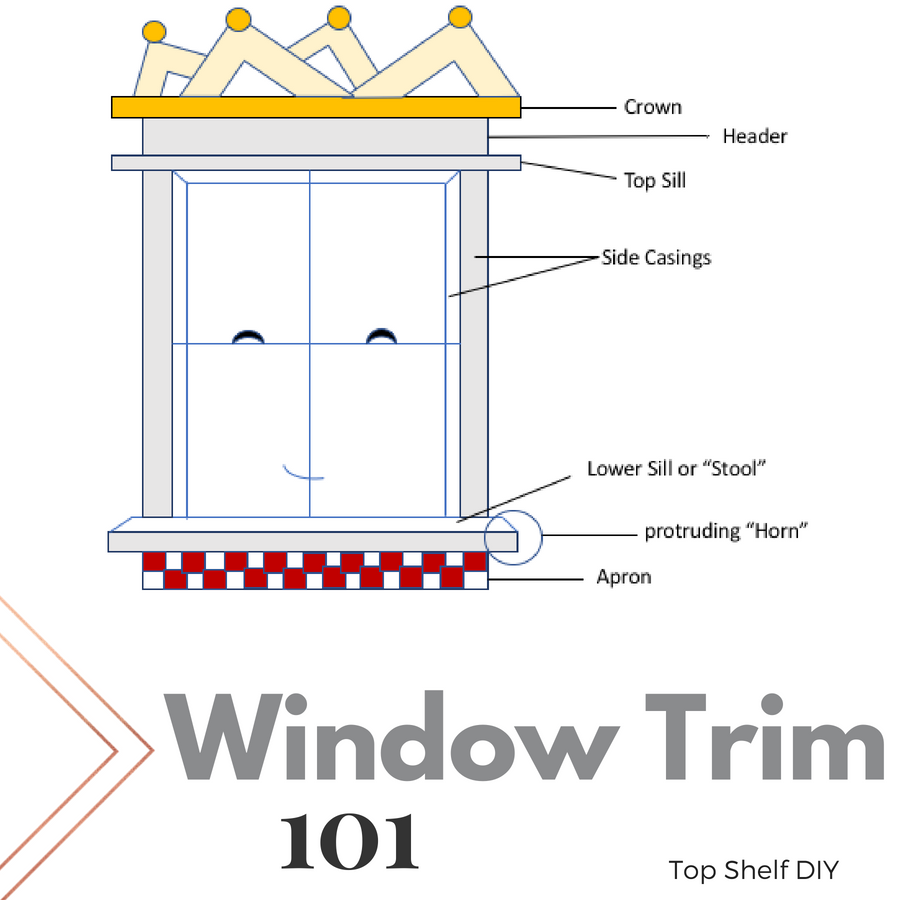
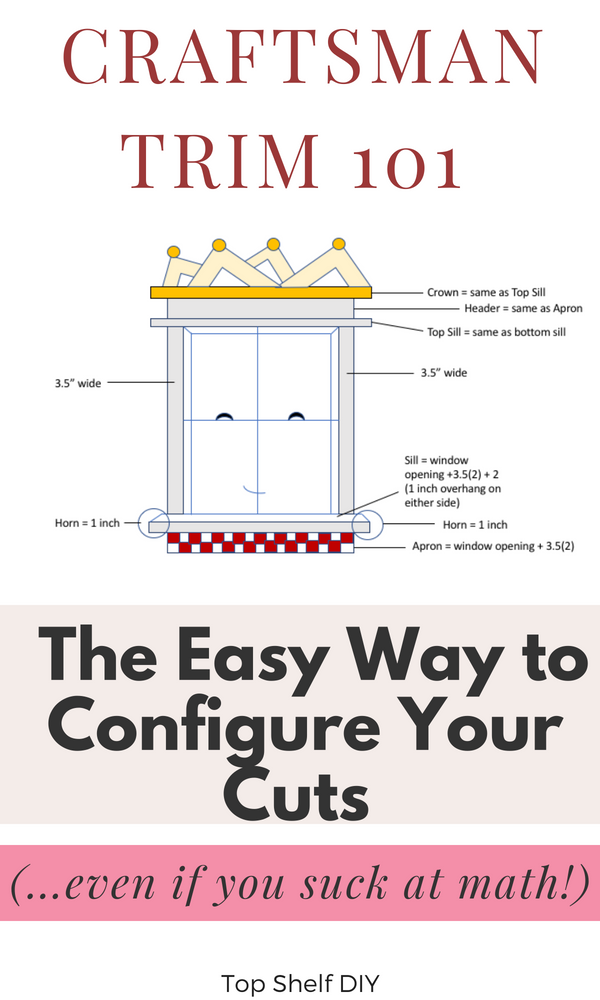
First things first: Dissecting a Window Frame
Let’s pretend you’re in 8thgrade biology class and this happy little window is your frog.
.
.
Not too complicated, right?
..
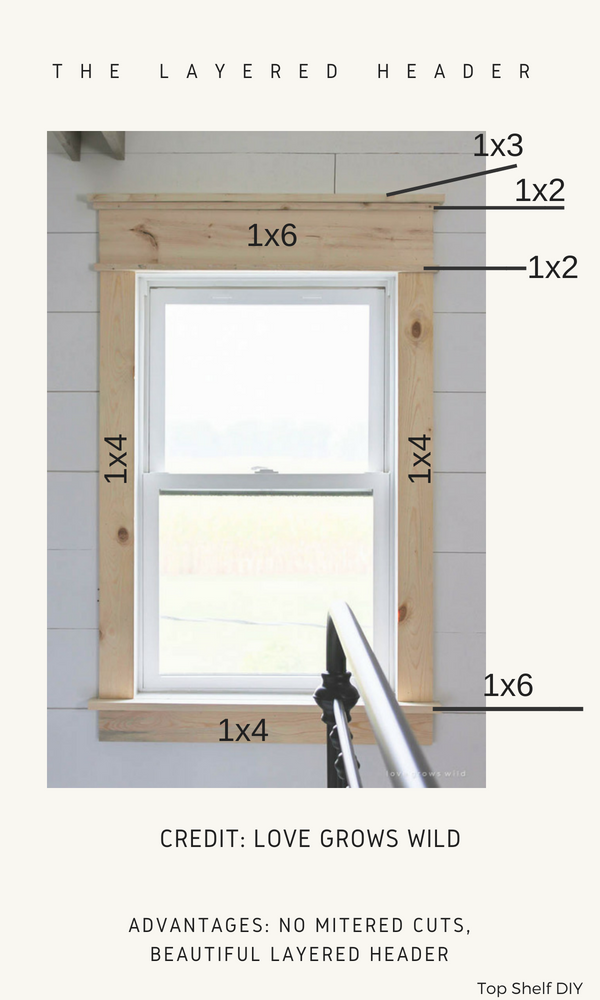
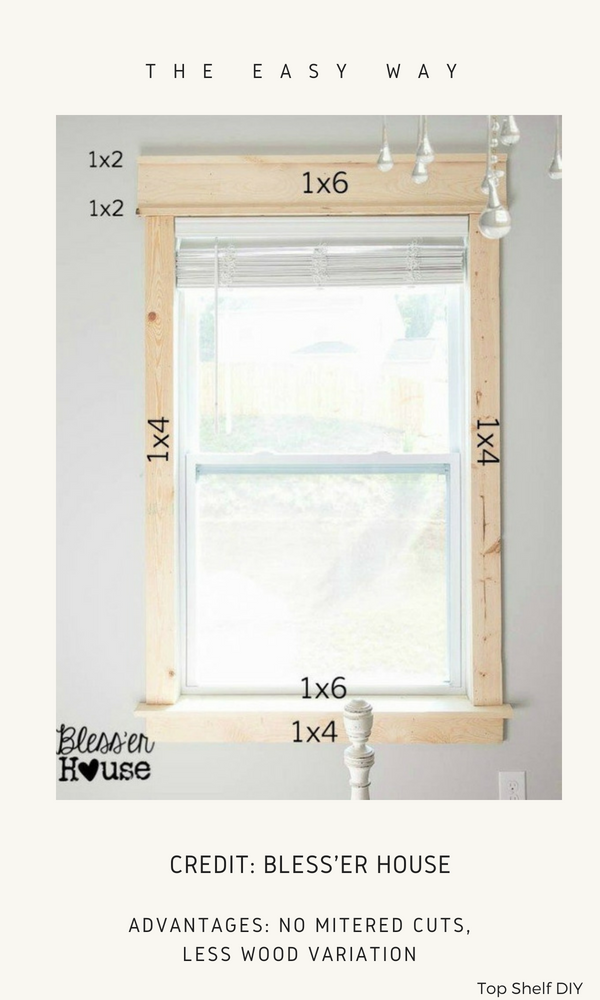
Secondly: Know Your Options
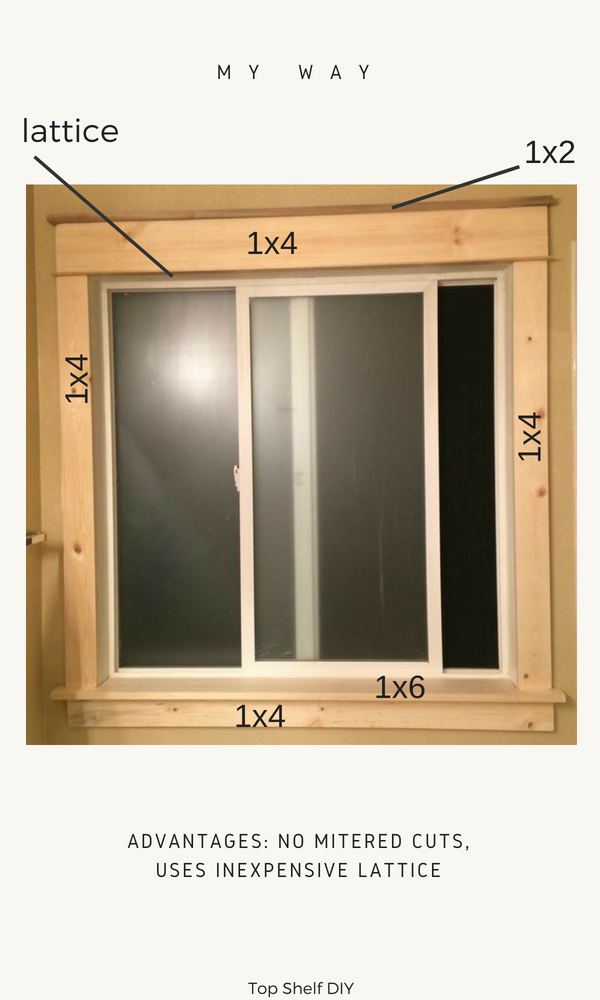
There are many ways to pull off the craftsman look depending on your preference and skill level.
Here are just a few options:
.
.
.
Last but not least, if you own a miter saw, you can go for this look:

Now, pick your poison based on the style of your home and whatever materials you already have lying around.
I've intentionally picked these tutorials because they use 1x4 side casings, which is the only consistent piece you'll need to make my measurements work for you. Everything else can be tailored to your window depth.
Important: the depth of your current window sill will dictate the size of the piece you use for your new window sill. If it's a shallow window sill you'll want to use a 1x4 piece. If it's relatively deep to begin with (3 inches or more), feel free to use either a 1x4 or 1X6.
.
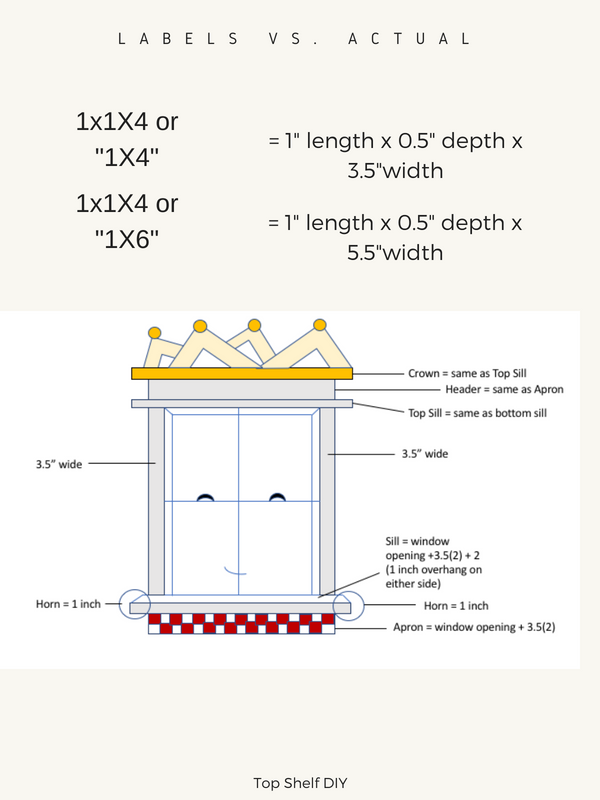
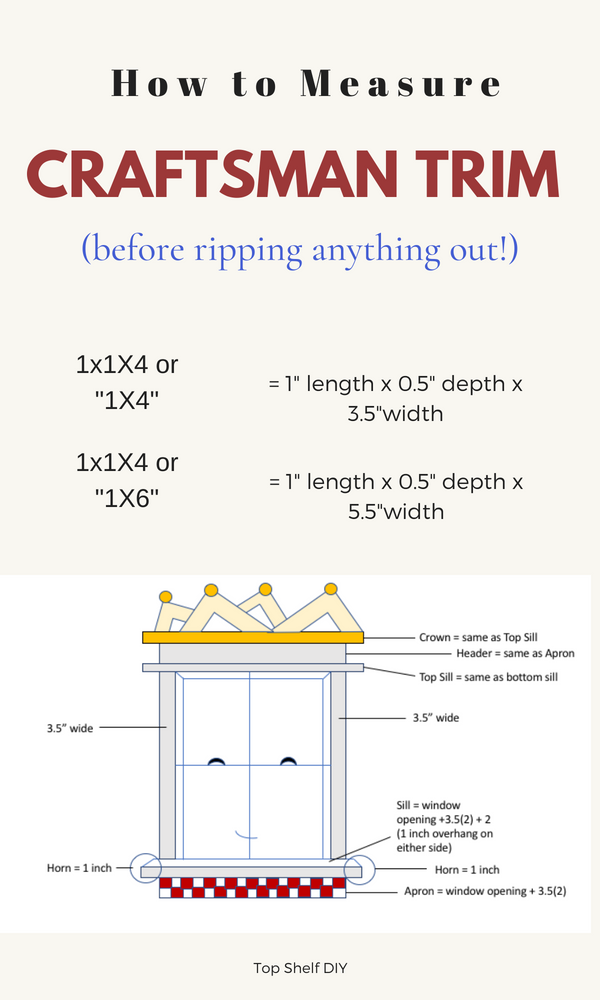
Thirdly: A Note on Wood Sizes
Wood labels can be misleading. A 1x4 piece of unfinished pine is actually 3.5 inches wide, not 4 inches. A 1x6 piece is only 5.5 inches wide.
This is why all my measurements below include the number 3.5.
.
Fourthly: The Measurement Hack
Before leaving the house to buy my wood I'll do a rough estimate of how much I need. If you're a newbie, throw in an extra piece or two just in case you make a mistake. Here’s how I calculate the measurements once again:
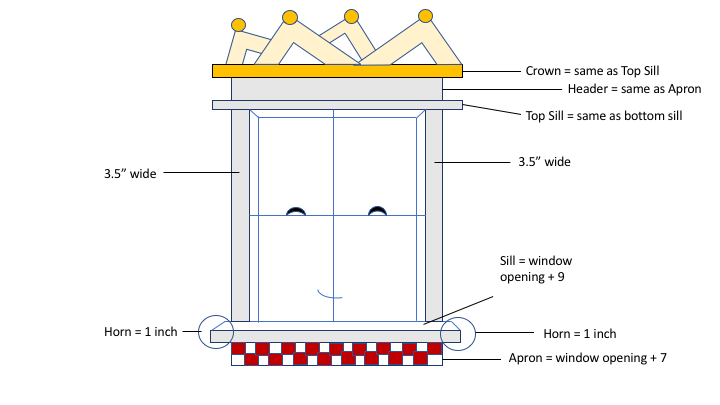
- Apron: window opening + 7"
- Lower sill: window opening + 9"
- Side casings: length from the top of the window opening to the bottom of the window opening. I usually add these pieces last, after the header and lower sill pieces have been nailed in.
- Top sill: same length as bottom sill
- Header: same length as apron
- Crown: same length as top sill
I will usually round up an inch or two when headed to the store for my wood, just to give myself some room for error.
Also, when making your cuts, I suggest adding a little bit of extra to your measurement (just in case). You can always tweak your cuts down, but you can't add wood back if your calculation is short.
Not too terrible, right?
I hope this helps with your next home project!
Have I missed anything? Share in the comment box below!
.

I’ve read several blogs about window trim, but didn’t really understand until I read yours. As a fellow visual learner, I found your graphics extremely helpful! Thank you!!!
Look out windows. I’m coming for you.
Yesss. Get it girl!
This is helpful. I do have a question though. We live in Florida so we have a marble window sill. Can I take that out and insert wood or with the humidity and amount of rain we get do you think I should leave it?!
Thanks
I wouldn't touch the marble!