And How to Create the Illusion of a Wider Doorway!
Like many homes built in the '90s, our entire house is beige. Not the worst color in the world, but because we are flanked by big trees on all sides the overall mood is very dark.
Luckily, paint and new trim have done wonders.
I removed the wainscoting and added an industrial bar cart to our dining room. Eventually I'd like to replace the bar cart with built-in cabinetry! But I'm getting ahead of myself.
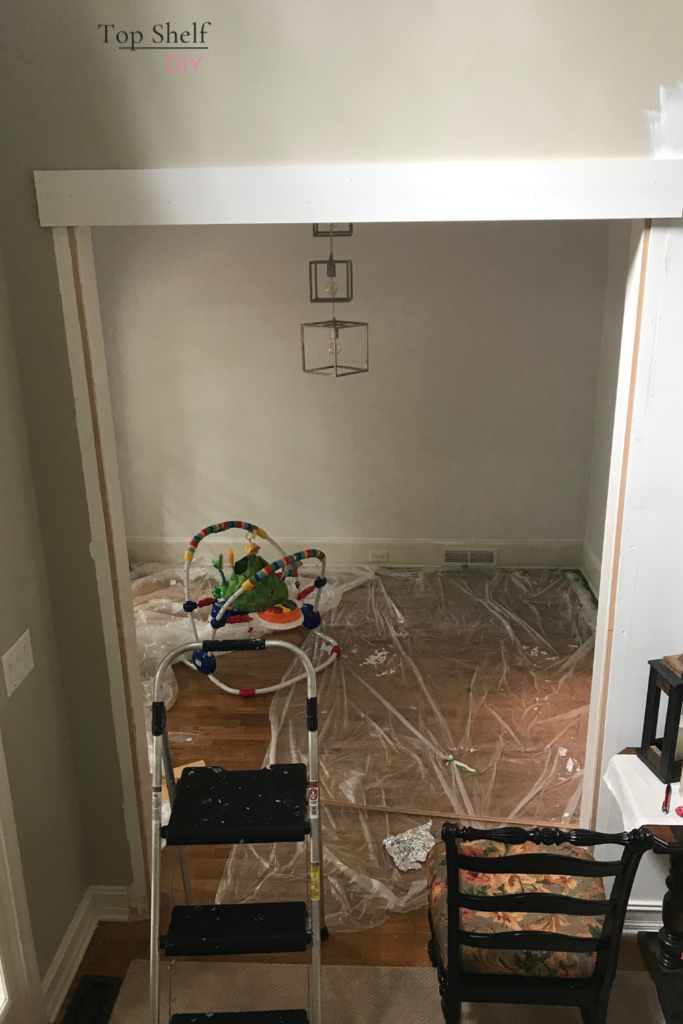
Beefing up the interior doorway entailed a lot of little tricks – kind of like a Criss Angel mindfreak of the interior design world. To recap, here's what the doorway looked like when construction began.
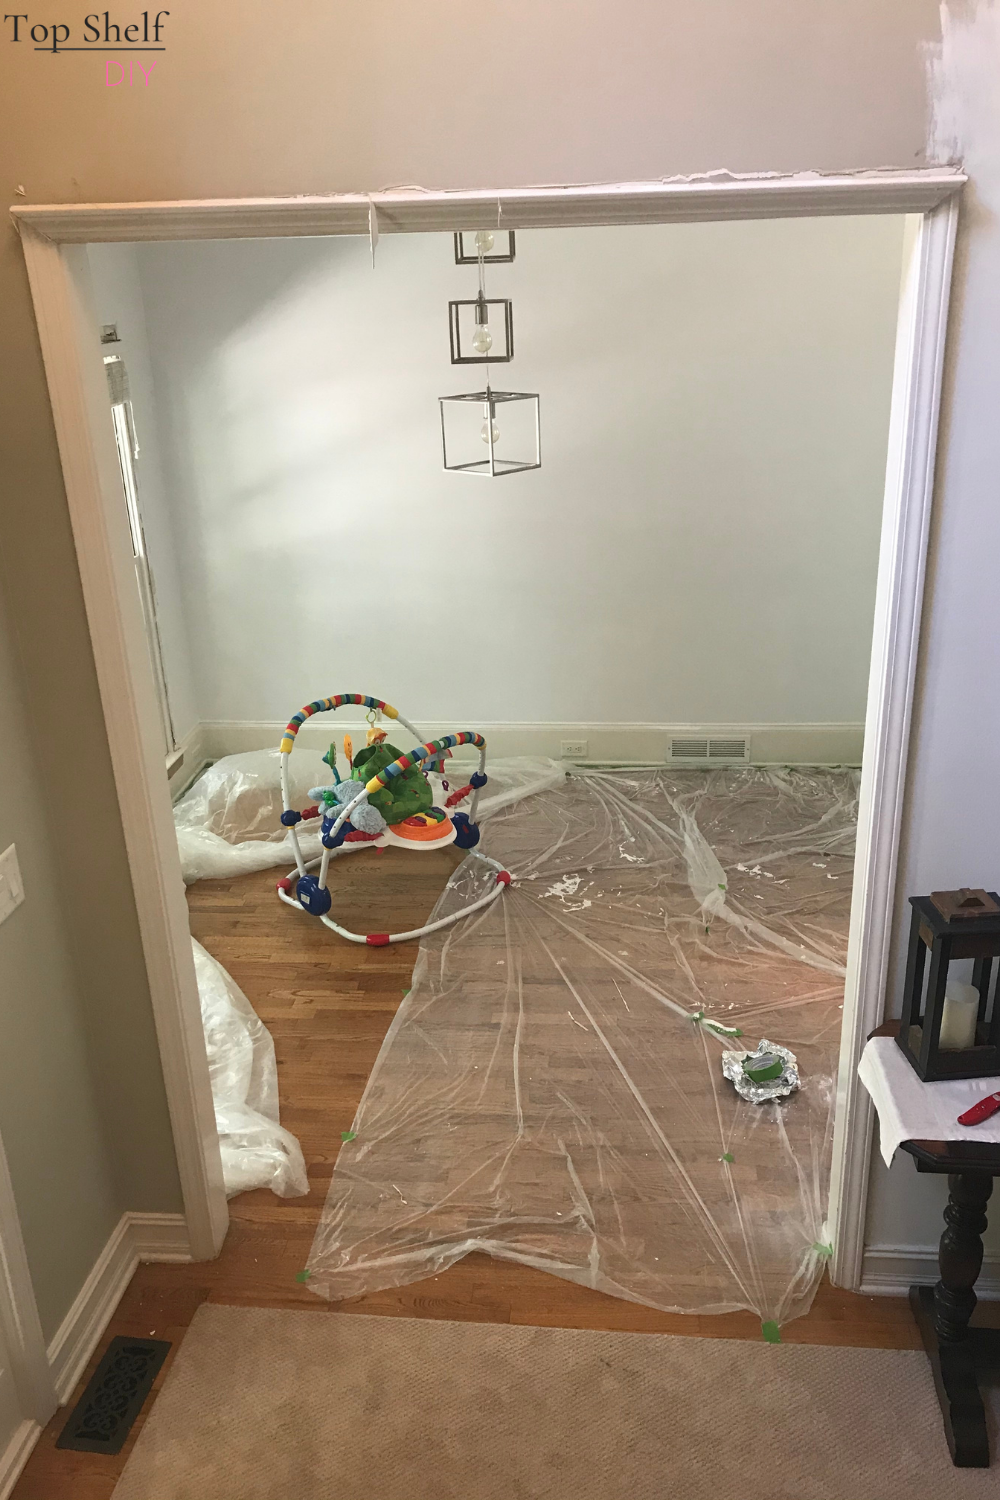
So I ripped off the builder grade trim. Per usual, my husband thought I was nuts. But I saw the potential for bigger and better, especially after being inspired by Cristina Garay's doorway renovation over at Remodela Casa.
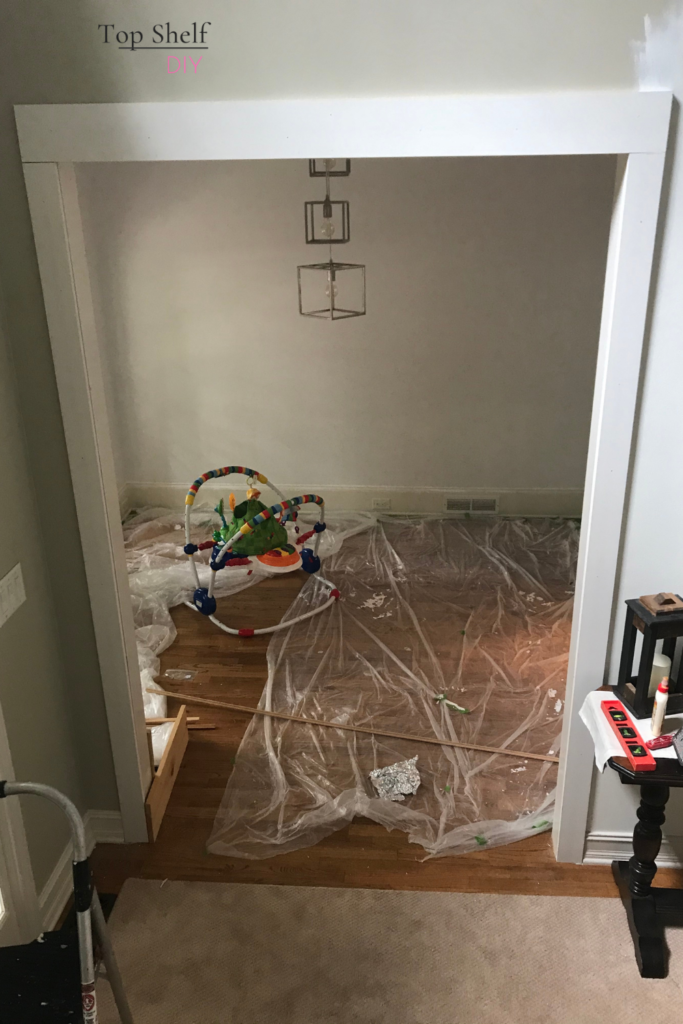
Here's what the backside of this same doorway looked like before construction.

My process was very slow due to my infant son dealing with reflux and my own severe sleep deprivation. But it's done and that's what matters.
Interior Doorway Trim: The Install Process
*This post includes affiliate links -- girl's gotta eat!*
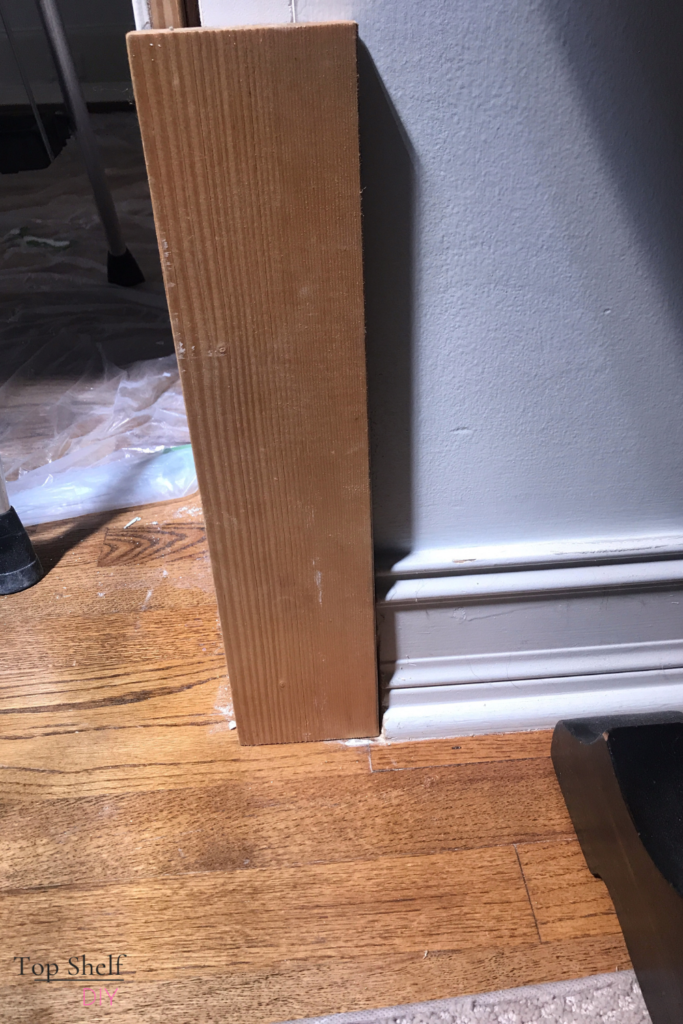
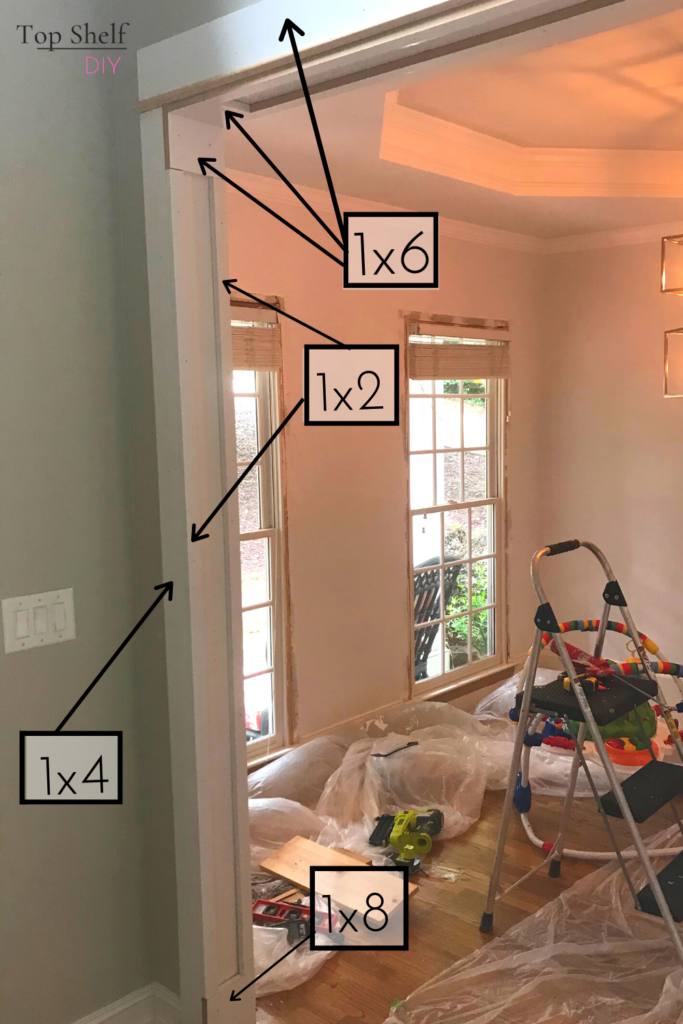
I started by using my Ryobi multi-tool to cut away some of the existing baseboard. I needed to make room for new 1x4 MDF. I used a piece of scrap pine to make sure I was trimming away the correct amount.
Then I built a header out of a 1x6 MDF. I made sure the board was as wide as the doorway + 7" (3.5 inches for the 1x4 on either side).
Next I added the 1x4 rails to either side of the header with wood glue and 2" brad nails. It was already looking so much better!
Then I added ogee trim along the lower edge of the header, making sure to cut the sides at 45-degree miters. I secured with wood glue and brad nails. If you have a pin nailer this would be preferred -- less damage to the surface of your wood.
Once you're done nailing your trim you can cover up those holes with good ol' spackle.
I cut a piece of 1x8 MDF to match our pre-existing baseboard inside the dining room. The sides of the doorway opening consist of pre-primed 1x2 boards. Like Christina, I added a small piece of 1x6 to the end of each 1x2.
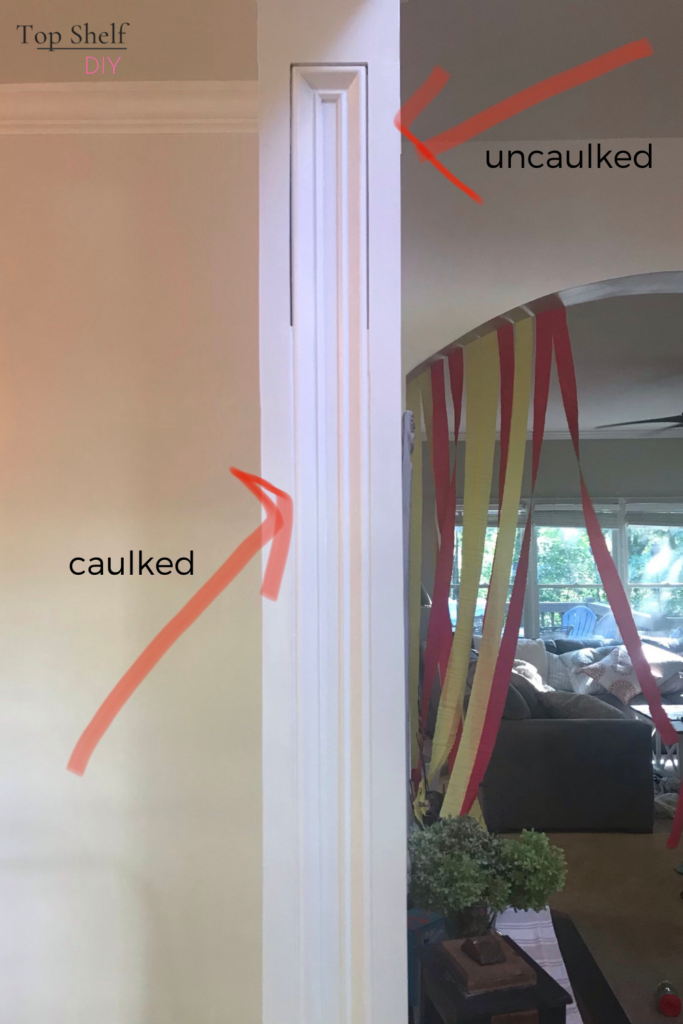
Then I added base cap between the 1x2 boards inside the door way. You can see here the line of separation between where the trim has been caulked and left raw. Caulk makes a huge difference!
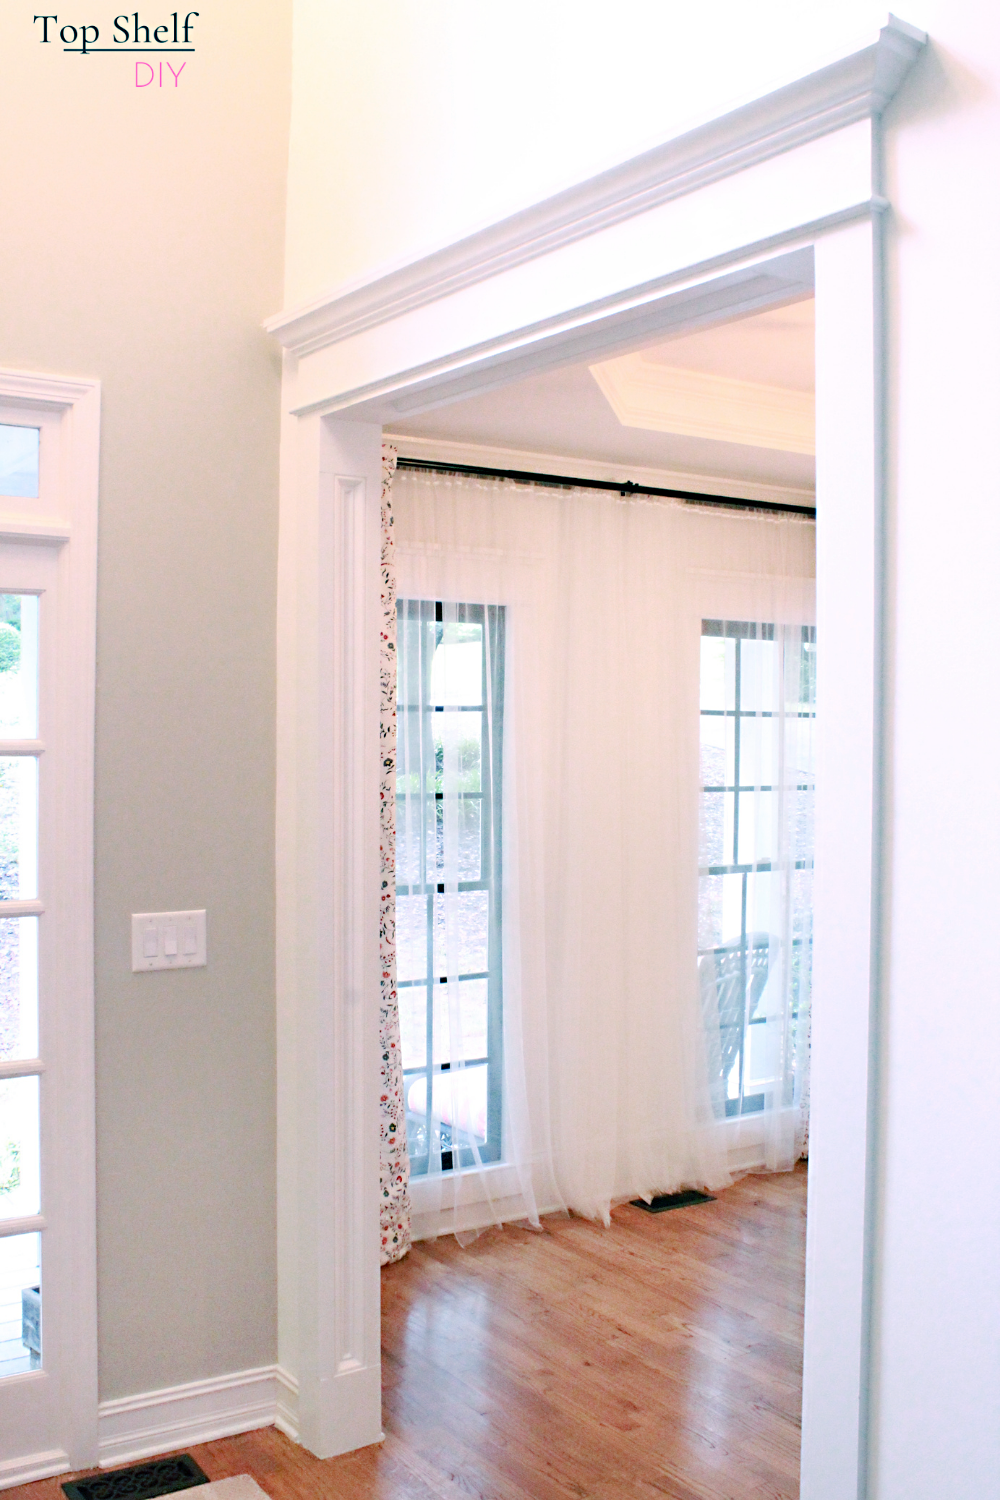
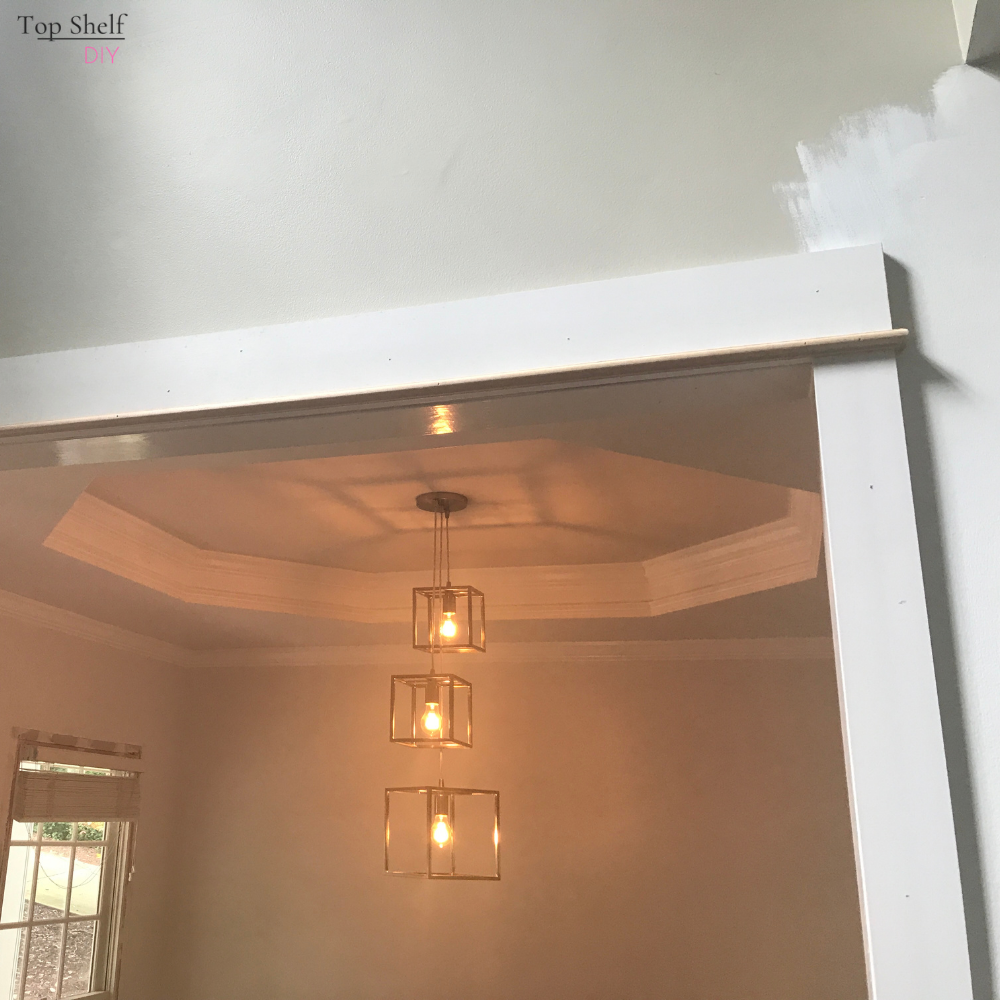
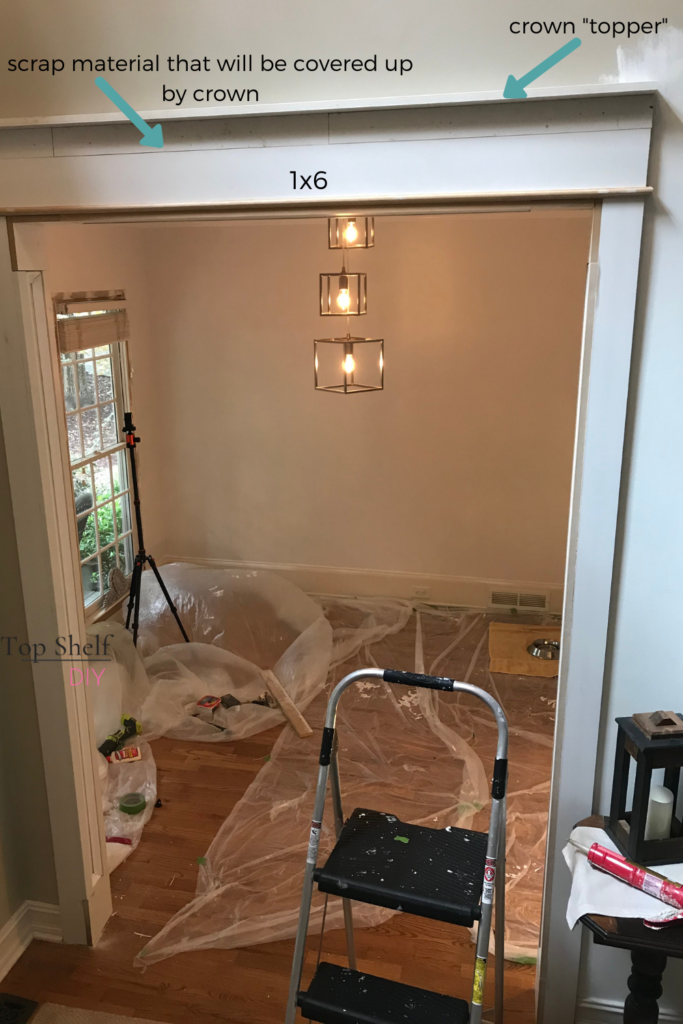
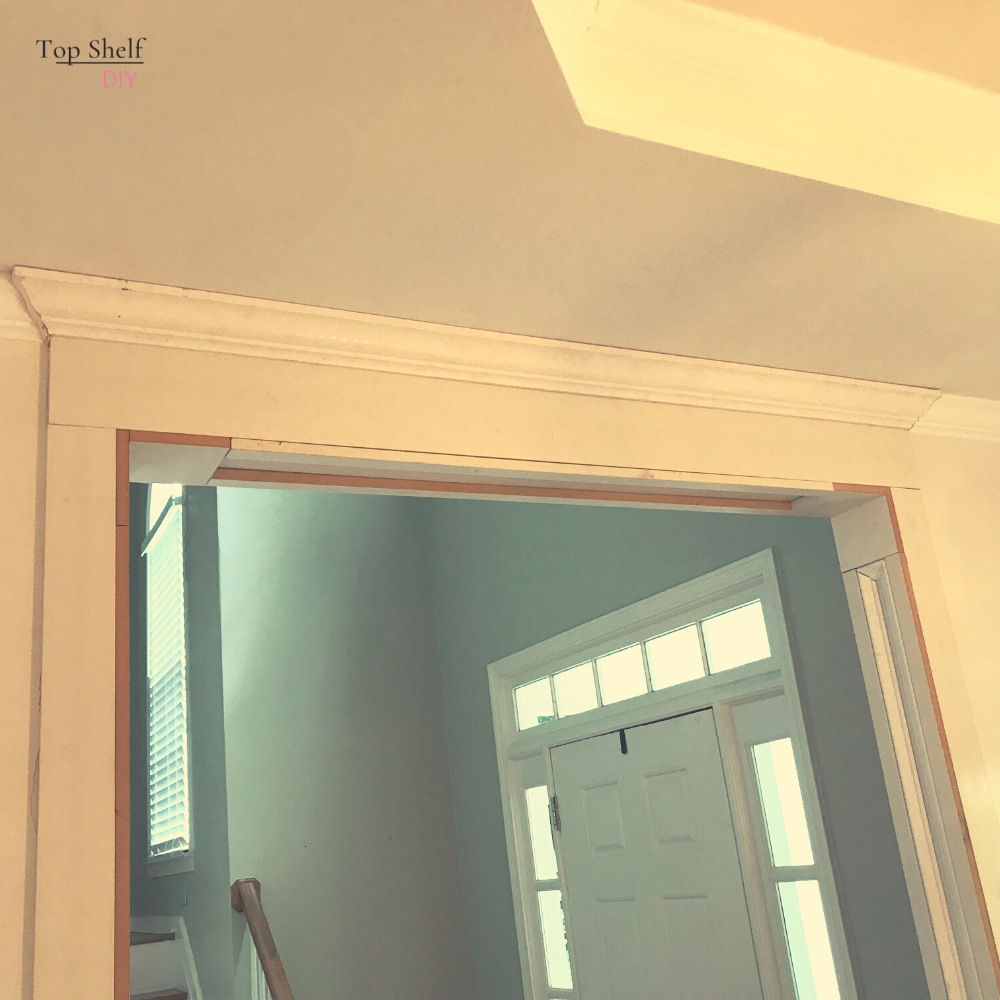
Next came the crown molding on either side of the doorway. The foyer side of the header was a bit tricky because the ceiling is really high -- like 15 feet or so. I needed to create a crown "topper" because you could totally see down into the crown from the landing upstairs.
What I did was build up the header a bit using MDF scraps ripped to 2 3/8" wide. I topped this with a piece of 1x scrap wide enough to cover the spring angle of the crown molding (i.e. how far it juts out from the wall).
Don't worry, I took a million photos of this too 🙂
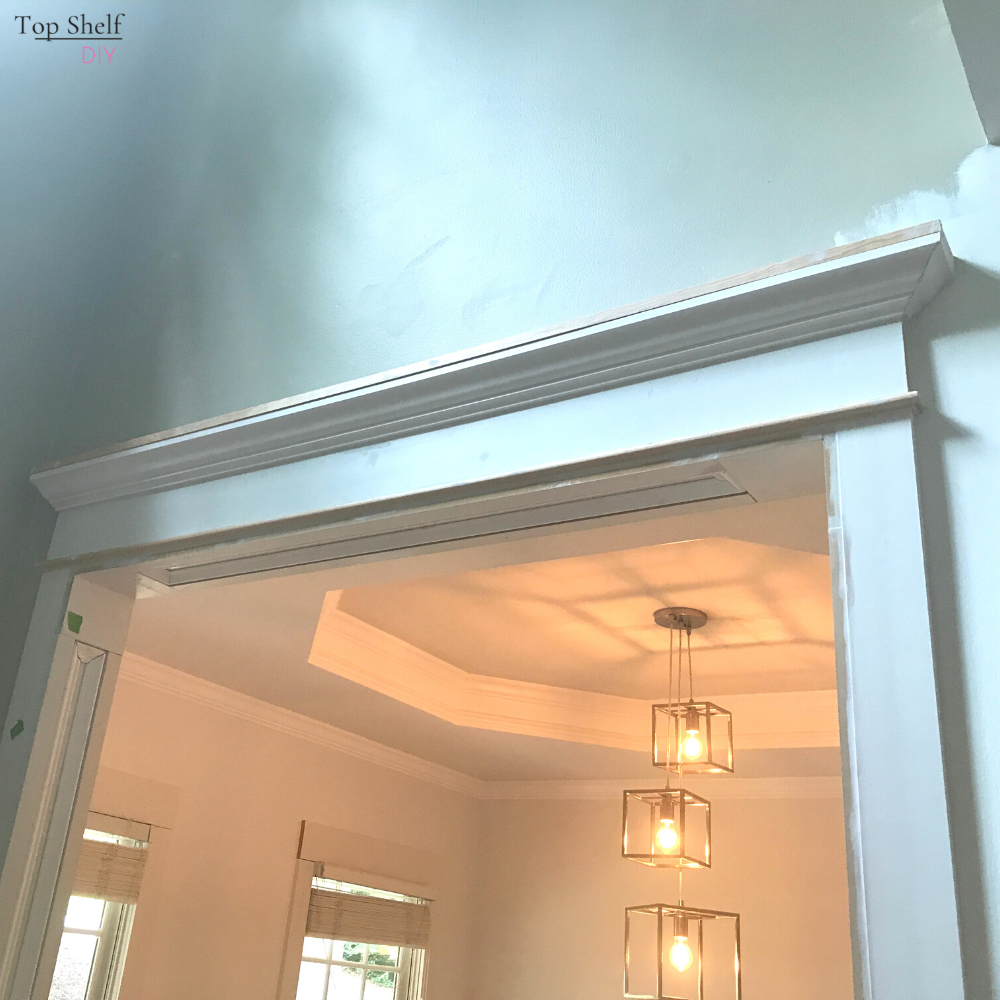
Here's what the header looked like once crown was added. I had to add another piece of scrap to the "topper" since it didn't quite run all the way to the edge of the crown. It was an easy fix, though.
The sides of the crown were mitered at 45-degrees. You won't want to use a nail gun for the sides since the impact will likely destroy your little corner piece. I simply attached with wood glue and a few pieces of frog tape. Let dry overnight and remove the tape.
Now I could move on to the other side of the wall, windows, and kitchen doorway!
Attaching the Dining Room Trim
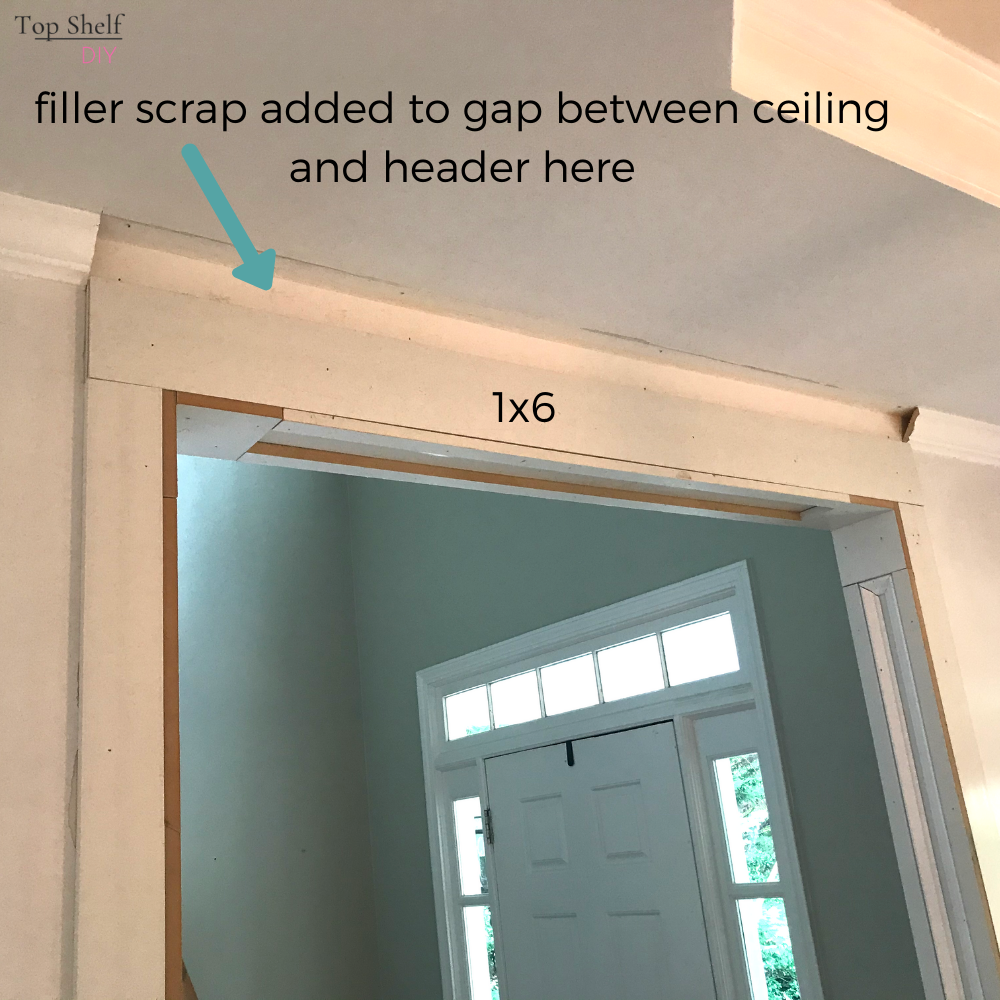
The crown was much easier to attach on the other side since I had a ceiling to work with. I started by removing the existing crown with my handy dandy multi-tool as before. Then I added a piece of filler scrap between the ceiling and the header (indicated below).
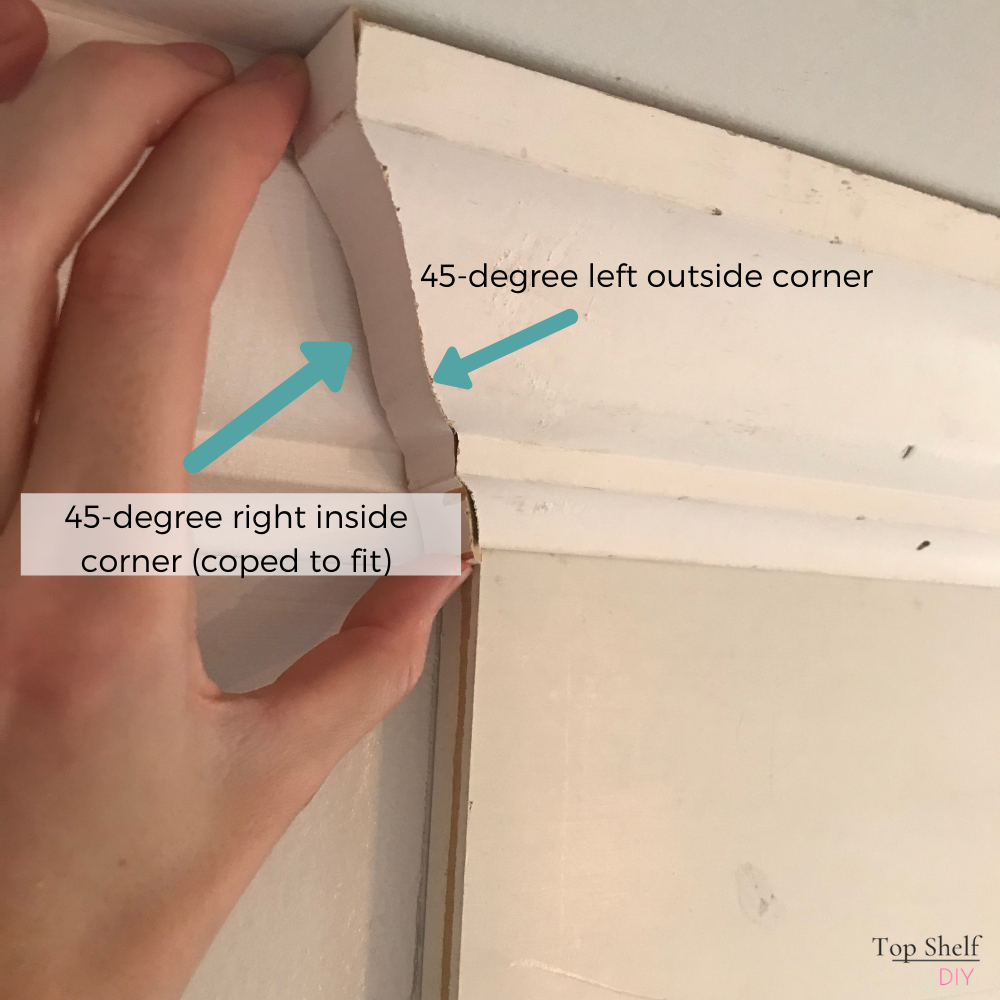
The crown was secured to the ceiling and wall with 2" brad nails and Liquid Nails construction adhesive. The only tricky part was cutting the teeny tiny corner pieces at 45 degrees.
Here's what the inside corner looks like on the left side. Basically the tiniest piece of crown I've ever cut. You'll want to start with a nice long piece to protect your hands from the miter saw blade. Cut your right inside corner first, cope it with a coping saw, then cut the left outside corner while your piece is still long.
Related: Six Essential Tools for a Seamless Crown Molding Install
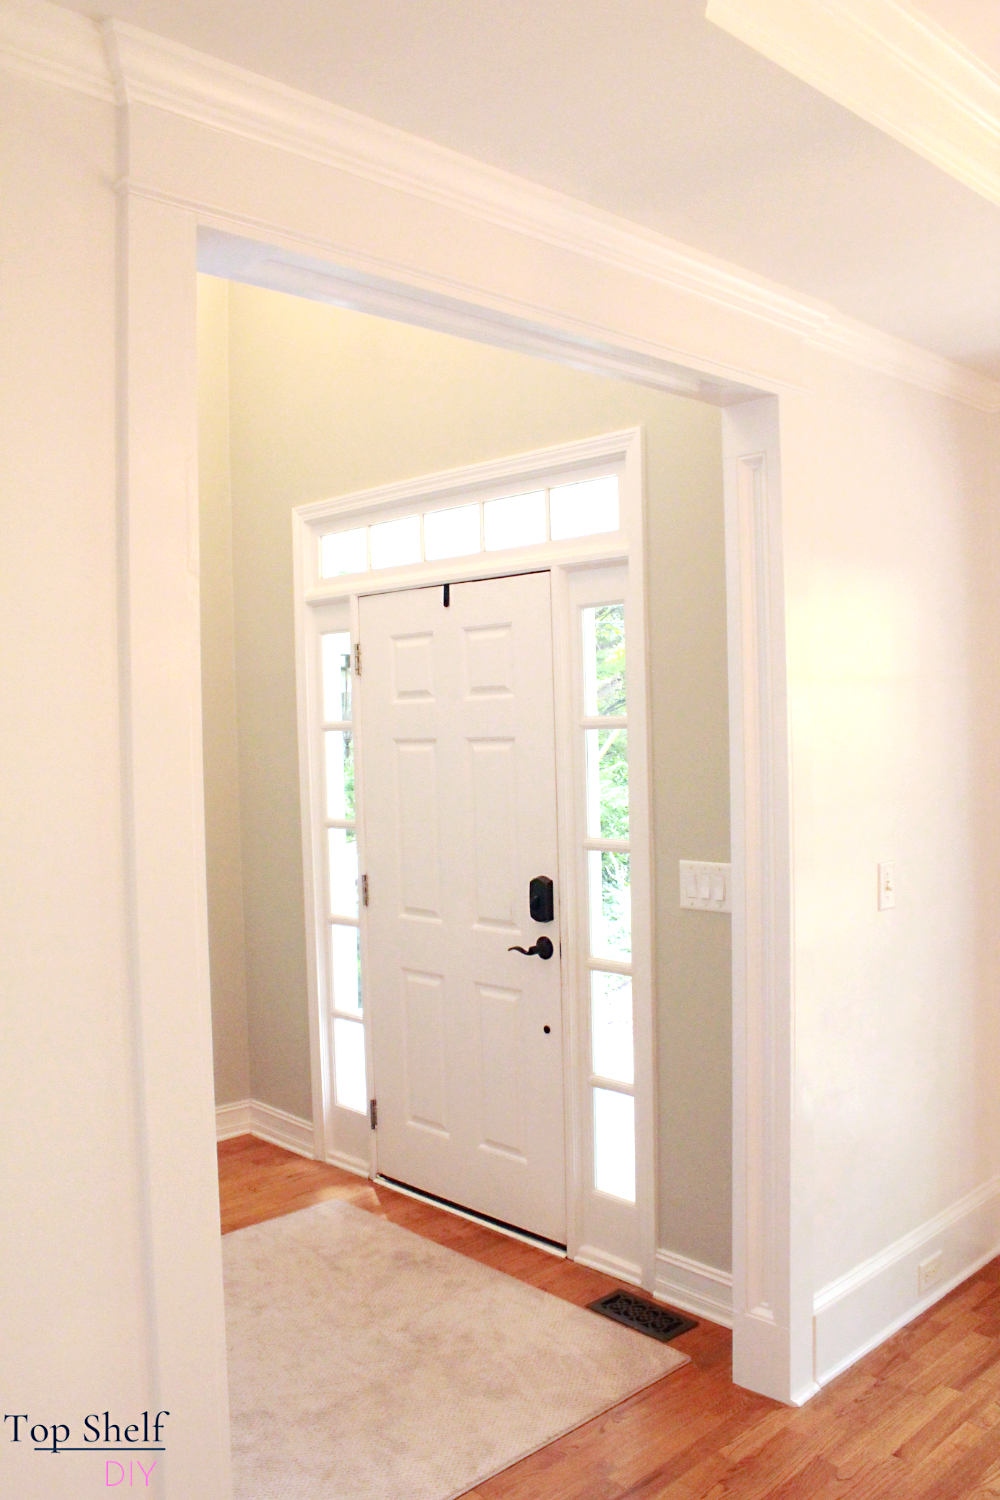
This is how the opposite side of the doorway was looking before caulk and paint. It honestly looked like it was always meant to be there!
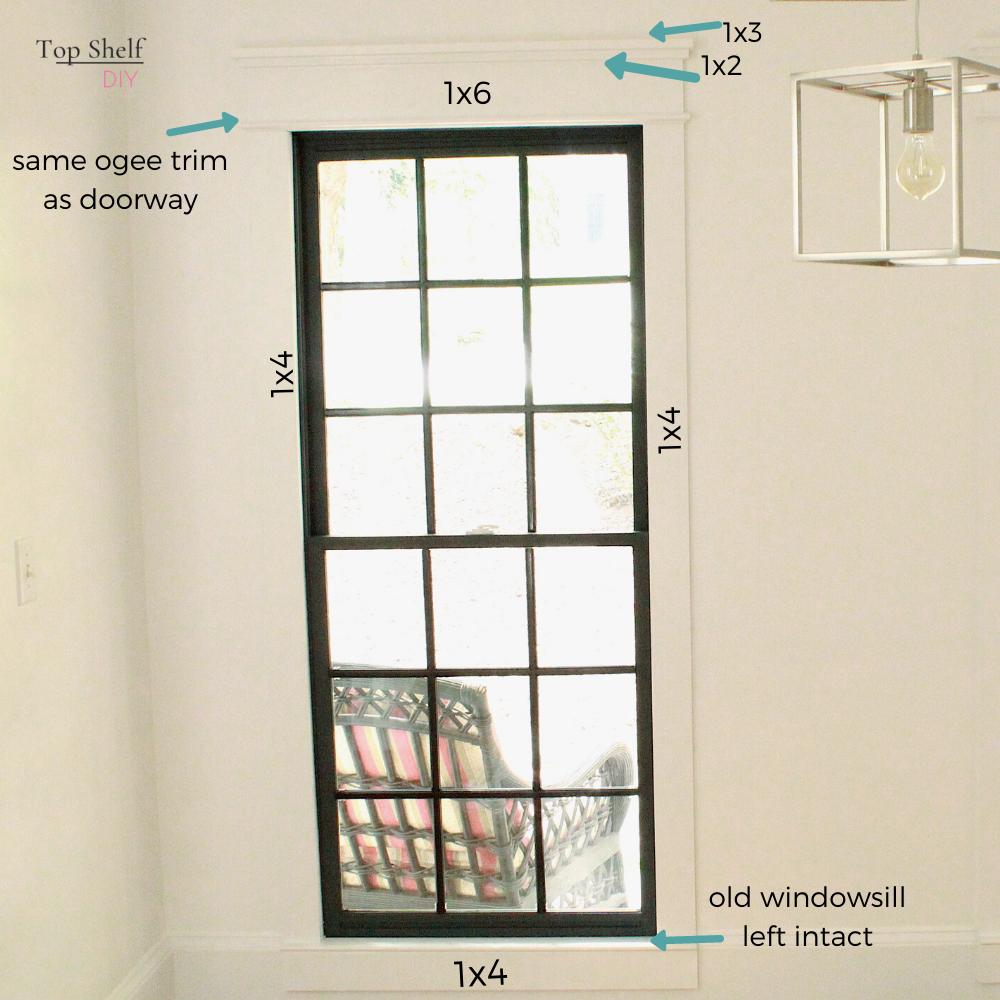
Adding the Window Trim
Now we're in the final stretch. I decided to keep things straightforward with the window trim. No more crown molding, thank you very much. Here's the piece breakdown.
Related: Four Different Ways to Achieve Craftsman Trim Windows
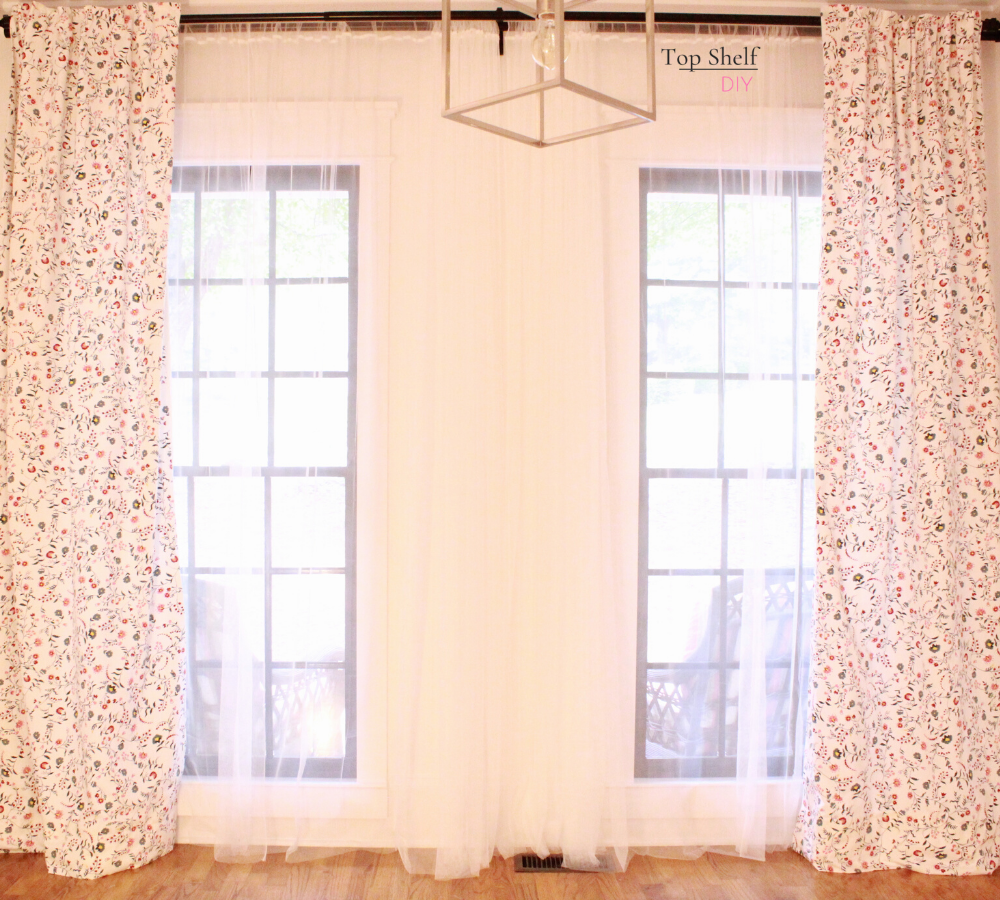
I caulked all the seams and filled in the nail holes with spackle. Everything got a coat of semi-gloss white paint. I removed the cheap blinds, painted the casing black, and added custom lined Ikea curtains for privacy.
There's another doorway leading to our kitchen that I trimmed out exactly like this window (minus the windowsill and apron). I'll spare you the details.
Looking for more project inspiration? I created a free guide to 10 Easy Handywomen Projects that can be completed in a weekend. We're talking easy peasy here – like fixing the holes your kids put in your drywall when they were messing around. You can impress your mother-in-law the next time she comes to visit. Just saying.
Cheers,
Erin

Erin, it looks ten thousand times better than what you had there before! Love all that yummy trim and your black windows are awesome too!
Thank you so much for allll your help.
Hi Erin,
Nice job!! What type of trim did you use on the inside of the opening between the 1×2 rails and the 1×6 caps
Thanks Curt! It's a simple base cap molding.
Did you caulk and then paint the trim once it was all up? If so, how did you paint it? Or did you paint it first and then caulk after?
I caulked wherever there was a seam between the trim and the wall. Used wood filler for nail holes. Sand smooth and then give everything a coat of paint!