Make and install office cubby dividers for less than $20!
I'm so excited to share our upcoming His and Hers Farmhouse Office reveal, which started...um, well...back in July.
Right now I'm in the Organization Phase meaning it's ALMOST. DONE!!
I'm working on shelving, shelving, and more shelving...which seems oddly appropriate considering the name of this blog.
Anyway, I'm a HUGE Ikea fan, but if you have a generic cube unit from a different store you can apply the same instructions. Just be sure to measure the inside dimensions of your cube and adjust accordingly.
I basically made a few dividers out of scrap wood lying around in my garage, and I couldn't be more pleased:
.
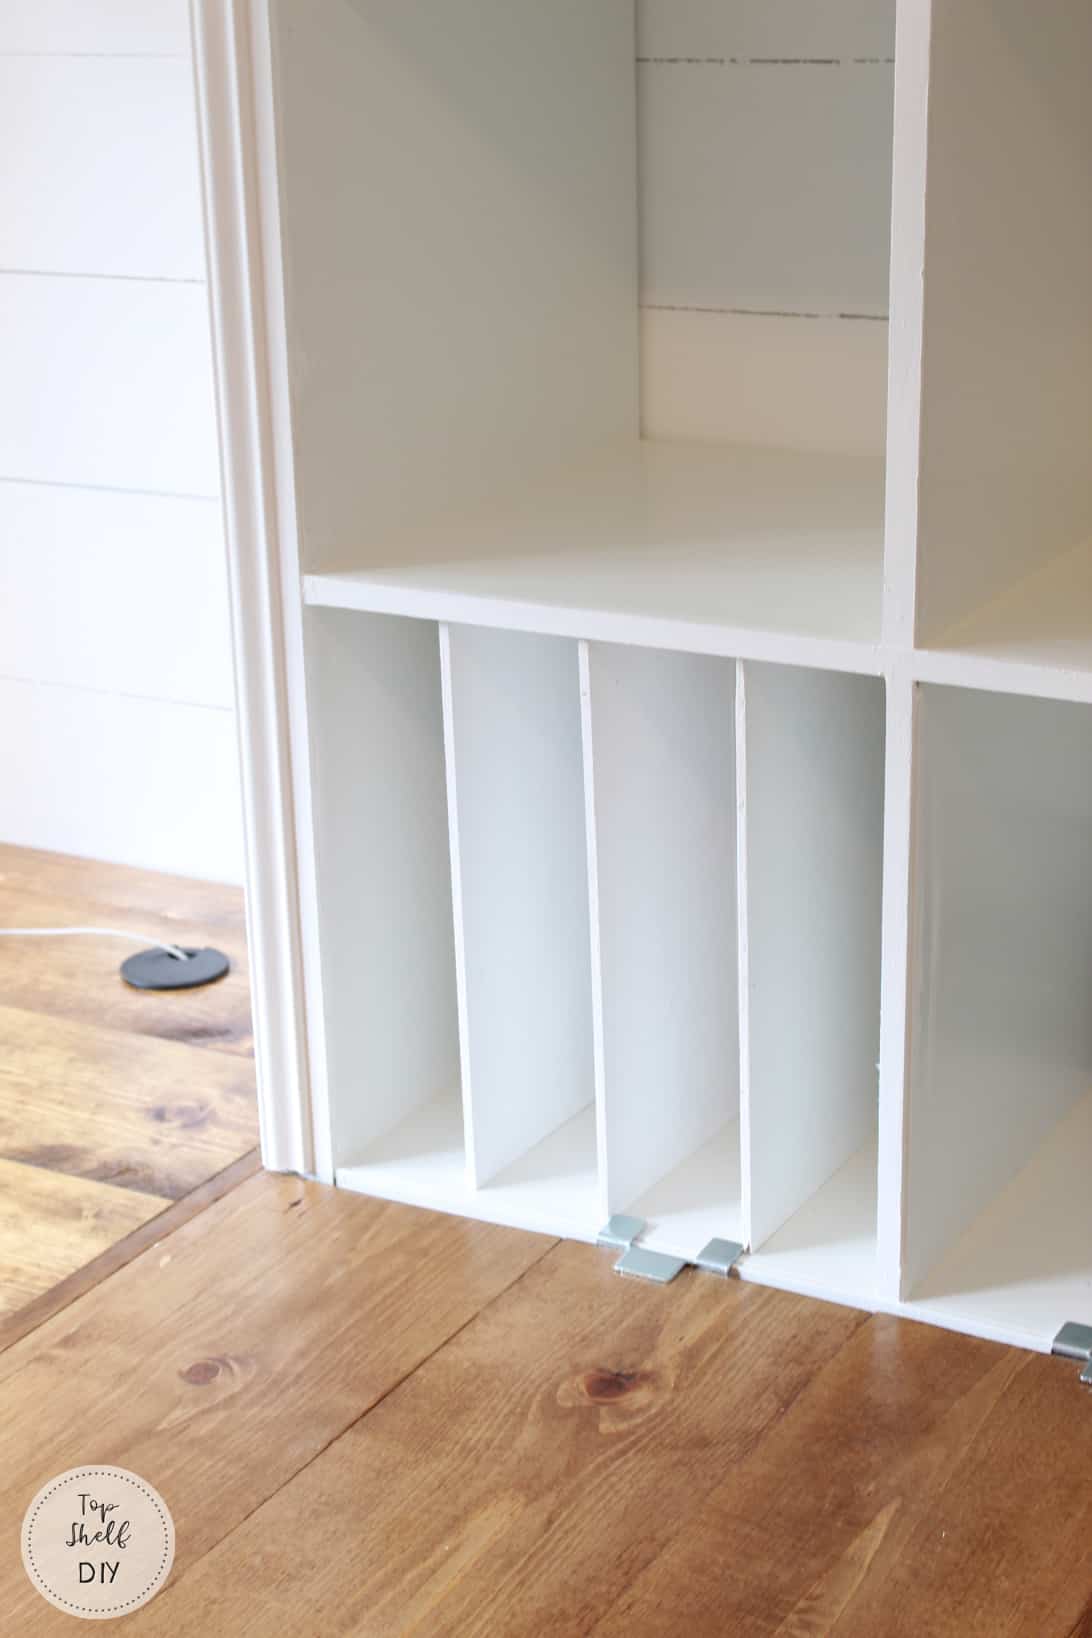
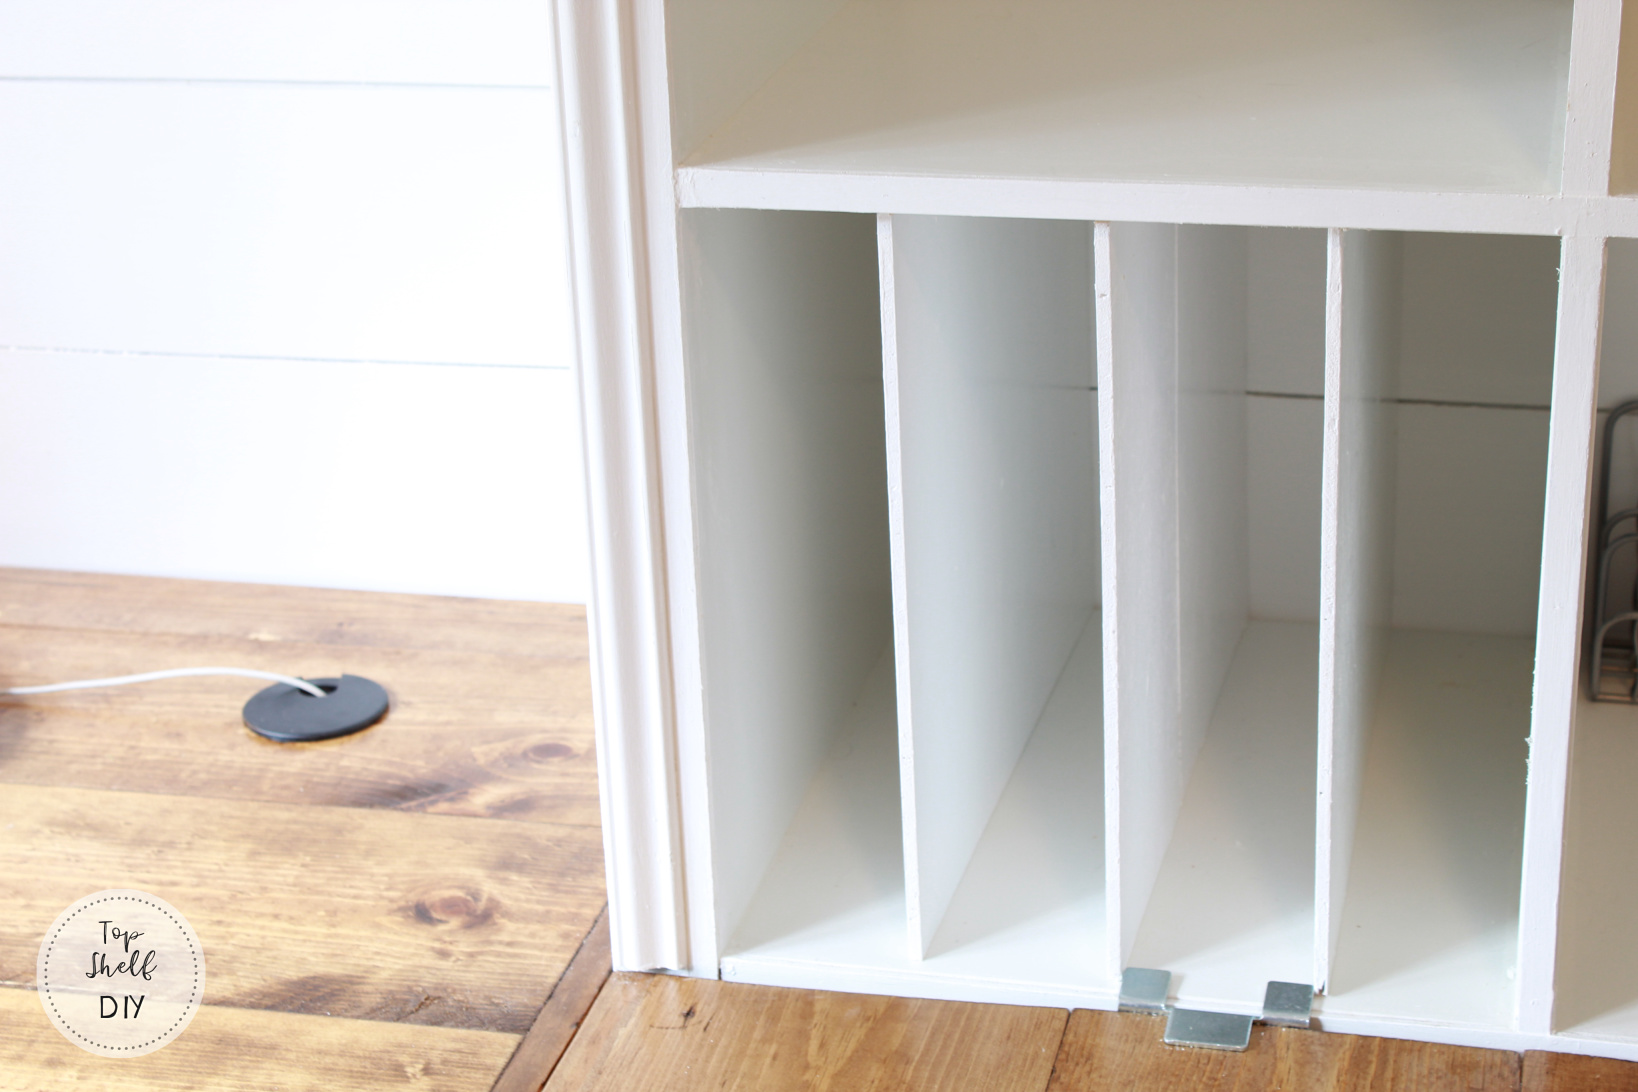
If you bend down and look inside, you'll see my secret slot system in place:
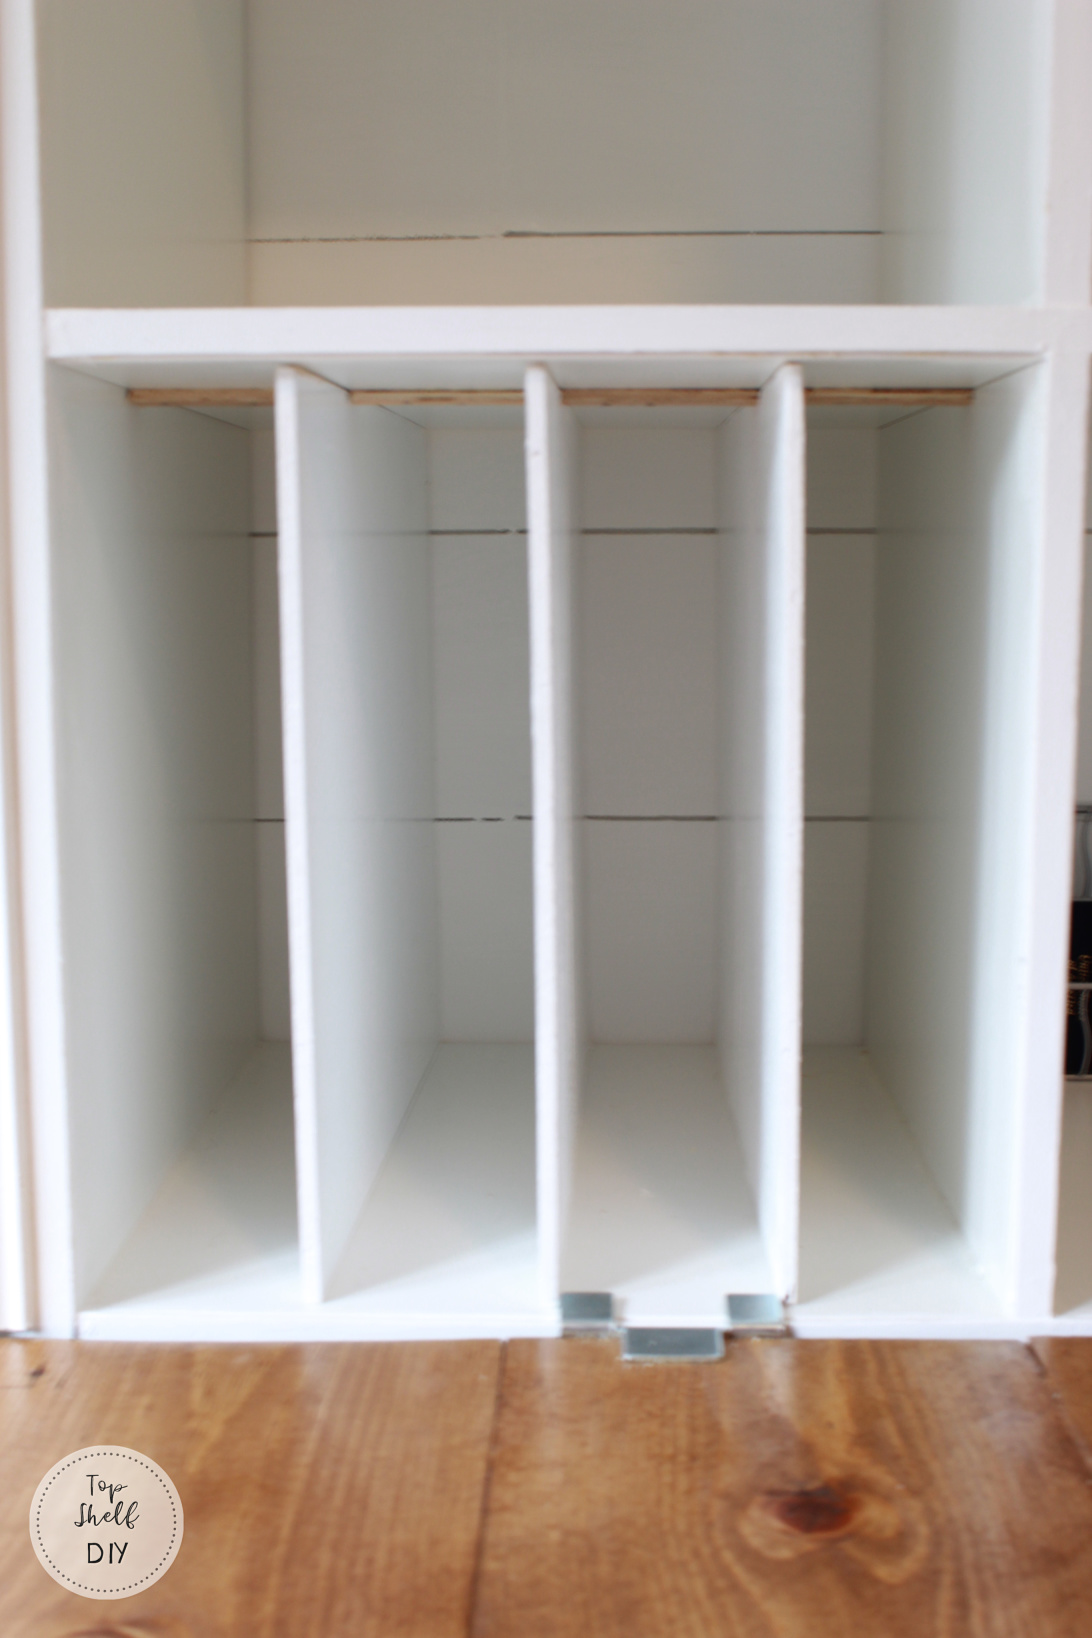
But from a standing position, all you can see is this:
.
Pretty groovy, eh?
Here's how I made these sweet little dividers.
Disclaimer: this post includes affiliate links, which means I may earn a small commission should you decide to purchase any of these supplies.
Shelving Unit Supplies
- one Ikea KALLAX unit (mine is actually a 4-unit Kallax stacked on top of an 8-unit Kallax)
- one 4ft x 8 ft sheet of 1/4" plywood (this is enough to make 21 dividers).
- paint (optional); I used Ultra White Behr Semi-Gloss
- scrap wood for your slots: mine are 1/4" plywood ripped to 1 inches wide, but lattice or quarter round would also work.
- hammer
- #18 x 3/4 nails
- wood glue
- table saw
- miter saw (not required but helpful)
.
Cutting Your Shelf Dividers
Using a table saw, cut your plywood into 15" x 13 1/4" squares. If you don't own a table saw, ask the guys at Lowe's to cut your pieces for you. I found it helpful to have a miter saw because I needed to trim the edges a bit to get them to slide in juuuuust right. They were actually trimmed closer to 13-1/8" once all was said and done.
Now see if your squares slide into your cube. You can always sand the edges a bit if they don't slide in perfectly.
.

.
Give your dividers a coat of paint if you like. While they're drying, grab a pen and paper for some math fun.
And by fun I mean torture, 'cause I hate math. But passion breeds excellence as they say, so I'm getting pretty good at fractions these days.
.
How to Make the Slot System for Your Dividers
Keep in mind these numbers will vary based on the size of your cube, the width of your divider wood, and how many dividers you're planning to insert. Simply take my formula and apply it as needed!
- For vertical dividers like mine, measure the width of your cube. If you're inserting horizontal dividers, measure the height of your cube.
.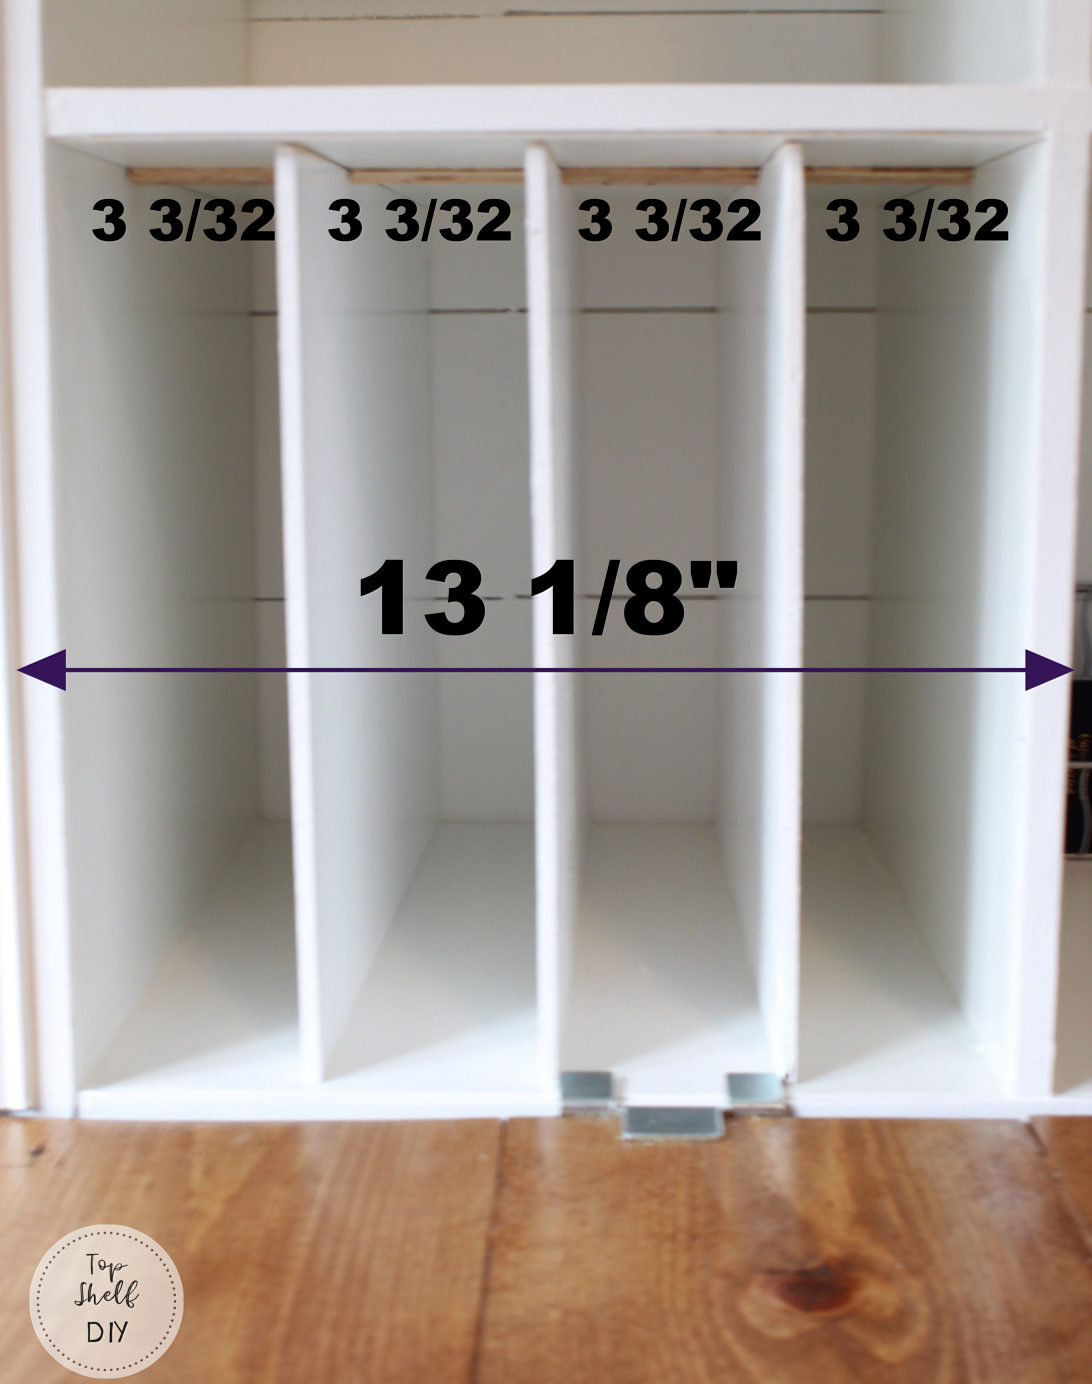
. - Next, take the total width of your divider wood and subtract that from the width of your cube. I had three dividers of 1/4" so I subtracted 3/4" from my opening of 13-1/8". This left me with a remaining opening of 12-3/8 (also known as 99/8).
. - Take your width opening figure and divide that by the number of slots. For me, I had four slots between my dividers. I divided 12-3/8 by 4, which gave me 3-3/32.
Fraction form: 99/8 x 1/4 = 99/32 or 3-3/32.
.
4. Now cut your scrap pieces to the length you just calculated. My scrap pieces were about 1" wide.
.
5. Do a test fit with your dividers once they're completely dry. I let mine dry overnight.
.
Slot System Installation
- To install your little scrap slots, simply apply a small bead of wood glue and then secure them in place with a couple of nails.
.
Each divider should easily slide in and out of your slots. If not, trim the edge of your wood just a wee bit.
.

.
I am so excited to add more of these to my other cubes! If you're like me and have trouble fitting your 4x8 sheets of plywood into your car, here's a helpful tip from Jennifer Maker:
.
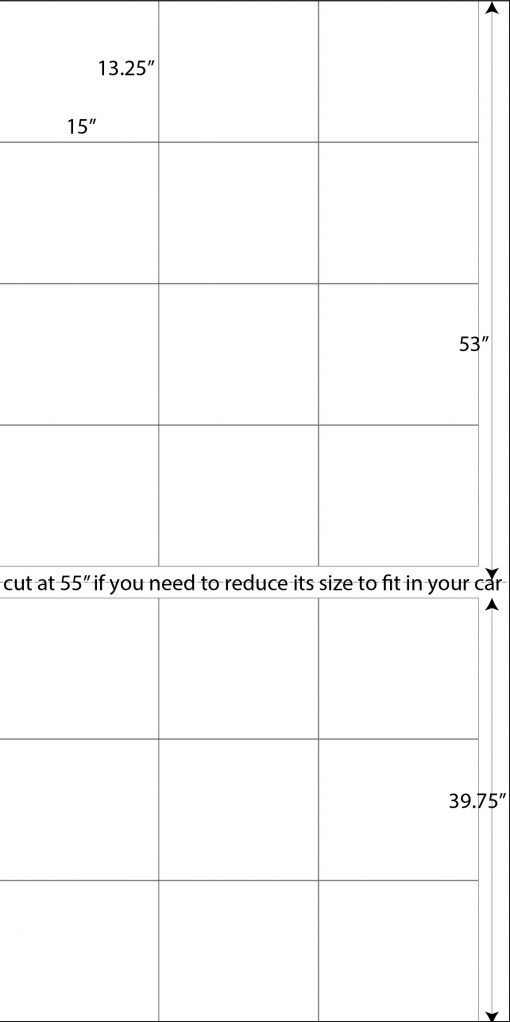
Ask the Lowe's guy to cut it at the 55" mark so you don't waste any wood.
I finally invested in a table saw after dealing with rough, splintery, inaccurate cuts from the Lowe's cutter time and time again. But if I need to get a big piece home it's to the cutter I go!
I hope this helps you organize your craft space, kid's playroom, library, or anywhere else you decide to use the versatile KALLAX shelving unit ♥
Cheers!
Erin

I just love your tutorials on storage. This storage ideas is the best one
I have seem. Thank You.
You are very welcome!
Could you tell me how you fixed the bottoms of the dividers please?
This is great! I could do it horizontally to split my cubes
FANTASTIC! can't wait to make my own ! Thank you !!!