I've got a dealer, and I'm not ashamed.
Her name is Kathy and we met on Craigslist.
She's about 60 years old, 5-feet tall, and she's got a horde of wine crates like you wouldn't believe.
I have her saved as "Craigslist Lady" in my phone.
I met her a few months ago when I was trying to buy a French Provincial night stand. I noticed she was trying to get rid of some wine crates, and although I had no idea what I'd do with them at the time, I bought 4 of 'em.
Last week I used one of those crates to make a Farmhouse Tool Caddy in my 7 Projects in 7 Days Challenge.
To recap, my challenge was to use only what was already in my garage over the course of 7 days. My mission: make one project every day for an entire week.
.

.
Here's what I made from them:
Day 1: An Oily Shelf (get the full scoop here)
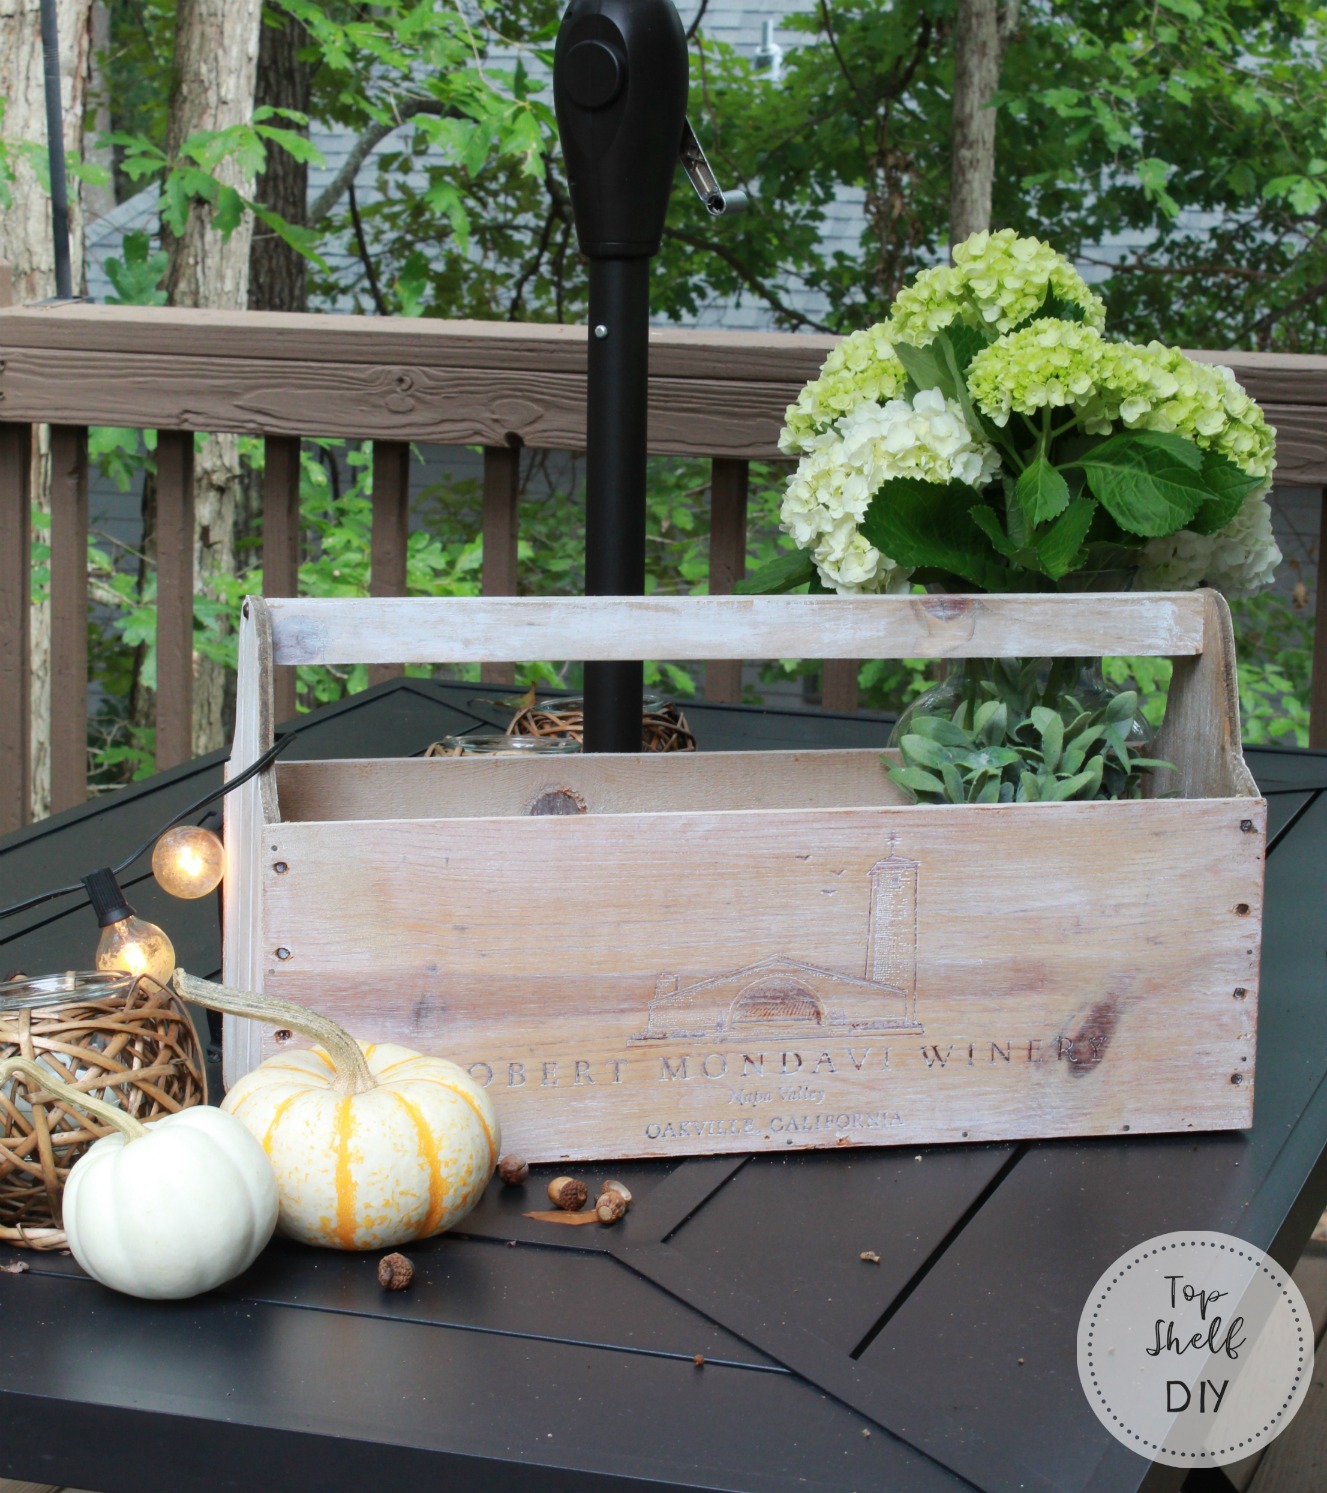
Day 2: A Farmhouse Tool Caddy
Day 3: A Decorative Vase
Day 4: A Herringbone Tray
Day 5: A Lantern
Day 6: A Drop Leaf Table for my son's play kitchen
Are you ready for it? She's a dreamboat...
.
.
I love the vintage look and this caddy is big enough for silverware, votives, branch decor, lights...the list goes on! Once I figured out the shape of the side profile, this Farmhouse Tool Caddy was really quite easy to make.
Sorry I don't have a real dining room table right now to showcase this Lovely -- we sold ours when we moved last year 🙁 Another dream project, another day...
Here's the recap.
How to Turn a Wine Crate into a Farmhouse Tool Caddy
Supplies:
- one wine crate
- a reciprocating saw or jigsaw for deconstructing your crate
- stain/paint of choice. I white washed this caddy with watered down white paint
- beadboard (plywood underlayment would work too)
- nail gun (I use an 18v Ryobi)
- miter saw or table saw
- regular small nails + hammer
- Titebond wood glue
- two screws (for securing your tool bar)
- one piece of 1x2 cut to approx. 20" (adjust according to the size of your caddy)
- A template for your side profile (available in my Printables library, get the password by filling out the form at the bottom of this post).
Directions:
- Break down your wine crate to remove your side pieces. Hold onto the front, back, and underside.
. - Using a table saw (or a miter saw if you have a compound saw), cut your underside piece to the appropriate depth of your caddy (mine is 7" deep). Then reattach your pieces so it looks like this:
.
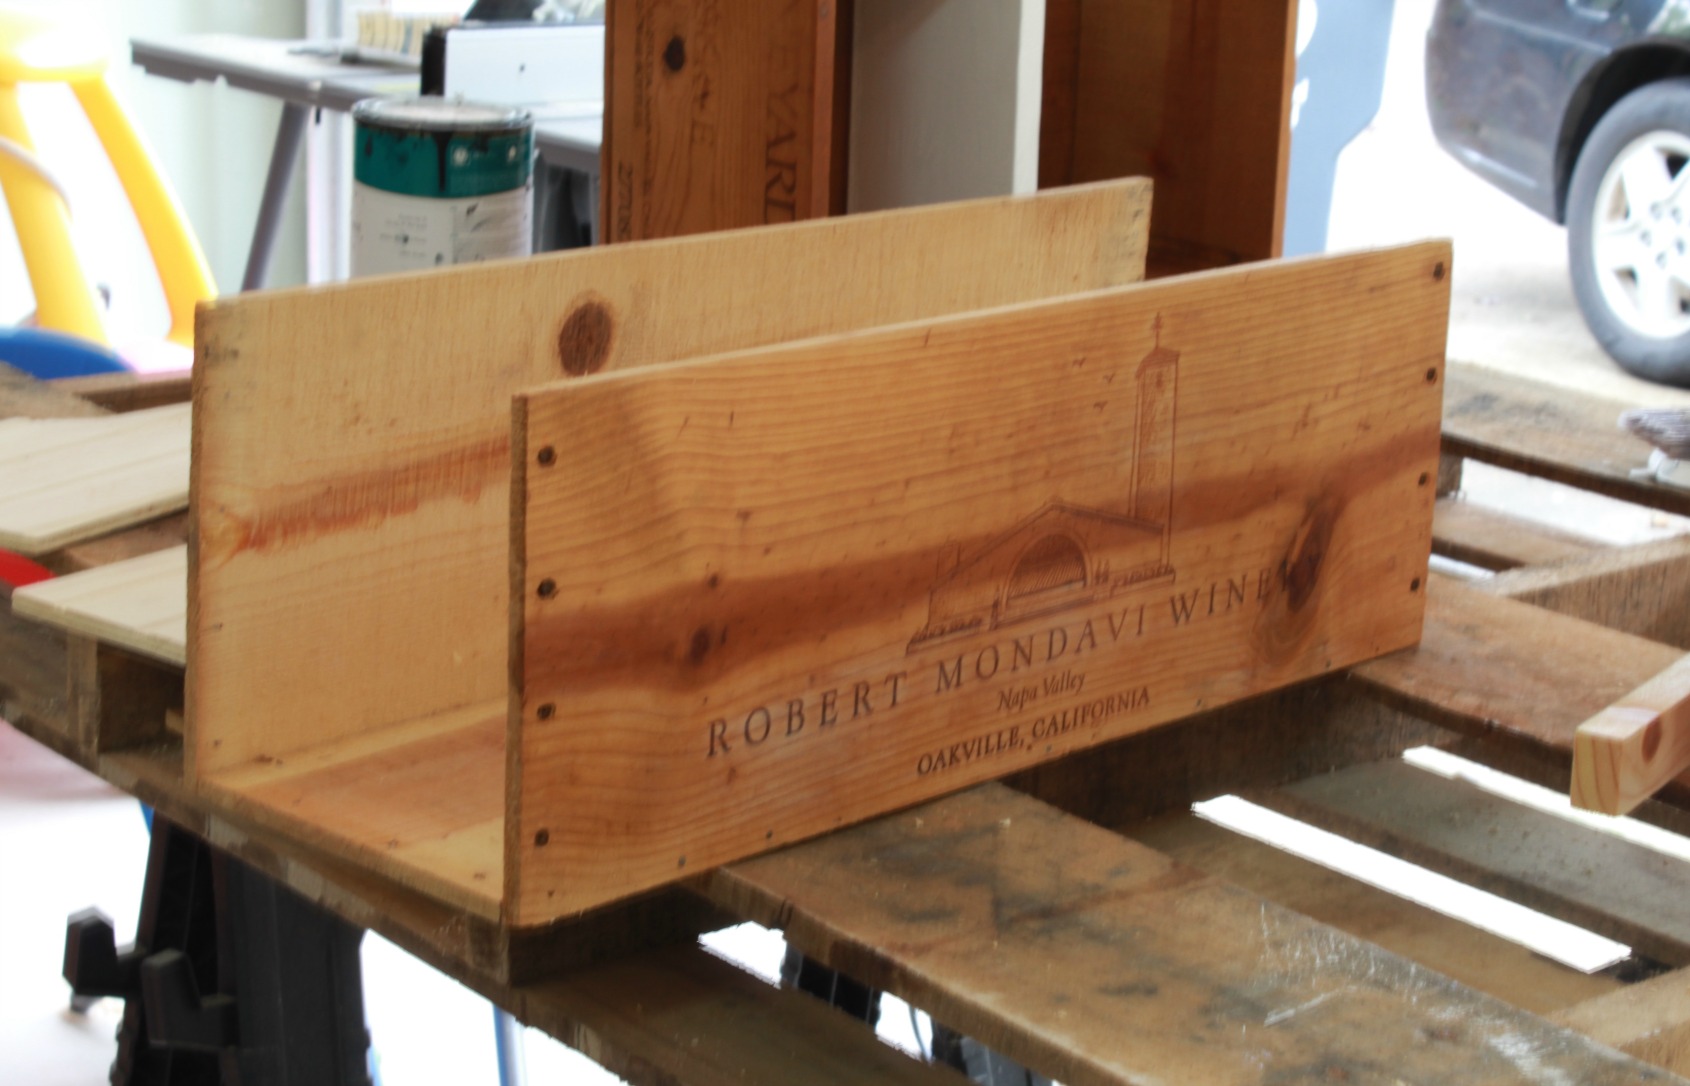 . My box is now 21" wide and 7" deep.
. - Next, cut out your side profiles, which will look like this:
.
 .
.
I've taken the guess work out of this process for you and saved my template to my Printables library! See the bottom of this post for details.
.
. - Trace your template twice onto beadboard (or plywood if that's what you have), then cut out with a jigsaw. Secure both pieces to your box with wood glue and nails. It should now look like this:
.
 .
. - Take your 1x2 and cut it to the appropriate length so that it just spans the width of your caddy. Mine was 20" long, but double check to make sure that is correct for yours.
. - Secure your bar to your caddy at the very top of your side profiles using wood glue and one screw per side. I actually used a Kreg Jig screw because it was an aged bronze color that matched the nails in front.
.

. - Lastly, stain or paint your piece in whichever way you prefer. I did a white wash on mine to give it a more unified, vintage look.
Total cost of this project: $6 for the wine crate, which I bought from Craigslist dealer months ago. Everything else was just scrap I had lying around in my garage. Can't beat that for an cheap DIY project!
Free Template for the Farmhouse Tool Caddy
Want to replicate the look above? Access my woodworking template by heading over to my Printables Library.
Directions: Print out template at 100% and trace it onto beadboard. For best results, cut out your profile with a fine-toothed jigsaw.
.
Cheers,
Erin

where do i get the template for the ends?
I apologize Gordon! If you head over to the menu item called "Printables Library" there will be instructions on how to access the template there.
Thanks I should have just looked a little more.