I like to think of crown molding as the decorative icing on my cake and shiplap as the rolled fondant holding everything together.
I’m no baker, but I’m pretty sure there's no such thing as too much fondant...or sugar. Same goes for shiplap.
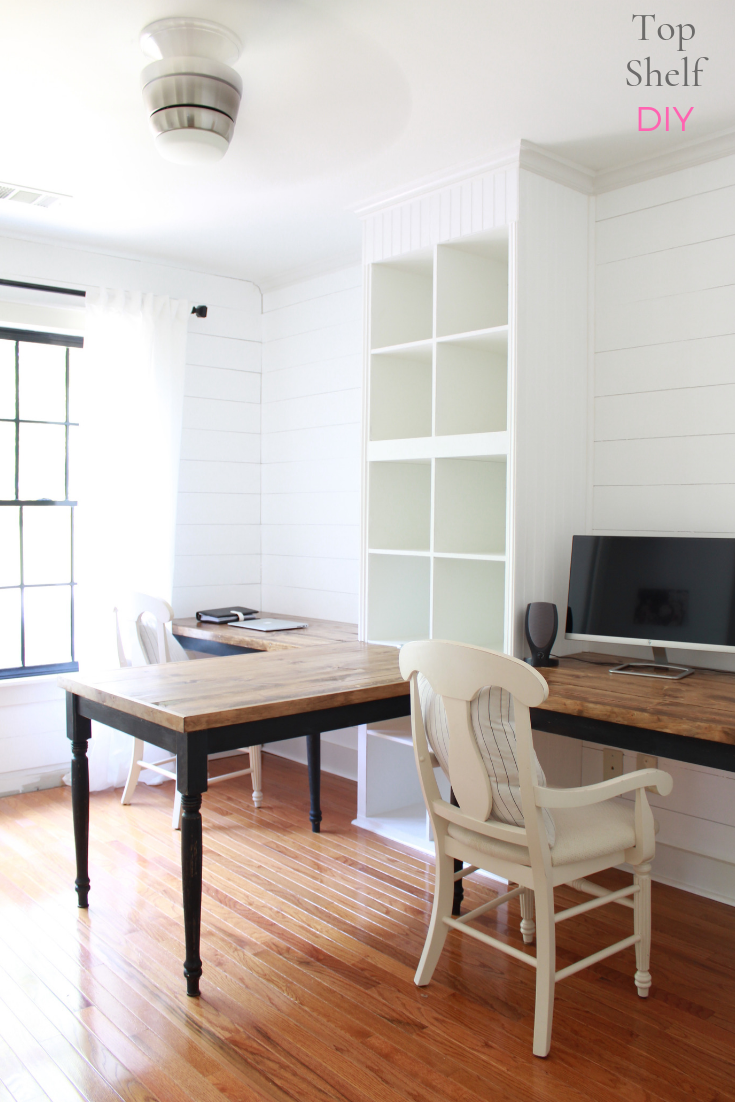
If you’ve been following my Farmhouse Office renovation, you may have noticed I recently installed shiplap for the first time.
Like any other project “first,” it was both scary and exciting. I’ve read so many shiplap tutorials over the course of my lifetime that I assumed everything would just go up quickly and smoothly…hahaha, silly me!
The bad news: I made at least 8 different mistakes during the two weeks I was installing and painting our shiplap.
The good news: I was able to fix most of them!
After receiving a lot of feedback from my readers, I'd like to add one disclaimer:
Many of these mistakes can be avoided if you install real shiplap boards rather than faux shiplap made from plywood underlayment.
Real shiplap boards are cut in a factory setting to a consistent width and have consistent spacing when installed. Plus, you can buy them pre-primed, which will save you many hours of painting down the road.
On the other hand, it's significantly more expensive when installed on a large scale; it's also much heavier than 1/4" plywood or underlayment, making it trickier to work with if you're doing this project alone.
When installed carefully, you can still enjoy the look of shiplap by going the "faux" route. I love mine and would do it all over again!
Avoid these 10 common mistakes when installing faux shiplap
Disclaimer: this post includes affiliate links, which means I may earn a small commission should you purchase any of the products recommended below.
1. Follow the correct order of operations
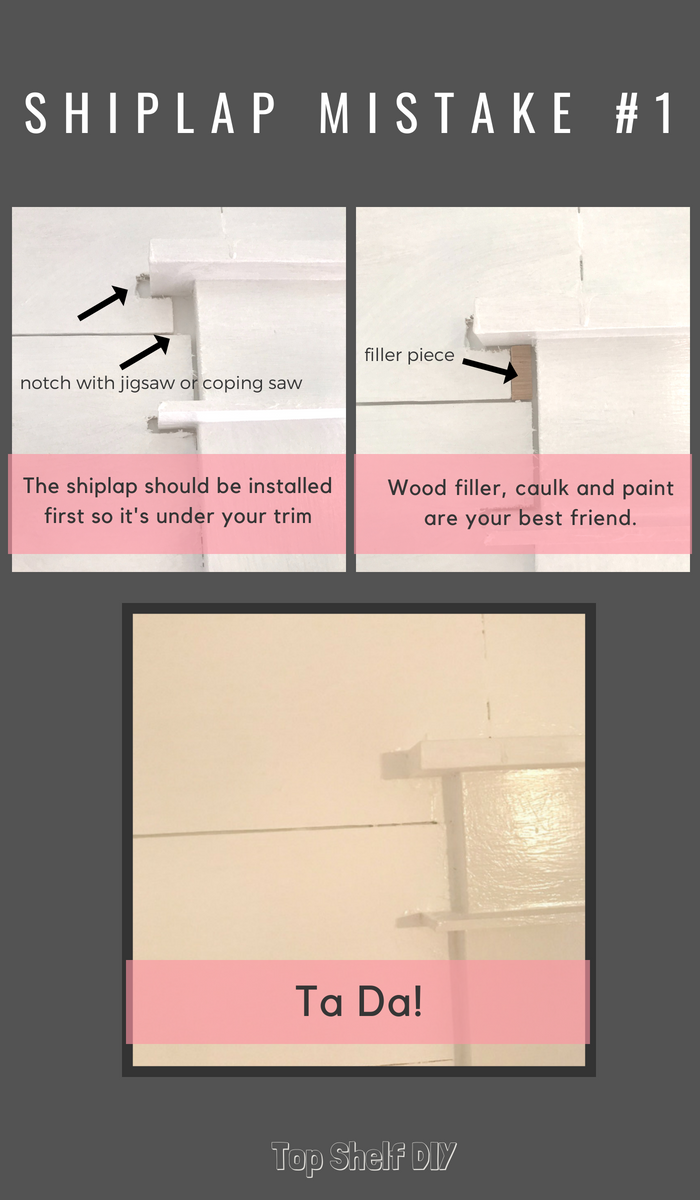
Install your faux shiplap before anything else in the room – meaning baseboard, crown, and trim. Unfortunately I made the mistake of installing my trim before my shiplap, so I had to notch my shiplap pieces with a jigsaw to make them fit around my windows and doors.
What a pain! This added a lot of time to my project...so avoid this if at all possible!
If you don't want to rip out all your trim or baseboards before installing shiplap, it's definitely doable, but will require a bit more patience and finesse.
Start your shiplap above your baseboards. If you have trim, very carefully notch out your shiplap with a saw and use wood filler/caulk to fill in the remaining gaps. No one will even notice from a distance!
2. Make sure your store rips your pieces to the correct width
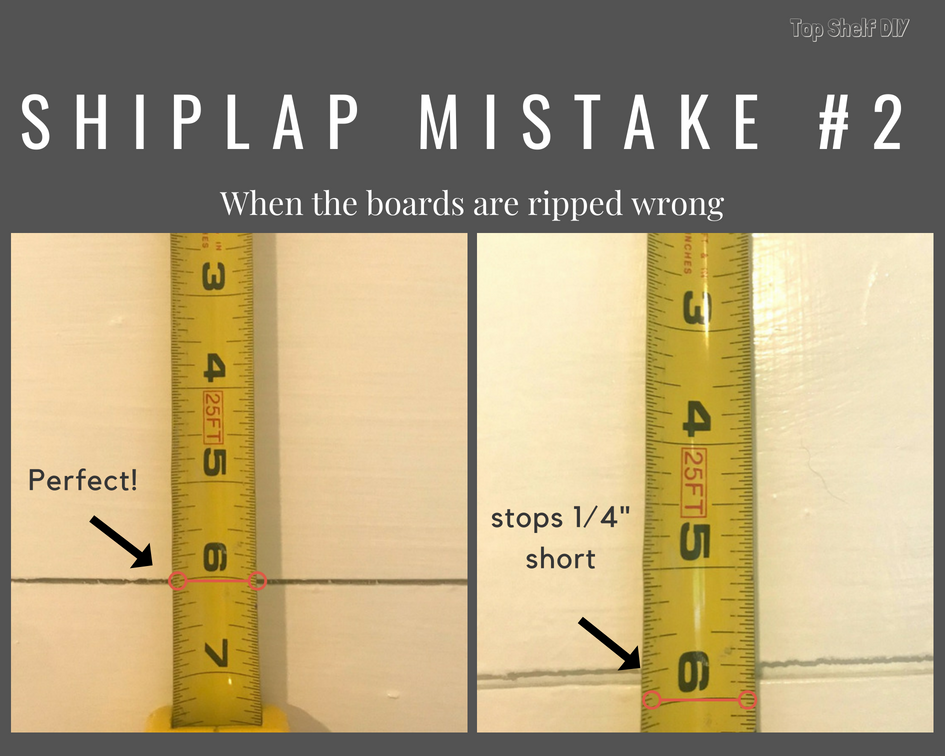
The big box stores will rip your plywood pieces to 6 or 8 inches so they can be used as faux shiplap. However, sometimes they charge 25 cents/cut and when I got home I realized they ripped some of my pieces incorrectly.
While some strips were a perfect 6 inches, others were ripped to 5-3/4" instead. That's a huge difference. Others were off by 1/8", so the cuts were all over the place.
My advice would be to bring a measuring tape with you to the store and double check their work. Once you're moving along with the installation process, you're not going to want to return to the store.
3. Remember to grab outlet box extenders!
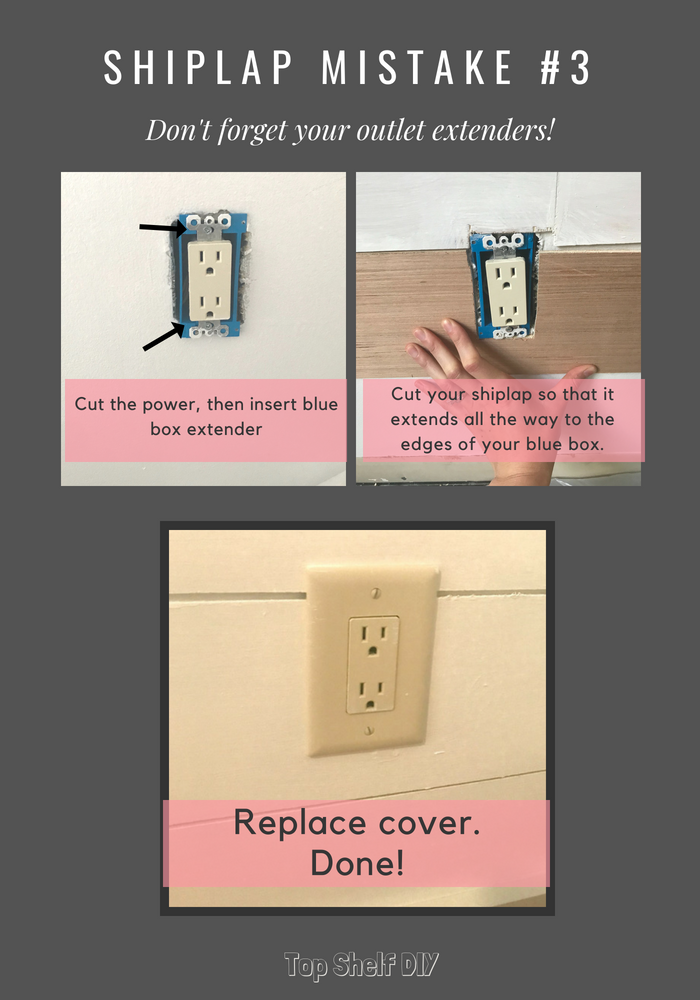
Since shiplap adds bulk to your wall, you'll want to extend the depth of your outlets with outlet box extenders so they remain flush with the wall.
These little blue boxes are super easy to install (just remember to turn off the power supply on your home's electrical box beforehand). I forgot to buy them in advance and had to run back to the store in the middle of my work...not a big deal, but it did cost me about half a day's worth of time.
4. Use Tile Spacers instead of Pennies
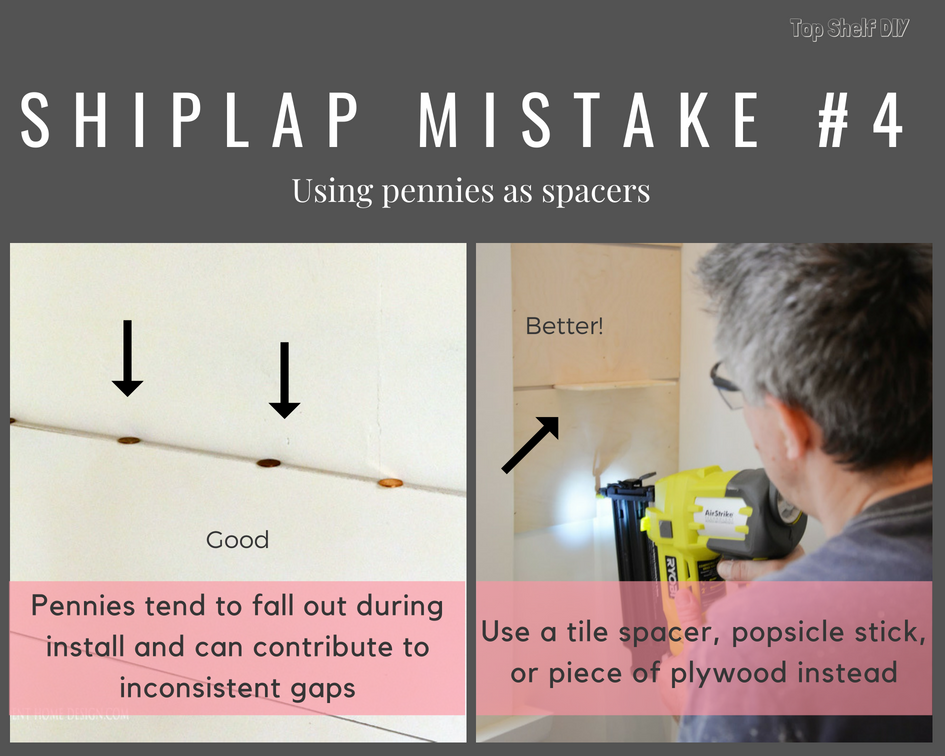
A lot of shiplap tutorials recommend using pennies as spacers between your boards of 1/4-inch plywood. I found pennies to be small and flimsy. They tend to fall out while you're trying to hold your piece in place. My mom and I had a few laughs over that...in the beginning anyway. I ended up eye-balling a lot of my spacing in lieu of the "penny method" because it was too inconsistent.
My advice: use something a bit more bulky -- tile spacers, actual tile samples, popsicle sticks or nickels!
5. Avoid Spreading Too Much Wood Filler Between Adjacent Boards
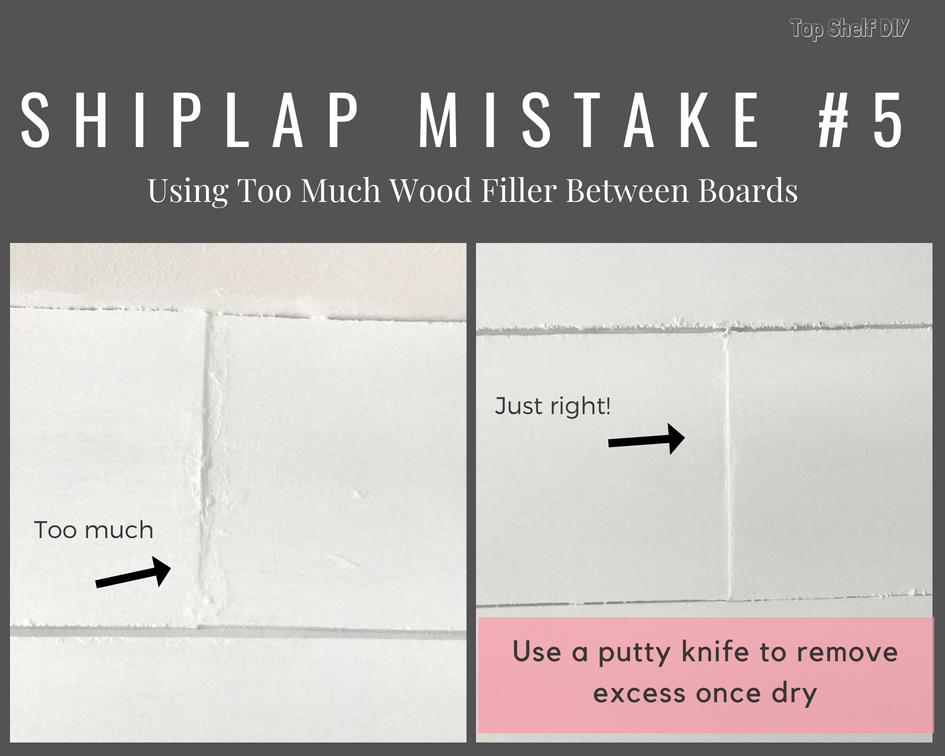
A little bit goes a long way. In fact, a lot of people don't put any wood filler between adjacent boards and that looks pretty nice too. If you end up using too much wood filler you'll know right away because it will look all clumpy when dry. Simply scrape off the excess with a putty knife.
6. Sand your boards very, very well
Hands down this was the biggest mistake I made. Lowe's basically shredded my boards, leaving the ends all splintery even after we sanded them with a rough sanding block. A cursory sanding just wasn't enough. As a result, I was left with boards looking like this:
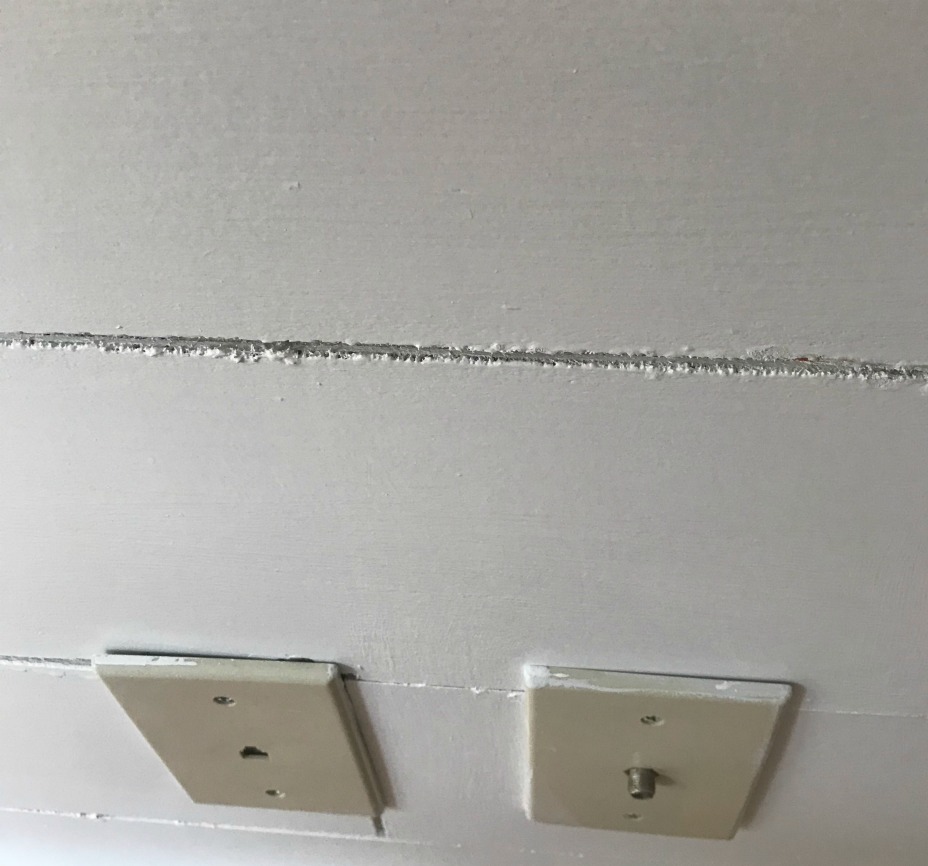
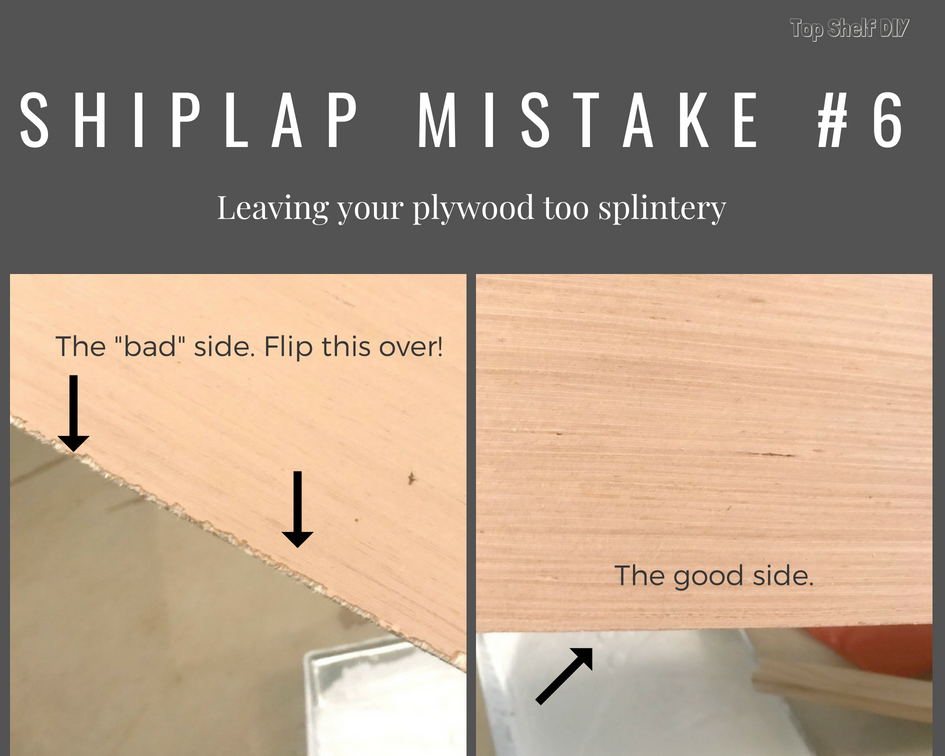
The good news is that there's usually a "good" side and a "bad" side to your plywood. Figure out which side has the cleaner edges and make sure it's the one facing outward. Also, thoroughly sand your boards to remove every last splinter.
👉 Pro Tip: if you're ripping the boards yourself on a table saw, place painter's tape along your cut line. This step will significantly reduce tear out and splintering.
7. Make sure your ceiling boards are level and that your corners line up
I was very careful to ensure the boards along my ceiling were level (rather than flush with the ceiling), because ceilings are rarely level.
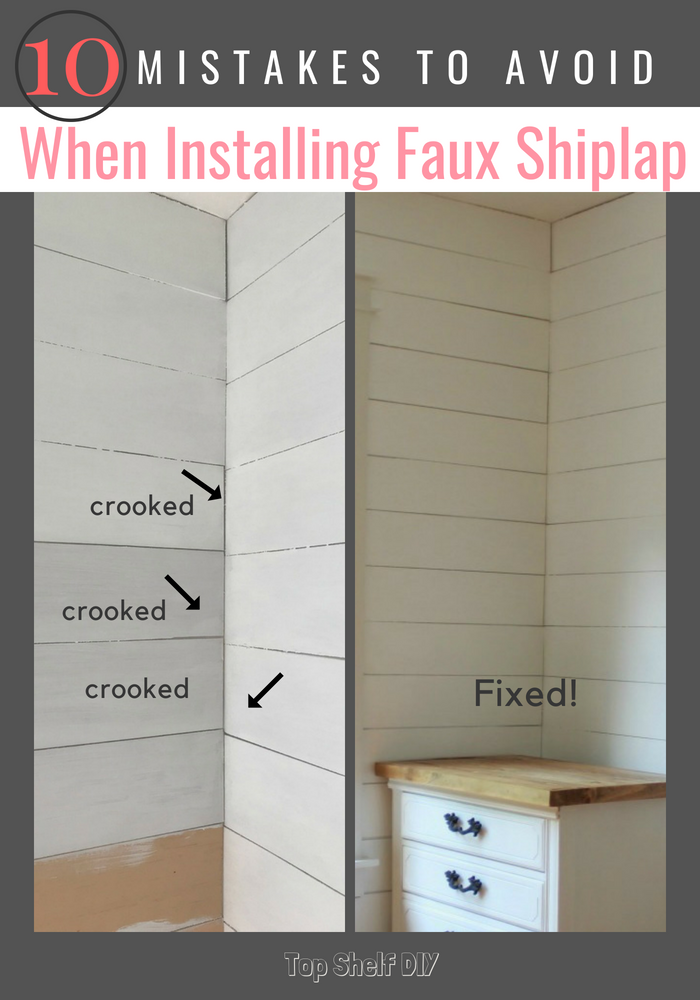
I did have to go back and rip down 6 boards, however, when I realized the boards in my corner weren't lined up correctly:
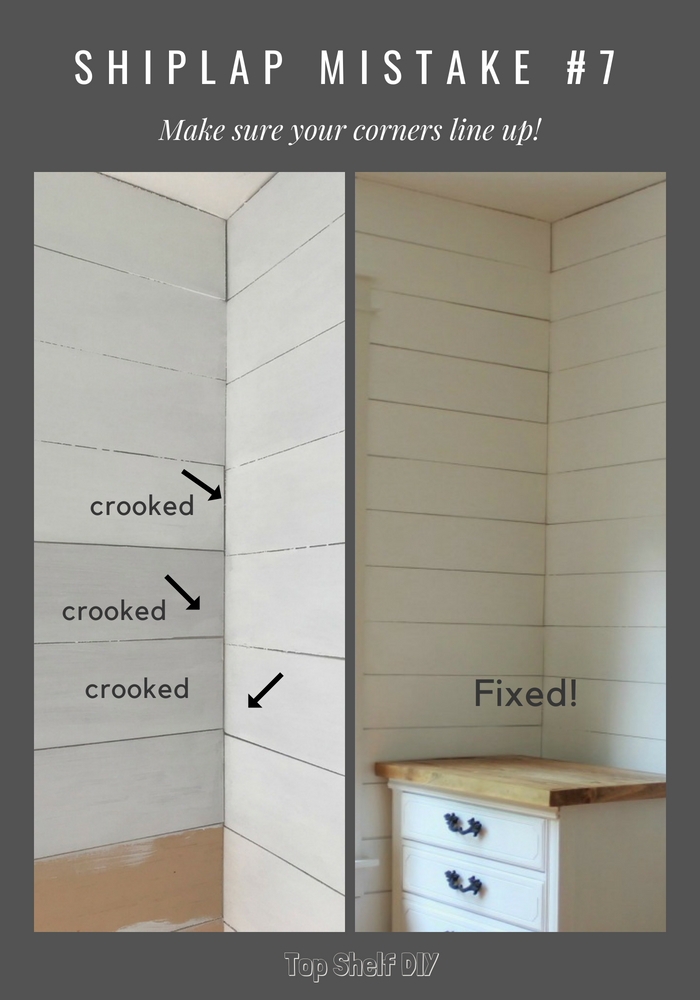
Luckily the planks can be pulled back off fairly easily; once your board is off the wall, take a hammer and tap the nail back through the board to remove it. It's a tedious but fixable problem.
8. Paint between your boards as you're installing them
I highly recommend painting the top and bottom edges of your plywood as you're installing them in order to avoid dark gaps between your boards. Yes you can go back and paint them later, but you'll be a tad more limited on space and you'll probably destroy your paintbrush from repeatedly pushing the tip into a narrow space.

9. Don't apply adhesive to the back of your boards
Chances are, if you're accident prone like me, you'll make a small mistake somewhere along the line and need to pull the shiplap off the wall. Luckily, because the plywood is so thin, this is easy to do even if you've already nailed it to the wall. If you use an adhesive like Liquid Nails you're going to have a harder time pulling it off. Also, you run the risk of ripping off layers of drywall. If you decide at a later date to remove the shiplap all together it won't be a big deal.
10. Expect the project will take longer than you think.
I thought it would take me one week to install shiplap…boy was I wrong. Give yourself a generous window of time to complete this project.
Plywood boards absorb paint very unevenly, so be prepared to spend a lot of time painting if you're going with white. I used Kilz2 Latex Primer because it was free, but I should have used the Kilz Premium Gold Primer for "heavy stains." I ended up needing 3 layers of primer and 3 layers of Behr Ultra White Semi-Gloss paint+primer to get the level of white I wanted. That's 6 layers of paint!
Are you ready to jump on the shiplap band wagon yet? Hopefully my war stories haven't discouraged you. Despite all these issues, I'm planning to install more shiplap in my house. I know...I'm crazy. I've been bit by the farmhouse bug for good!
Save this pin for the next time you're ready to tackle shiplap, and for a basic tutorial on the installation process I recommend visiting this tutorial over at Little Red Brick House!
Have you ever attempted installing faux shiplap and got stuck? Let me know!



I have 30 foot ceilings in my open concept living and dining area. Can break up that wall with shiplap? I would like to only put the ship lap up about 10 feet and paint the top. Can that been done?
Hey Linda - I can definitely be done but you may want to put some kind of trim where the shiplap meets the wall at the 10-foot mark. Possibly a chair rail or something of that nature. You could always just add a chair rail made of 1x4 pine so there is a clear delineation of the space!
My husband purchased primed shiplap and avoided most, if not all, of your problems.
I believe it! Most of my problems related to using faux shiplap made from ripped plywood. Definitely less expensive than regular primed shiplap, but a bit trickier to work with if you want a professional looking finish.
I’m amazed at the bad information I see on these sites. I’m also amazed that people will take advice that is so far off base that it’s not even in the ball park. All wood is going to move, all wood needs to be acclimated to the environment it will be installed in. Usually 72hrs. Pop level lines on all walls, or use a laser to get level lines around the room. You can purchase an inexpensive Bosch laser at a big box store. Sand all edges! Never let Lowe’s or Home Depot cut your plywood! They know less than you do and care nothing about quality. Not to mention that the panel saws there are rarely, if ever calibrated.
Good Day
I apologize for being so negative. It’s been a rough day, dealing with a DIY customer that refused to take advice and will now cost her 30,000.00 to repair. She sent me to your website. I admire DIY’s and am one myself in many aspects. I’m also a professional builder and have a little bit of experience under my belt. IMO, if you are going to use plywood to do a feaux nickle gap because you are trying to save money, it’s going to cost you more than buying the real deal. Unless of course you have the proper tools to cut and sand the plywood yourself. The labor will still cost you more in the end. If you decide to go this route, purchase a Makita or Festool track saw and cut it yourself. Invest in a good random orbital sander, and sand the face and all edges. If there is Sheetrock behind the plywood, paint it first. Prime and first coat the plywood before install. Remember, there is no such thing as a Primer/ paint / one coat. That is a homeowner gimmick. Always primer and at least 2 coats. Make sure to lay out the studs and mark si your nails will hit the studs. Also, depending on the size of the boards, you might want to start at the top and work down. You need to layout each horizontal line and make air it works out with your trim at windows and doors etc. if the had to be a rip, place it at the bottom. One more thing. This customer installed 7” boards but has 3 1:2” base. Big no- no. Boards should be same size or smaller than base trim. If tall ceilings I use 7” NG and 1x8 base with a ledge on top.
Can you explain why 7" boards are a big no-no with small baseboards? Other than aesthetics that is. I'm partial to large baseboard but someone DIY'ing their shiplap may prefer to leave the existing baseboards alone. Thank you for your insight, I appreciate feedback even if it's coming from a place of frustration.
Hi LMC! As another DIY’er, I just wanted to say your apology was admirable. We all have bad days. I also appreciate the pointers you provided. I am reading Erin’s pointers as I am debating faux vs real shiplap so I appreciate everyone’s dos and don’ts. I agree that some of the Lowe’s/HomeDepot cutters know less that some of the DIY’ers. I had to explain to a cutter that tape helps keep the wood from splintering. He didn’t seem to believe me until he tried it. LOL! Anyway, Thank you all for the comments as we learn together!
Thanks for your insight. I agree with many of your points. I did not acclimate our shiplap boards and luckily, haven't had any issues to date (3 years later). Now that I have a table saw I would prefer to rip my own plywood. Not everyone has that luxury when they're first starting out.
Hello, I have not found the right way to transition from a top to bottom 12x24 tile wall to a shiplap tongue n groove wall where they meet. I knew to take my time when a installer said to just fill in gap with tile caulk which does not seem right.
Any suggestions?
Hi Ted,
Hard to picture what you're trying to accomplish...maybe send to my email and I can give suggestions! [email protected].
-Erin
We are installing tongue & groove ceiling boards and ship lap on our walls. Our plan is to paint both. Should I install trim pieces where the walls and ceiling meet or in the corners? My carpenter told me that most often shiplap isn't trimmed and left to look like this. Any insight?
A toe kick molding would look nice in all the corners! Maybe crown molding where the walls meet the ceiling? It's really personal preference, your carpenter would have good insight.
putting up shiplap on wall and going around corner to another wall what kind of trim to to use on corner piecesue street
You can either miter the edges of your boards or put a piece of corner trim on the corner. Something like this: https://www.homedepot.com/p/American-Wood-Moulding-WM-205-1-1-8-in-x-1-1-8-in-Primed-Finger-Jointed-Pine-Outside-Corner-Moulding-0W205-93192C/206595804
Hello,
I love your website!
Just finished putting up shiplap in the bathroom but am having a hard time finding trim to complete. One wall, 4 corners. What would you suggest? Thank you!
Planning on putting up shiplap from homedepot on a wall without base molding. Would starting upside down with the lip on top be okay? Will be putting crown molding up on the top of the wall. This is a cut out area above front door.
Hi Jud, I can't speak to using real shiplap since I've only ever installed the faux kind. I think you could install it upside down as long as you're okay with the look of the final product! Good luck.
Worked great, wish I could have added a picture. So I covered up the lip on the top not the bottom, Did add trim at the bottom at the request of the mrs.
I had a contractor install faux shiplap (using plywood) in my kitchen that is being renovated. He applied one coat of primer using a sprayer and one coat of satin paint using the same method. Some of boards are flush and some have gaps. It doesn’t look good. He said my walls are not straight. I asked him to apply another coat playing special attention to the gaps between boards. He said it wouldn’t help the dark lines and I should have kept drywall if I wanted a smooth finish. Its not the smooth finish I want. It is the dark lines in the gaps that bother me. Is there anything I can do to lessen the dark lines between the boards?
The dark lines might be due to shadows? That's the only thing I can think of.